m (Text replace - "File:01b-aquamentus.png" to "File:LoZ Aquamentus Artwork.png") |
m (Text replace - "LoZ Aquamentus Artwork.png" to "LoZ Aquamentus.png") |
||
| Line 1: | Line 1: | ||
{{Boss |
{{Boss |
||
|name = Aquamentus |
|name = Aquamentus |
||
| − | |image = [[File:LoZ Aquamentus |
+ | |image = [[File:LoZ Aquamentus.png|160px]] |
|title = |
|title = |
||
|game = {{LOZ}}<br>{{OOS}} |
|game = {{LOZ}}<br>{{OOS}} |
||
Revision as of 02:37, 31 October 2015
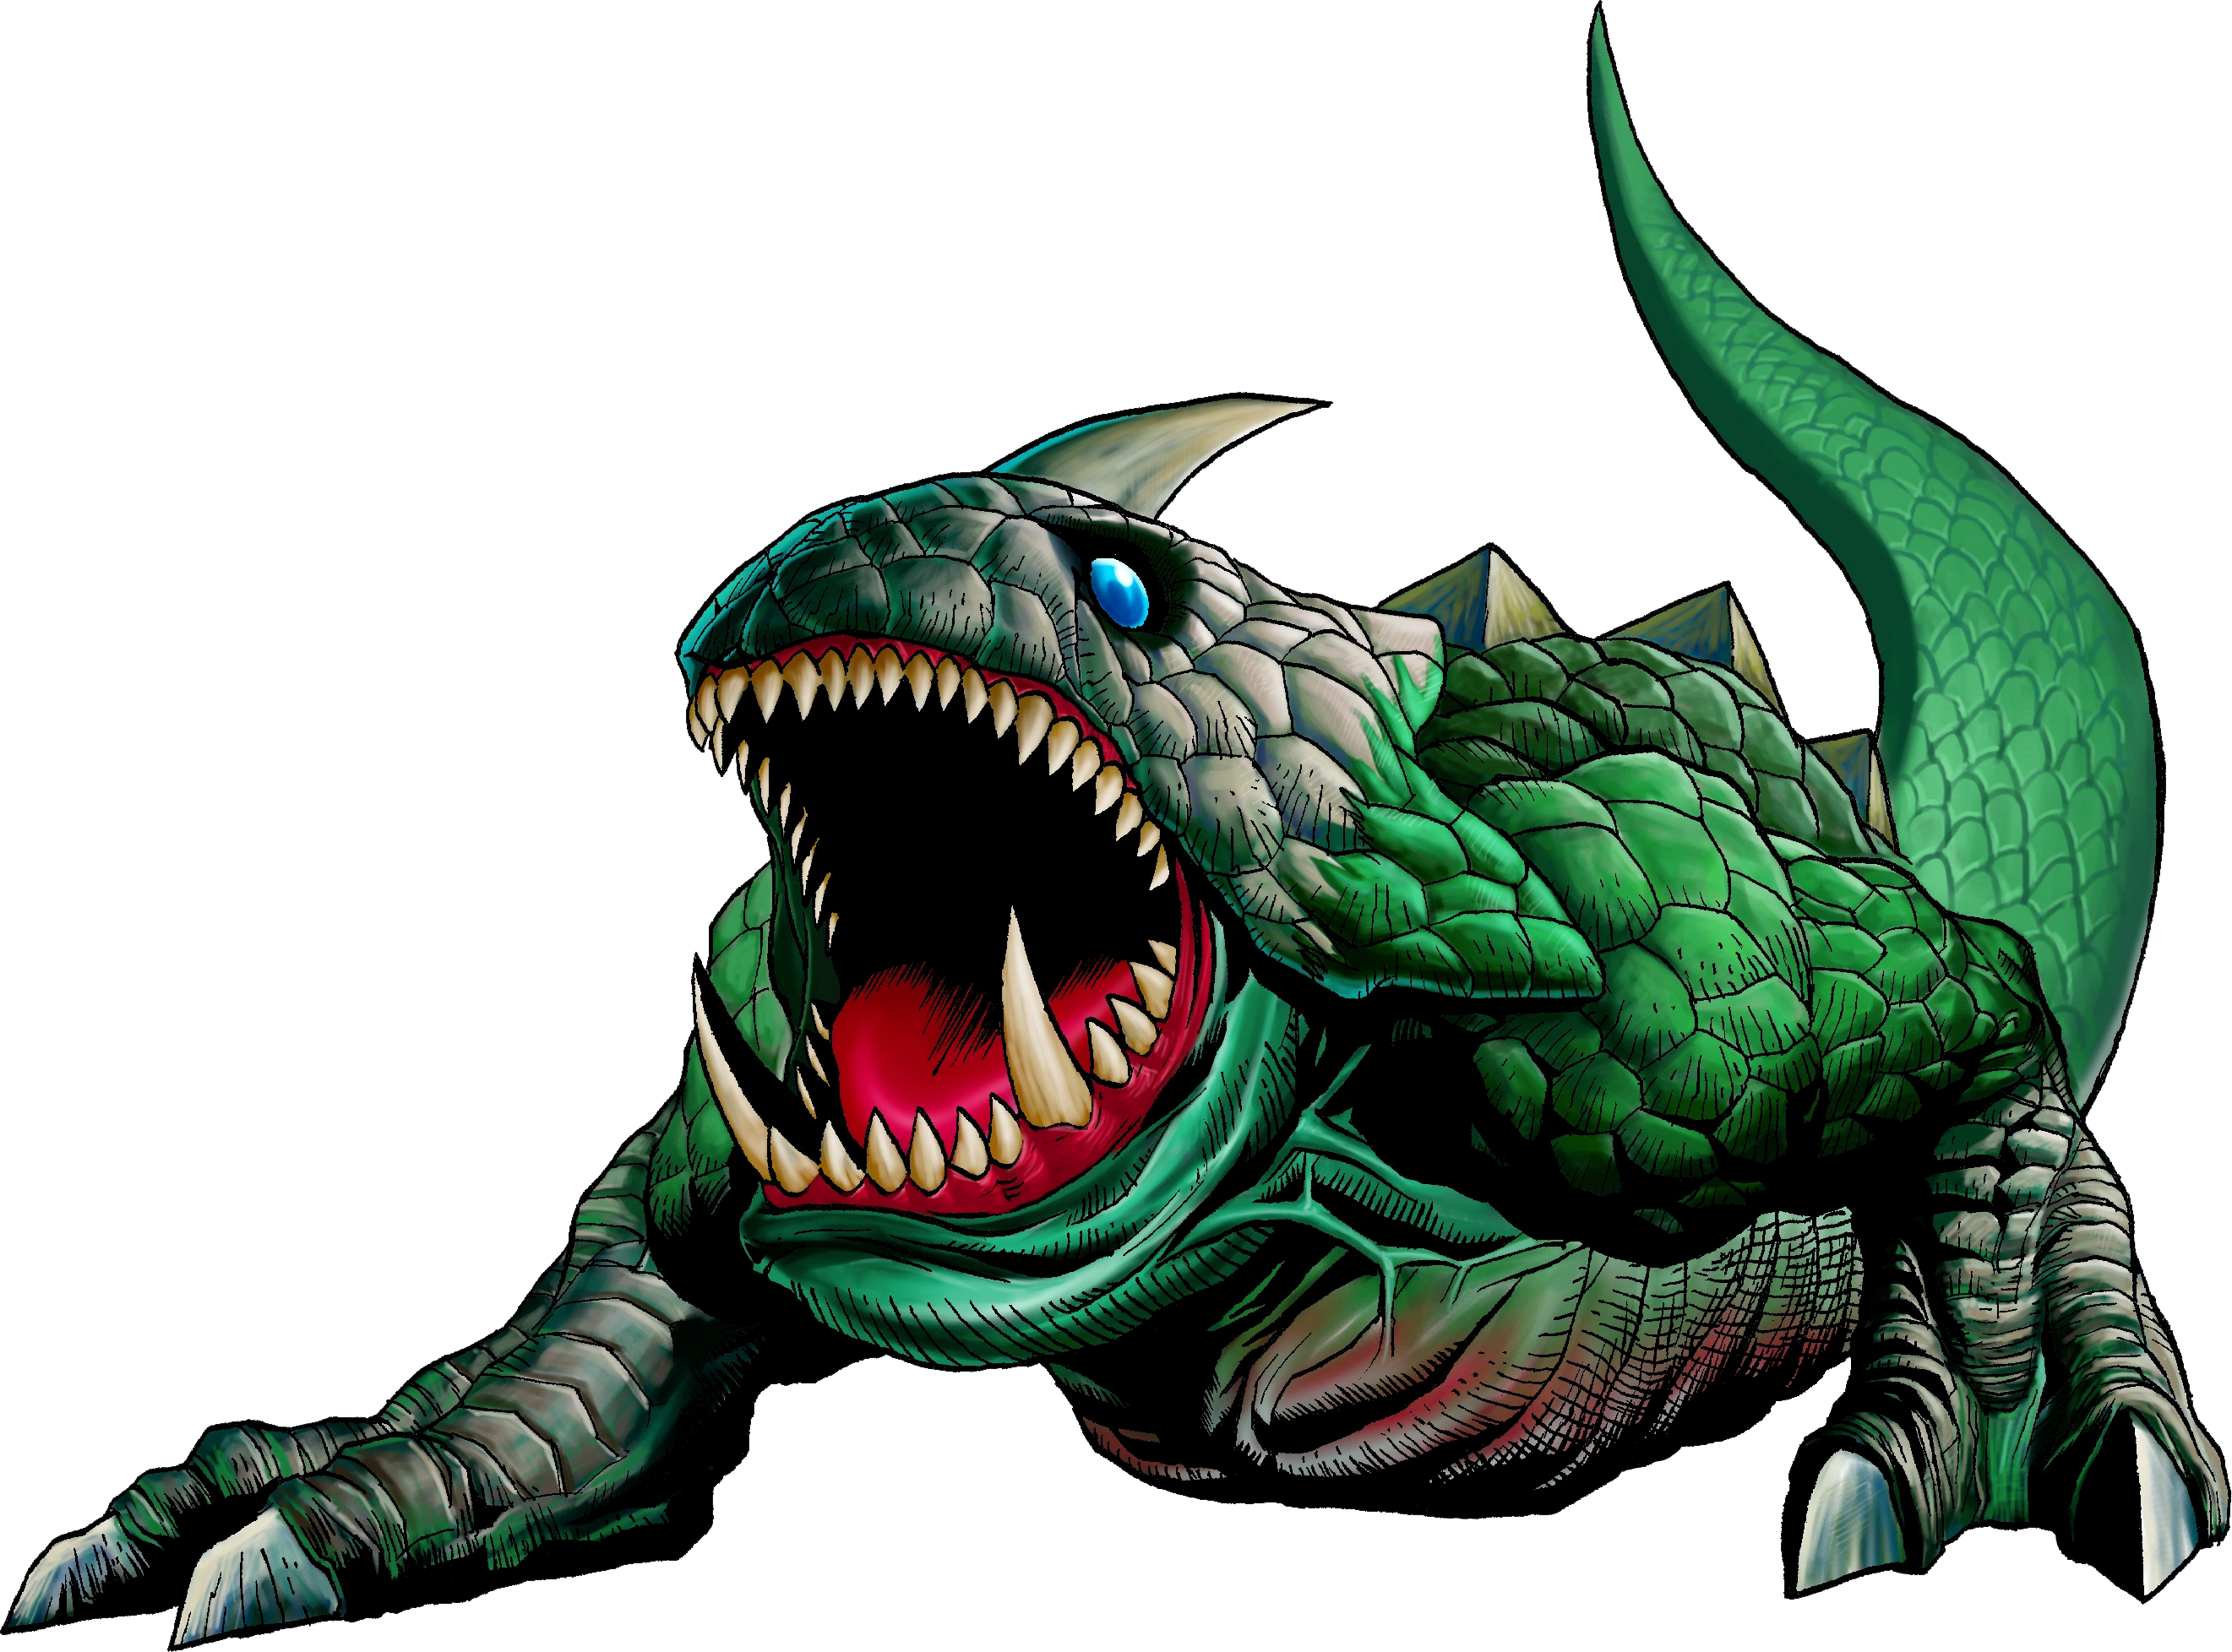
Template:Boss Aquamentus is a unicorn-like dragon and the first boss in Template:LOZ and Template:OOS. It appears solely in dungeons. Though its size may be intimidating, the strategy required to defeat it is simple: with its head, or rather specifically its horn as its prime weak spot, Link must only strike it upon the head to vanquish it in both incarnations. Template:TLoZManual
Appearances
The Legend of Zelda
Aquamentus is fought as a main boss in the Eagle and Demon in the First Quest, and returns as the boss of the Eagle in the Second Quest as well. However, it also appears as a mini-boss in some other dungeons.
If Link rushes into the creature's whereabouts unprepared, it can be a little challenging. If Rupees are saved up for a shield first, then this enemy can be defeated easily. Aquamentus will periodically shoot three fireballs simultaneously at Link,[1] each of which can dish out plenty of damage, but none will even so much as graze the hero if he blocks them with a Magical Shield. Even without the expensive shield, the fireballs can be dodged easily if Link isn't too close. Since it is unlikely that Link will have the Magical Shield, the best strategy is to watch for his mouth opening to see when he is about to fire these beams so they can be avoided, or attack from a distance with Sword Beams or the Bow if possible.
Aside from its projectiles, the only method this beast has of harming the hero is bumping into him. Considering how slowly the bulky dragon moves, his tackles aren't very threatening. Link can damage Aquamentus by hitting its horn with Arrows, his Sword, or well-placed Bombs. Bombs can inflict much more damage than Link's Wooden Sword, so these explosives can come in handy during the first fight against this dragon if Link has them.
By defeating Aquamentus in a labyrinth that it appears as a boss, Link will earn a Heart Container and a shard of the Triforce of Wisdom.
Oracle of Seasons
Aquamentus is once again the boss of the first labyrinth, known as Gnarled Root Dungeon, a similar dungeon to Eagle Labyrinth. Unlike in his first appearance, Link doesn't have a chance to "buff up" much before fighting this monster. Link can move diagonally and has access to the Spin Attack now, but Aquamentus also has a new attack in the form of a dangerous charge across the screen. After impacting on the far wall, Aquamentus will take to the air using its wings before landing back on the right side of the room and continuing his attack. Since the dragon is larger than it was, it is also slightly harder to hit his horn. Before emitting beams, its horn will glow. When Aquamentus has sustained enough damage, his horn will be removed, his power will wane and he shall be destroyed. Upon the dragon's defeat, Link receives a Heart Container and the first Essence of Nature, Fertile Soil.
Non-canon Appearances
The Legend of Zelda Game Watch
Aquamentus is the boss in each of the four dungeons from Template:GW, but is referred to as simply "dragon". He can only be defeated using a bomb.
Animated series
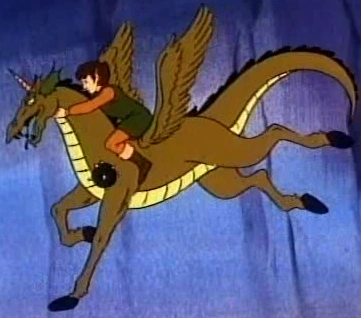
Aquamentus in the animated series
An Aquamentus is depicted as a horse-like monster in the "Underworld Connections" episode of the animated series. Just as Link is retrieving a shard of the Triforce of Wisdom while swimming in the Black Falls, an Aquamentus appears out of a dark, underwater cave. The Aquamentus takes him to the surface while Link is riding on top of it, struggling.[2] Princess Zelda then grabs a bomb from Link's pouch and throws it at the Aquamentus, which instantly defeats it.[3]
Oracle of Seasons Manga
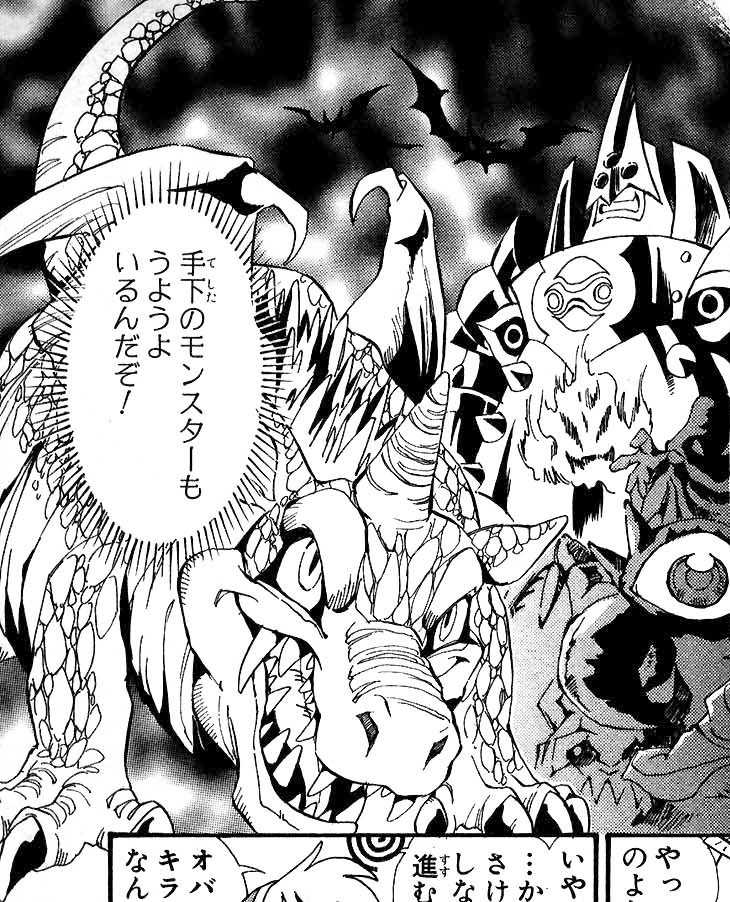
Aquamentus alongside Onox and other monsters in the manga
Aquamentus makes an appearance in Oracle of Seasons manga alongside various other enemies and boss monsters from the game, where they attack Link, Ricky and Maple under Twinrova's supervision before they can reach Onox's Castle. They swarm all at once with Aquamentus leading the charge, while Ricky attempts to protect Link by putting him in his pouch and attacking with Tornado Punches. Aquamentus breaths fire, and while Ricky attempts to block the flames with his tornadoes, he is overwhelmed and defeated. It would of been a lost battle if it was not for the appearance of Moosh, who awakes from hibernation at just the right moment to give them a ride to safety at extremely high speed.
Trivia
- Aquamentus is the first boss to appear in the history of the Zelda series. Despite this, he has only appeared in as many main series games as Digdogger and Patra and is the only boss not to have any related species.
- Aquamentus is based on a unicorn and a dragon.
Gallery

Aquamentus in BS The Legend of Zelda
- Aquamentusfly.png
Aquamentus flying in Oracle of Seasons
Videos
| Aquamentus in Oracle of Seasons |
| Aquamentus in The Legend of Zelda |
References
| Language | Name | Meaning | |
|---|---|---|---|
| Japanese | Template:Japanese | Aquamentus | |
| German | Aquamentus | - | |
| Italian | Aquamentus | - | |
| Spanish | - | ||
| SpanishLA | Aquamentus | - | |
Mazura · Jermafenser · Rebonack · Carock · Gooma · Barba · Thunderbird ![]() · Link's Shadow
· Link's Shadow
Light World
Ball and Chain Trooper ![]() · Six Armos Knights · Lanmola Trio · Moldorm · Agahnim
· Six Armos Knights · Lanmola Trio · Moldorm · Agahnim ![]()
Dark World
Helmasaur King · Arrghus · Mothula · Blind the Thief · Kholdstare · Vitreous · Trinexx · Ganon
Super Helmasaur · Super Arrghus · Super Mothula · Super Blind · Dark Links![]()
Bosses
Moldorm · Genie · Slime Eye · Angler Fish (2D) · Slime Eel · Facade · Evil Eagle (2D) · Hot Head · Shadow Nightmares
Guardians
Rolling Bones ![]() · King Moblin
· King Moblin ![]() · Hinox
· Hinox ![]() · Dodongo Snakes x2
· Dodongo Snakes x2 ![]() · Lanmola
· Lanmola ![]() · Cue Ball
· Cue Ball ![]() · Master Stalfos x4 · Gohma Twins · Armos Knight
· Master Stalfos x4 · Gohma Twins · Armos Knight ![]() · Smasher
· Smasher ![]() · Grim Creeper · Turtle Rock · Blaino
· Grim Creeper · Turtle Rock · Blaino
Bosses
Gohma · King Dodongo · Barinade · Phantom Ganon · Volvagia · Morpha · Bongo Bongo · Twinrova · Ganondorf · Ganon
Middle Bosses
Lizalfos · Big Octo · Stalfos · Meg · Flare Dancer · White Wolfos · Dark Link · Dead Hand · Gerudo Thief · Iron Knuckle · Dynalfos
Bosses
Odolwa · Goht · Gyorg · Twinmold · Majora ![]()
Middle Bosses
Dinolfos · Gekko · Wizzrobe · Gerudo Pirate · Wart · Gekko and Mad Jelly
Captain Keeta · Iron Knuckle · Sharp · Igos du Ikana · Garo Master · Gomess · Eyegore
Bosses
Aquamentus · Dodongo · Mothula · Gohma · Digdogger · Manhandla · Gleeok · Medusa Head · General Onox ![]()
Sub-Bosses
Brother Goriyas · Facade ![]() · Omuai · Agunima · Great Moblin
· Omuai · Agunima · Great Moblin ![]() · Syger · Vire
· Syger · Vire ![]() · Poe Sisters · Frypolar
· Poe Sisters · Frypolar
Bosses
Pumpkin Head · Head Thwomp (2D) · Shadow Hag · Eyesoar · Smog · Octogon · Possessed Nayru · Plasmarine · Ramrock · Veran ![]()
Sub-Bosses
Giant Ghini · Swoop · Subterror · Armos Warrior · Great Moblin ![]() · Smasher · Vire
· Smasher · Vire ![]() · Angler Fish (2D) · Blue Stalfos
· Angler Fish (2D) · Blue Stalfos
Bosses
Gohma · Kalle Demos · Gohdan · Helmaroc King · Jalhalla · Molgera · Puppet Ganon ![]() · Ganondorf
· Ganondorf
Minibosses
Green Bokoblin · Moblin · Mothula · Darknut · Cyclos · Phantom Ganon · Stalfos · Wizzrobe · Mighty Darknut · Big Octo![]()
Bosses
Phantom Ganon ![]() · Stone Arrghus · Helmaroc King · Big Poe · Big Moldorm x2 · Frostare · Vaati · Ganon
· Stone Arrghus · Helmaroc King · Big Poe · Big Moldorm x2 · Frostare · Vaati · Ganon
Sub-Bosses
Chief Soldier · Shadow Link ![]() · Manhandla · Dodongos · Big Dark Stalfos · Gohma · Big Dodongo
· Manhandla · Dodongos · Big Dark Stalfos · Gohma · Big Dodongo
Bosses
Big Green Chuchu ![]() · Gleerok · Mazaal · Big Octorok
· Gleerok · Mazaal · Big Octorok ![]() · Gyorg Pair · Vaati
· Gyorg Pair · Vaati ![]()
Sub-Bosses
Madderpillar ![]() · Dark Nut · Big Blue Chuchu
· Dark Nut · Big Blue Chuchu ![]() · Red Dark Nut · Black Knight
· Red Dark Nut · Black Knight
Bosses
Diababa · Fyrus · Morpheel · Stallord · Blizzeta · Armogohma · Argorok · Zant · Puppet Zelda · Ganon · Ganondorf ![]()
Sub-Bosses
Ook · King Bulblin · Dangoro · Twilit Carrier Kargarok · Twilit Bloat · Deku Toad · Death Sword · Darkhammer · Darknut · Aeralfos · Phantom Zant
Bosses
Stagnox · Fraaz · Phytops · Cragma · Byrne · Skeldritch · Demon Train · Chancellor Cole · Malladus
Stagnox II · Fraaz II · Phytops II · Cragma II · Skeldritch II · Dark Link![]()
Sub-Bosses
Mothula · Geozard · Rocktite · Ice Keese · Freezard · White Wolfos · Geozard Chief · Big Blin ![]() · Snapper · Helmet Chuchu · Metal Chuchu · Stalfos · Heatoise · Stalfos Warrior · Gerune · Ergtorok ·
· Snapper · Helmet Chuchu · Metal Chuchu · Stalfos · Heatoise · Stalfos Warrior · Gerune · Ergtorok ·
Bosses
Ghirahim ![]() · Scaldera · Moldarach · The Imprisoned
· Scaldera · Moldarach · The Imprisoned ![]() · Koloktos · Tentalus · Levias
· Koloktos · Tentalus · Levias ![]() · Bilocyte
· Bilocyte ![]() · Demise
· Demise
Sub-Bosses
Stalfos · Lizalfos · Stalmaster · Moldarach · LD-002G Scervo · Dark Lizalfos · Magmanos · Moldorm · Dreadfuse
Bosses
Yuga ![]() · Moldorm · Margomill · Gemesaur King · Arrghus · Knucklemaster · Stalblind · Zaganaga · Dharkstare · Grinexx · Yuga Ganon
· Moldorm · Margomill · Gemesaur King · Arrghus · Knucklemaster · Stalblind · Zaganaga · Dharkstare · Grinexx · Yuga Ganon
Sub-Bosses
Armos · Red Stalfos · Heedles · Green & Red Goriyas · Gigabari · Gibdos & Purple Mini-Moldorms · Red Eyegores · Flying Tiles & Devalants · Big Pengator & Pengators · Fire Gimos · Moldorm · Lorule Ball and Chain Soldier · Arrghus
StreetPass Bosses
Bosses
Margoma · Arrghus · Moldorm · Blizzagia · The Lady's Pets ![]() · Stalchampion · Prismantus · The Lady
· Stalchampion · Prismantus · The Lady
Shadow Link x3![]()
Mini-Bosses
Electric Blob King · Electric Blob Queen · Hinox Brothers · Freezlord · Vulture Vizier · Grim Repoe · Gigaleon
Bosses
Windblight Ganon · Fireblight Ganon · Master Kohga · Thunderblight Ganon · Waterblight Ganon · Calamity Ganon · Dark Beast Ganon ![]()
Sub-Bosses
Stone Talus · Igneo Talus · Frost Talus · Molduga · Hinox · Blue Hinox · Black Hinox · Stalnox · Igneo Talus Titan · Molduking
Bosses
Colgera · Mucktorok · Marbled Gohma · Queen Gibdo · Phantom Ganon · Seized Construct · The Demon King's Army · Demon King Ganondorf · Demon Dragon ![]()
Sub-Bosses
Flame Gleeok · Frost Gleeok · Sludge Like · Thunder Gleeok · King Gleeok · Yunobo · Frox · Flux Construct · Moragia · Molduga · Hinox · Stalnox · Frost Talus · Igneo Talus · Stone Talus · Battle Talus · Stone Talus (Luminous) · Ganondorf · Master Kohga · Phantom Ganon
| |||||||||||||||||||||||
.png)