m (→Shrines) |
m (added HW:AOC Acrylic Panel Art) |
||
| (24 intermediate revisions by 7 users not shown) | |||
| Line 1: | Line 1: | ||
{{BasePageLink|Sheikah Language}} |
{{BasePageLink|Sheikah Language}} |
||
| − | + | The [[Sheikah Language]] appears in [[The Legend of Zelda: Breath of the Wild|Breath of the Wild]] and [[Hyrule Warriors: Age of Calamity]]. As its name implies, the Sheikah Language appears exclusively on [[Sheikah]] architecture and technology. |
|
The Sheikah Language is based on English, as its letters are a cipher of the Latin alphabet. |
The Sheikah Language is based on English, as its letters are a cipher of the Latin alphabet. |
||
{{clear}} |
{{clear}} |
||
| + | [[File:Breath of the Wild Shiekah Language.svg|190px|right]] |
||
| − | |||
==Sheikah Slate== |
==Sheikah Slate== |
||
{| class="wikitable" style="text-align:center; width:100%;" |
{| class="wikitable" style="text-align:center; width:100%;" |
||
| Line 18: | Line 18: | ||
| |
| |
||
| |
| |
||
| − | | |
+ | | ARTIFACT<br>LOCATION<br>MOUNTAIN<br>PLACE<br>REGION<br>TIMBER<br>WATER |
|- |
|- |
||
| Map HUD |
| Map HUD |
||
| Line 24: | Line 24: | ||
| |
| |
||
| |
| |
||
| − | | |
+ | | CLOCK<br>THERMOMETER<br>ACHIEVEMENT<br>SHEIKAHSENSOR |
| + | |- |
||
| + | | Map colored Pins |
||
| + | | |
||
| + | | |
||
| + | | |
||
| + | | 0<br>1<br>2<br>3<br>4 |
||
|- |
|- |
||
| Damaged Sheikah Slate |
| Damaged Sheikah Slate |
||
| Line 30: | Line 36: | ||
| |
| |
||
| |
| |
||
| − | | |
+ | | RUNE<br>ALBUM<br>HYRULECOMPENDIUM |
|- |
|- |
||
| horizontal text along top and bottom |
| horizontal text along top and bottom |
||
| Line 38: | Line 44: | ||
| SHEIKAHSLATE<br>''Sheikah Slate'' {{Small|(repeating)}} |
| SHEIKAHSLATE<br>''Sheikah Slate'' {{Small|(repeating)}} |
||
|- |
|- |
||
| − | | |
+ | | Blinking text |
| |
| |
||
| |
| |
||
| Line 44: | Line 50: | ||
| (portions of the alphabet){{Small|(repeating, lines alternate between going forwards and backwards)}} |
| (portions of the alphabet){{Small|(repeating, lines alternate between going forwards and backwards)}} |
||
|- |
|- |
||
| − | | Rune page |
+ | | {{Term|BotW|Rune|link}} page |
| |
| |
||
| |
| |
||
| |
| |
||
| − | | |
+ | | FIRSTITEM<br>SECONDITEM<br>THIRDITEM<br>FOURTHITEM<br>FIFTHITEM<br>SIXTHITEM<br>SEVENTHITEM |
|- |
|- |
||
| + | | {{Term|BotW|Hyrule Compendium|link}} numbered entries |
||
| ⚫ | |||
| + | | |
||
| + | | |
||
| + | | |
||
| + | | {{Small|(entry number, repeated once)}} |
||
| + | |- |
||
| ⚫ | |||
| |
| |
||
| |
| |
||
| |
| |
||
| N E S W<br>{{Small|(one at each cardinal direction)}} |
| N E S W<br>{{Small|(one at each cardinal direction)}} |
||
| + | |- |
||
| + | | #1 Album memory note, <br>before remembrance |
||
| + | | |
||
| + | | |
||
| + | | |
||
| + | | SACREDGROUNDRUINS<br>''Sacred Ground Ruins'' |
||
| + | |- |
||
| + | | #2 Album memory note, <br>before remembrance |
||
| + | | |
||
| + | | |
||
| + | | |
||
| + | | LAKEKOLOMO<br>''Lake Kolomo'' |
||
| + | |- |
||
| + | | #3 Album memory note, <br>before remembrance |
||
| + | | |
||
| + | | |
||
| + | | |
||
| + | | ANCIENTCOLUMNS<br>''Ancient Columns'' |
||
| + | |- |
||
| + | | #4 Album memory note, <br>before remembrance |
||
| + | | |
||
| + | | |
||
| + | | |
||
| + | | KARAKARABAZAAR<br>''Kara Kara Bazaar'' |
||
| + | |- |
||
| + | | #5 Album memory note, <br>before remembrance |
||
| + | | |
||
| + | | |
||
| + | | |
||
| + | | ELDINCANYON<br>''Eldin Canyon'' |
||
| + | |- |
||
| + | | #6 Album memory note, <br>before remembrance |
||
| + | | |
||
| + | | |
||
| + | | |
||
| + | | IRCHPLAIN<br>''Irch Plain'' |
||
| + | |- |
||
| + | | #7 Album memory note, <br>before remembrance |
||
| + | | |
||
| + | | |
||
| + | | |
||
| + | | WESTNECLUDA<br>''West Necluda'' |
||
| + | |- |
||
| + | | #8 Album memory note, <br>before remembrance |
||
| + | | |
||
| + | | |
||
| + | | |
||
| + | | HYRULECASTLE<br>''Hyrule Castle'' |
||
| + | |- |
||
| + | | #9 Album memory note, <br>before remembrance |
||
| + | | |
||
| + | | |
||
| + | | |
||
| + | | SPRINGOFPOWER<br>''Spring of Power'' |
||
| + | |- |
||
| + | | #10 Album memory note, <br>before remembrance |
||
| + | | |
||
| + | | |
||
| + | | |
||
| + | | SANIDINPARKRUINS<br>''Sanidin Park Ruins'' |
||
| + | |- |
||
| + | | #11 Album memory note, <br>before remembrance |
||
| + | | |
||
| + | | |
||
| + | | |
||
| + | | LANAYRUROAD-EASTGATE<br>''Lanayru Road - East Gate'' |
||
| + | |- |
||
| + | | #12 Album memory note, <br>before remembrance |
||
| + | | |
||
| + | | |
||
| + | | |
||
| + | | HYRULEFIELD<br>''Hyrule Field'' |
||
|} |
|} |
||
| Line 65: | Line 149: | ||
!style="width:25%"| English |
!style="width:25%"| English |
||
|- |
|- |
||
| − | | Sheikah Tower roof |
+ | | {{Term|BotW|Sheikah Tower|link}} roof |
| |
| |
||
| |
| |
||
| Line 85: | Line 169: | ||
|- |
|- |
||
| Travel gate |
| Travel gate |
||
| − | | |
+ | | {{Plural|BotW|Divine Beast|link}} |
| |
| |
||
| TRANSPORT<br>''transport'' {{Small|(repeating)}} |
| TRANSPORT<br>''transport'' {{Small|(repeating)}} |
||
| Line 98: | Line 182: | ||
| |
| |
||
| MOVE<br>''Move'' {{Small|(repeating)}} |
| MOVE<br>''Move'' {{Small|(repeating)}} |
||
| + | |- |
||
| + | | Wide electric paths |
||
| + | | {{Term|BotW|Divine Beast Vah Naboris|link}} |
||
| + | | |
||
| + | | HIGHVOLT<br>''High Volt'' {{Small|(High voltage, repeating)}} |
||
|- |
|- |
||
| Main shaft engravings |
| Main shaft engravings |
||
| − | | Final Trial |
+ | | {{Term|BotW|Final Trial}} |
| |
| |
||
| THEBRAVETRIAL<br>''The Brave Trial'' {{Small|(fragmented, repeating)}} |
| THEBRAVETRIAL<br>''The Brave Trial'' {{Small|(fragmented, repeating)}} |
||
|- |
|- |
||
| Large stone door's four bolts |
| Large stone door's four bolts |
||
| − | | Final Trial |
+ | | {{Term|BotW|Final Trial}} |
| |
| |
||
| {{Exp|Water|W}}{{Small|(upper left)}}<br>{{Exp|Air|A}} {{Small|(upper right)}}<br>{{Exp|Earth|E}} {{Small|(lower left)}}<br>{{Exp|Fire|F}} {{Small|(lower right)}} |
| {{Exp|Water|W}}{{Small|(upper left)}}<br>{{Exp|Air|A}} {{Small|(upper right)}}<br>{{Exp|Earth|E}} {{Small|(lower left)}}<br>{{Exp|Fire|F}} {{Small|(lower right)}} |
||
|- |
|- |
||
| [[Monk Maz Koshia]] arena floor, pillars and pedestal |
| [[Monk Maz Koshia]] arena floor, pillars and pedestal |
||
| − | | Final Trial |
+ | | {{Term|BotW|Final Trial}} |
| |
| |
||
| TRIAL<br>''Trial'' {{Small|(repeating)}} |
| TRIAL<br>''Trial'' {{Small|(repeating)}} |
||
|- |
|- |
||
| Monk Maz Koshia small incantation circle |
| Monk Maz Koshia small incantation circle |
||
| − | | Final Trial |
+ | | {{Term|BotW|Final Trial}} |
| |
| |
||
| R {{Small|(Rin - Power)}}<br>P {{Small|(Hyo/Pyo - Energy)}}<br>T {{Small|(Toh - Harmony)}}<br>S {{Small|(Sha - Healing)}}<br>K {{Small|(Kai - Intuition)}}<br>J {{Small|(Jin - Awareness)}}<br>R {{Small|(Retsu - Dimension)}}<br>Z {{Small|(Zai - Creation)}}<br>Z {{Small|(Zen - Absolute)}}<br>{{Small|(The Nine Syllable Seals)}} |
| R {{Small|(Rin - Power)}}<br>P {{Small|(Hyo/Pyo - Energy)}}<br>T {{Small|(Toh - Harmony)}}<br>S {{Small|(Sha - Healing)}}<br>K {{Small|(Kai - Intuition)}}<br>J {{Small|(Jin - Awareness)}}<br>R {{Small|(Retsu - Dimension)}}<br>Z {{Small|(Zai - Creation)}}<br>Z {{Small|(Zen - Absolute)}}<br>{{Small|(The Nine Syllable Seals)}} |
||
|- |
|- |
||
| Monk Maz Koshia large incantation circle |
| Monk Maz Koshia large incantation circle |
||
| − | | Final Trial |
+ | | {{Term|BotW|Final Trial}} |
| |
| |
||
| R {{Small|(Rin - Power)}}<br>P {{Small|(Hyo/Pyo - Energy)}}<br>T {{Small|(Toh - Harmony)}}<br>S {{Small|(Sha - Healing)}}<br>K {{Small|(Kai - Intuition)}}<br>J {{Small|(Jin - Awareness)}}<br>R {{Small|(Retsu - Dimension)}}<br>Z {{Small|(Zai - Creation)}}<br>Z {{Small|(Zen - Absolute)}}<br>{{Small|(The Nine Syllable Seals, repeated once)}} |
| R {{Small|(Rin - Power)}}<br>P {{Small|(Hyo/Pyo - Energy)}}<br>T {{Small|(Toh - Harmony)}}<br>S {{Small|(Sha - Healing)}}<br>K {{Small|(Kai - Intuition)}}<br>J {{Small|(Jin - Awareness)}}<br>R {{Small|(Retsu - Dimension)}}<br>Z {{Small|(Zai - Creation)}}<br>Z {{Small|(Zen - Absolute)}}<br>{{Small|(The Nine Syllable Seals, repeated once)}} |
||
| Line 242: | Line 331: | ||
| |
| |
||
| GOAHEAD<br>''Go Ahead''<br>{{Small|(in mirror reverse fashion, repeating)}} |
| GOAHEAD<br>''Go Ahead''<br>{{Small|(in mirror reverse fashion, repeating)}} |
||
| + | |- |
||
| + | | Thin electric pathways |
||
| + | | {{Term|BotW|Kay Noh Shrine|link}} |
||
| + | | |
||
| + | | VOLTAGE<br>''Voltage''<br>{{Small|(repeating)}} |
||
|- |
|- |
||
| Exterior of Champion Ballad Shrine |
| Exterior of Champion Ballad Shrine |
||
| Line 247: | Line 341: | ||
| |
| |
||
| THEBRAVETRIAL<br>''The Brave Trial'' |
| THEBRAVETRIAL<br>''The Brave Trial'' |
||
| + | |- |
||
| + | |Rails for climbing Stone |
||
| + | |[[Sharo Lun Shrine]] |
||
| + | | |
||
| + | |DUNGEON |
||
| + | Dungeon |
||
|} |
|} |
||
| Line 258: | Line 358: | ||
|- |
|- |
||
| Rails near Distilling Stone |
| Rails near Distilling Stone |
||
| − | | Hateno Ancient Tech Lab |
+ | | {{Term|BotW|Hateno Ancient Tech Lab|link}} |
| |
| |
||
| SHUTTER<br>''shutter'' {{Small|(repeating)}} |
| SHUTTER<br>''shutter'' {{Small|(repeating)}} |
||
|- |
|- |
||
| Base of Cherry |
| Base of Cherry |
||
| − | | Akkala Ancient Tech Lab |
+ | | {{Term|BotW|Akkala Ancient Tech Lab|link}} |
| |
| |
||
| CHERRY<br>''Cherry'' {{Small|(repeating)}} |
| CHERRY<br>''Cherry'' {{Small|(repeating)}} |
||
| Line 363: | Line 463: | ||
| |
| |
||
| LABORATORY {{Small|(repeating)}} |
| LABORATORY {{Small|(repeating)}} |
||
| + | |- |
||
| + | | Sheikah levitating platform concept art |
||
| + | | [[File:BotW_Sheikah_Levitating_Platform_Concept.jpg|150px]] |
||
| + | | concept art |
||
| + | | |
||
| + | | MOVINGPLATE<br>''Moving Plate'' {{Small|(repeating)}} |
||
| + | |- |
||
| + | |Advertisement for Hyrule Warriors: Age of Calamity |
||
| + | |[[File:20201204 220104.jpg|thumb]] |
||
| + | |Advertisement for Hyrule Warriors: Age of Calamity |
||
| + | | |
||
| + | |OPQRSTUVWXYZABCDEFGHIJKLMNOPQRST |
||
| + | |} |
||
| + | |||
| + | ==Hyrule Warriors: Age of Calamity== |
||
| + | {| class="wikitable" style="text-align:center; width:100%;" |
||
| + | |- |
||
| + | !style="width:40%"| Subject |
||
| + | !style="width:30%"| Sheikah Script |
||
| + | !style="width:30%"| English |
||
| + | |- |
||
| + | | Interior cover art |
||
| + | | |
||
| + | | HYRULEWARRIORSAGEOFCALAMITY<br>{{Small| (repeating)}} |
||
| + | |- |
||
| + | | [[Impa]] symbols |
||
| + | | |
||
| + | | F S T |
||
| + | |- |
||
| + | | [[Monk Maz Koshia]] symbols |
||
| + | | |
||
| + | | E N E F S T |
||
| + | |- |
||
| + | | [[Monk Maz Koshia]] Remote Bomb seal |
||
| + | | |
||
| + | | CALLING<br>''Calling'' {{Small|(same as Travel Medallion, repeating)}} |
||
| + | |- |
||
| + | | On the portal opened by [[Terrako]], or portals used by other characters |
||
| + | | |
||
| + | | GATE OF TIME OPEN<br>{{Small|(repeating)}} |
||
| + | |- |
||
| + | | Purrah's Guardian disabling field |
||
| + | | |
||
| + | | JAMMING<br>{{Small|(repeating)}} |
||
| + | |- |
||
| + | | On opportunity to use Sheikah Slate counters against enemies |
||
| + | | |
||
| + | | RUNE |
||
| + | |- |
||
| + | | {{Term|BotW|Divine Beast Vah Ruta|link}} bonus damage symbol when standing in water |
||
| + | | |
||
| + | | POWER(unknown symbol)UP<br>''Power Up'' |
||
| + | |- |
||
| + | | {{Term|BotW|Divine Beast Vah Ruta|link}} text while aiming Icicle Barrage |
||
| + | | |
||
| + | | LOCKON<br>''Lock On'' |
||
| + | |- |
||
| + | | Divine Beast commands briefly replaced with Sheikah text, during brief loading |
||
| + | | |
||
| + | | OPERATION |
||
| + | |- |
||
| + | | [[Terrako]] boot up scene |
||
| + | | |
||
| + | | {{Small|(text is broken & glitchy as it identifies characters, switching text with gibberish, until finally repaired and displaying names properly, with exception of Robbie who is recognized first and only shows broken text)}} BB <br>R BI <br>PURAH<br>MIPHA<BR>DARUK<BR>IMPA<BR>ZELDA |
||
| + | |- |
||
| + | | On the map screen |
||
| + | | |
||
| + | | ABCDEFGHIJKLMNOPQRSTUVWXYZ<br>{{Small|(repeating, broken in lines. On the right side it appears in reversed order)}} |
||
|} |
|} |
||
| Line 377: | Line 545: | ||
| |
| |
||
| SMASHBROS<br>''Smash Bros.'' |
| SMASHBROS<br>''Smash Bros.'' |
||
| + | |} |
||
| + | {| class="wikitable" style="text-align:center; width:100%;" |
||
| + | |- |
||
| + | !style="width:30%"| Product |
||
| + | !style="width:20%"| Subject |
||
| + | !style="width:25%"| Sheikah Script |
||
| + | !style="width:25%"| English |
||
| + | |- |
||
| + | | Switch Light Up Dock Shield<br>NA BotW Collector's Edition<br>Official NA BotW web page |
||
| + | | Zelda themed shield<ref>{{Cite web|url=https://store.nintendo.com/light-up-dock-shield-super-mario-odyssey-the-legend-of-zelda.html|Link to product page|site=Link to product page}}</ref><br>Collector's box & soundtrack case<br>Decorative trim text<ref>{{Cite web|url=https://www.zelda.com/breath-of-the-wild/|Link to North American official website|site=Link to North American official website}}</ref> |
||
| + | | |
||
| + | | THEHYRULEFANTASY<br>''The Hyrule Fantasy''<br>{{Small|(repeating)}} |
||
| + | | |
||
| + | |- |
||
| + | | Hyrule Warriors: Age of Calamity Acrylic Panel Art (Nintendo Reward) |
||
| + | | Acrylic Panel Art<ref>{{Cite web|url=https://my.nintendo.com/rewards/4f6b5d2ccafd8c66?lang=en-US|Link to product page|site=Link to product page}}</ref> |
||
| + | | |
||
| + | | HYRULEWARRIORSAGEOFCALAMITY<br>''Hyrule Warriors Age Of Calamity''<br>{{Small|(repeating)}} |
||
|} |
|} |
||
Revision as of 14:17, 10 February 2021
The Sheikah Language appears in Breath of the Wild and Hyrule Warriors: Age of Calamity. As its name implies, the Sheikah Language appears exclusively on Sheikah architecture and technology.
The Sheikah Language is based on English, as its letters are a cipher of the Latin alphabet.
Sheikah Slate
| Subject | Image | Location | Sheikah Script | English |
|---|---|---|---|---|
| Map locations | ARTIFACT LOCATION MOUNTAIN PLACE REGION TIMBER WATER | |||
| Map HUD | CLOCK THERMOMETER ACHIEVEMENT SHEIKAHSENSOR | |||
| Map colored Pins | 0 1 2 3 4 | |||
| Damaged Sheikah Slate | RUNE ALBUM HYRULECOMPENDIUM | |||
| horizontal text along top and bottom | SHEIKAHSLATE Sheikah Slate (repeating) | |||
| Blinking text | (portions of the alphabet)(repeating, lines alternate between going forwards and backwards) | |||
| Rune page | FIRSTITEM SECONDITEM THIRDITEM FOURTHITEM FIFTHITEM SIXTHITEM SEVENTHITEM | |||
| Hyrule Compendium numbered entries | (entry number, repeated once) | |||
| Final Trial map | N E S W (one at each cardinal direction) | |||
| #1 Album memory note, before remembrance |
SACREDGROUNDRUINS Sacred Ground Ruins | |||
| #2 Album memory note, before remembrance |
LAKEKOLOMO Lake Kolomo | |||
| #3 Album memory note, before remembrance |
ANCIENTCOLUMNS Ancient Columns | |||
| #4 Album memory note, before remembrance |
KARAKARABAZAAR Kara Kara Bazaar | |||
| #5 Album memory note, before remembrance |
ELDINCANYON Eldin Canyon | |||
| #6 Album memory note, before remembrance |
IRCHPLAIN Irch Plain | |||
| #7 Album memory note, before remembrance |
WESTNECLUDA West Necluda | |||
| #8 Album memory note, before remembrance |
HYRULECASTLE Hyrule Castle | |||
| #9 Album memory note, before remembrance |
SPRINGOFPOWER Spring of Power | |||
| #10 Album memory note, before remembrance |
SANIDINPARKRUINS Sanidin Park Ruins | |||
| #11 Album memory note, before remembrance |
LANAYRUROAD-EASTGATE Lanayru Road - East Gate | |||
| #12 Album memory note, before remembrance |
HYRULEFIELD Hyrule Field |
Sheikah Towers
| Subject | Location | Sheikah Script | English |
|---|---|---|---|
| Sheikah Tower roof | S HEIKAHTOWE R Sheikah Tower | ||
| Distilling stone | MASTER USING IT AND YOU CAN HAVE THIS |
Divine Beasts
| Subject | Location | Sheikah Script | English |
|---|---|---|---|
| Travel gate | Divine Beast | TRANSPORT transport (repeating) | |
| Hump elevators rails | Divine Beast Vah Naboris | LINE Line (repeating) | |
| Moving platform between the humps | Divine Beast Vah Naboris | MOVE Move (repeating) | |
| Wide electric paths | Divine Beast Vah Naboris | HIGHVOLT High Volt (High voltage, repeating) | |
| Main shaft engravings | Final Trial | THEBRAVETRIAL The Brave Trial (fragmented, repeating) | |
| Large stone door's four bolts | Final Trial | W(upper left) A (upper right) E (lower left) F (lower right) | |
| Monk Maz Koshia arena floor, pillars and pedestal | Final Trial | TRIAL Trial (repeating) | |
| Monk Maz Koshia small incantation circle | Final Trial | R (Rin - Power) P (Hyo/Pyo - Energy) T (Toh - Harmony) S (Sha - Healing) K (Kai - Intuition) J (Jin - Awareness) R (Retsu - Dimension) Z (Zai - Creation) Z (Zen - Absolute) (The Nine Syllable Seals) | |
| Monk Maz Koshia large incantation circle | Final Trial | R (Rin - Power) P (Hyo/Pyo - Energy) T (Toh - Harmony) S (Sha - Healing) K (Kai - Intuition) J (Jin - Awareness) R (Retsu - Dimension) Z (Zai - Creation) Z (Zen - Absolute) (The Nine Syllable Seals, repeated once) |
Shrines
| Subject | Location | Sheikah Script | English |
|---|---|---|---|
| Link's resurrection bed | Shrine of Resurrection | CAREUNIT Care Unit | |
| Shrine of Resurrection door | Shrine of Resurrection | SHUTOUT Shut Out | |
| One-Hit Obliterator stand | Shrine of Resurrection | TAKEIT Take It | |
| Sheikah Monk pagoda | Ancient Shrines | GOALPOINT Goal Point | |
| Floor tile used to interact with Monk | Ancient Shrines | GO AL goal | |
| Entrance portal | Ancient Shrines | DUNGEON Dungeon (rotated 180°, repeating) | |
| Text adorning walls along Sheikah architecture | Ancient Shrines | DUNGEON Dungeon (repeating) | |
| Lift | Ancient Shrines | MOVINGPLATE Moving Plate (repeating) | |
| Barred gate | Kaam Ya'tak Shrine | DUNGEON Dungeon (rotated 90°, repeating) | |
| Portcullis | Keh Namut Shrine | SLIDEUP Slide Up (rotated left 90°, repeating) | |
| Gear | Kam Urog Shrine | ROTATE Rotate | |
| Gyro | Kaam Ya'tak Shrine | GYROS Gyros (repeating) | |
| Stone plaque signs | Shee Vaneer Shrine | READ ME HINT read me hint | |
| Metal plates | Oman Au Shrine | PLATE plate (repeating) | |
| Hinges of large metal doors | Oman Au Shrine | INWARD inward (written twice per door) | |
| Text on floor tiles before metal door (end tiles) | Oman Au Shrine | (full stop)MOVE(full stop) move (written 3 times, rotating each time) | |
| Text on floor tiles before metal door (middle tiles) | Oman Au Shrine | MOVE(space)ON move on (because tiles repeat, text seems to say "move_onmove_on...") | |
| Stake Switch | Gee Ha'rah Shrine | STAKESWITCH Stake Switch | |
| Carved text atop Cannons | Bareeda Naag Shrine | CANNONCANNON | |
| Glowing text along Cannons | Bareeda Naag Shrine | DUNGEON (repeating) | |
| Arch | Mirro Shaz Shrine | GOAL GOAL | |
| Ramp | Rok Uwog Shrine | GOAHEAD Go Ahead (in mirror reverse fashion, repeating) | |
| Thin electric pathways | Kay Noh Shrine | VOLTAGE Voltage (repeating) | |
| Exterior of Champion Ballad Shrine | Sharo Lun Shrine | THEBRAVETRIAL The Brave Trial | |
| Rails for climbing Stone | Sharo Lun Shrine | DUNGEON
Dungeon |
Ancient Tech Labs
| Subject | Location | Sheikah Script | English |
|---|---|---|---|
| Rails near Distilling Stone | Hateno Ancient Tech Lab | SHUTTER shutter (repeating) | |
| Base of Cherry | Akkala Ancient Tech Lab | CHERRY Cherry (repeating) |
Calamity Ganon Tapestry
Whereas most Sheikah text enciphers English text, an exception to this rule is the tapestry found behind Impa, which instead enciphers a romanization of Japanese text.
| Sheikah Script | Japanese | English |
|---|---|---|
| taiko no mukashi "hylia" no chi ni haneisita oukoku ooku no tami-ra ga kurashi bunmei ga haguku-mareta |
太古 の 昔 "Hylia" の 地 に 繁栄した 王国 多く の 民等 が 暮らし 文明 が 育むまれた |
Long ago, in ancient times, a kingdom prospered in the land of Hylia. Many people/citizens lived there, and civilization was cultivated. |
Misc
| Subject | Image | Location | Sheikah Script | English |
|---|---|---|---|---|
| Outer edge of Pedestals | Overworld or Shrines | STONESPHERESOCKET stone sphere socket (repeating) | ||
| Inner text of Pedestals | Overworld or Shrines | SOCKET TEKCOS socket tekcos (rotates by 90 degrees) | ||
| Ancient Orbs | Overworld or Shrines | STONESPHERE stone sphere (repeating) | ||
| Travel Gates | Shrine entrance, Ancient Lab entrance, Travel Medallion | CALLING calling (repeating) | ||
| Text on Beacons | Overworld, where player places map pins | ITS DANGEROUS TO GO ALONE it's dangerous to go alone (repeating) | ||
| Dinraal's Horns | Dinraal's horns during the EX Champion Revali's Song quest | HORN | ||
| Rings of Light | 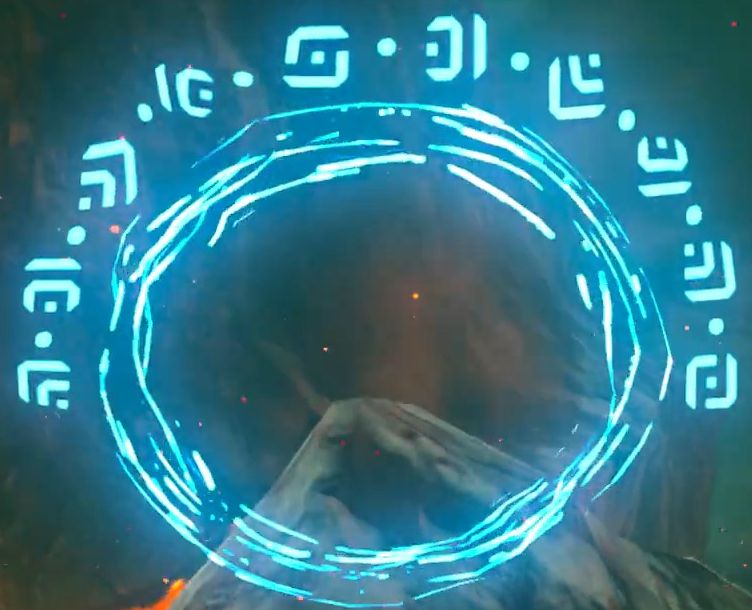
|
Death Mountain, must fly through many of these to access Sharo Lun shrine | 9876543210 | |
| Ring on Astral Observatory floor | 
|
Astral Observatory | LABORATORY (repeating) | |
| Sheikah levitating platform concept art | 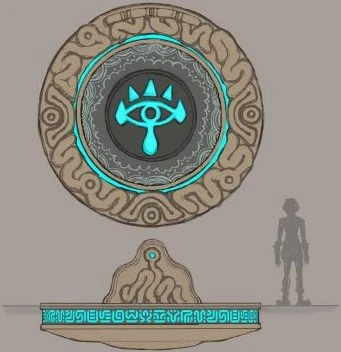
|
concept art | MOVINGPLATE Moving Plate (repeating) | |
| Advertisement for Hyrule Warriors: Age of Calamity | 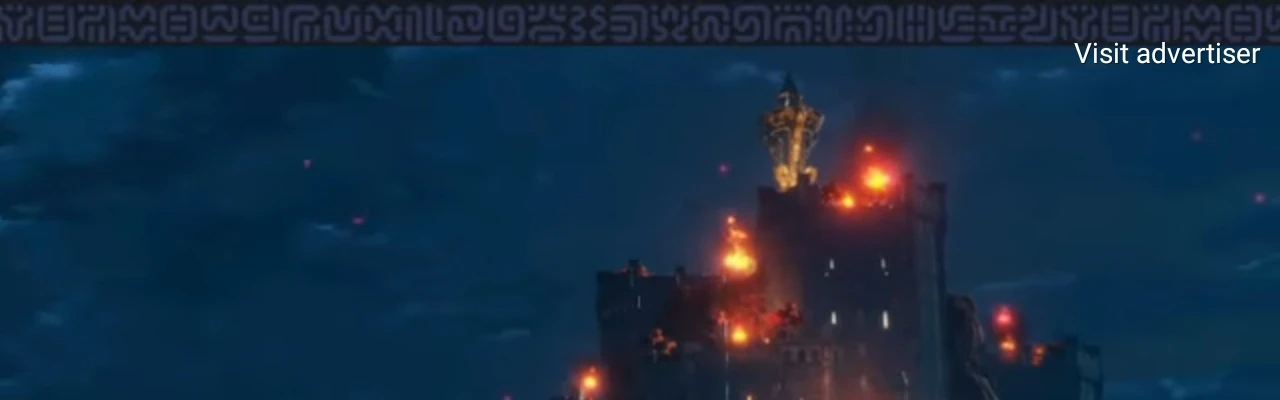  |
Advertisement for Hyrule Warriors: Age of Calamity | OPQRSTUVWXYZABCDEFGHIJKLMNOPQRST |
Hyrule Warriors: Age of Calamity
| Subject | Sheikah Script | English |
|---|---|---|
| Interior cover art | HYRULEWARRIORSAGEOFCALAMITY (repeating) | |
| Impa symbols | F S T | |
| Monk Maz Koshia symbols | E N E F S T | |
| Monk Maz Koshia Remote Bomb seal | CALLING Calling (same as Travel Medallion, repeating) | |
| On the portal opened by Terrako, or portals used by other characters | GATE OF TIME OPEN (repeating) | |
| Purrah's Guardian disabling field | JAMMING (repeating) | |
| On opportunity to use Sheikah Slate counters against enemies | RUNE | |
| Divine Beast Vah Ruta bonus damage symbol when standing in water | POWER(unknown symbol)UP Power Up | |
| Divine Beast Vah Ruta text while aiming Icicle Barrage | LOCKON Lock On | |
| Divine Beast commands briefly replaced with Sheikah text, during brief loading | OPERATION | |
| Terrako boot up scene | (text is broken & glitchy as it identifies characters, switching text with gibberish, until finally repaired and displaying names properly, with exception of Robbie who is recognized first and only shows broken text) BB R BI PURAH MIPHA DARUK IMPA ZELDA | |
| On the map screen | ABCDEFGHIJKLMNOPQRSTUVWXYZ (repeating, broken in lines. On the right side it appears in reversed order) |
Other Appearances
| Game | Subject | Sheikah Script | English |
|---|---|---|---|
| Super Smash Bros. Ultimate | Platform on the Great Plateau Tower Stage | SMASHBROS Smash Bros. |
| Product | Subject | Sheikah Script | English | |
|---|---|---|---|---|
| Switch Light Up Dock Shield NA BotW Collector's Edition Official NA BotW web page |
Zelda themed shield[1] Collector's box & soundtrack case Decorative trim text[2] |
THEHYRULEFANTASY The Hyrule Fantasy (repeating) |
||
| Hyrule Warriors: Age of Calamity Acrylic Panel Art (Nintendo Reward) | Acrylic Panel Art[3] | HYRULEWARRIORSAGEOFCALAMITY Hyrule Warriors Age Of Calamity (repeating) |
References
Link's Awakening (Nintendo Switch)
Bosses · Characters · Enemies · Items · Locations · Miscellaneous
Ocarina of Time 3D
Characters · Enemies · Items · Locations · Miscellaneous
Four Swords Anniversary Edition
Characters · Enemies · Items · Locations · Miscellaneous
The Wind Waker HD
Characters · Enemies · Items · Locations · Miscellaneous
Twilight Princess HD
Characters · Enemies · Items · Locations · Miscellaneous
Freshly-Picked Tingle's Rosy Rupeeland
Characters · Enemies · Items · Locations · Miscellaneous
Characters · Enemies · Items · Locations · Miscellaneous
Ocarina of Time · Ocarina of Time 3D · Majora's Mask · Majora's Mask 3D · The Wind Waker · The Minish Cap · Four Swords Adventures · Twilight Princess · Phantom Hourglass · Spirit Tracks · Skyward Sword · A Link Between Worlds · Tri Force Heroes · Breath of the Wild
Freshly-Picked Tingle's Rosy Rupeeland · Link's Crossbow Training
Sheikah Language