m (Text replace - "{{Japanese|" to "{{Romanize|") |
m (Text replace - "{{Japanese|" to "{{Romanize|") |
||
| Line 1: | Line 1: | ||
| + | {{Boss |
||
| − | {{merge|King of Red Lions}} |
||
| ⚫ | |||
| − | {{Character |
||
| + | |title = Armored Lizard |
||
| − | |name = Daphnes Nohansen Hyrule |
||
| ⚫ | |||
| ⚫ | |||
| + | |dungeon = [[Goron Temple]] |
||
| − | |caption = |
||
| + | |weakness = [[Sword]] attacks on blue crystal, [[Bombchu]], [[Bomb]] |
||
| − | |title = King of Hyrule<br>[[King of Red Lions]] |
||
| − | |race = [[Hylian]] |
||
| − | |gender = Male |
||
| ⚫ | |||
| − | |other = {{SSBB}}<br>{{HW}}<br>{{HWL}} |
||
| − | |era= [[Zelda Timeline#The Era without a Hero|Era Without a Hero]]<br>[[Zelda Timeline#The Era of the Great Sea|Era of the Great Sea]] |
||
| − | |family = [[Princess Zelda#Antediluvian Princess|Daughter]]<br>[[Tetra's Mother]]<br>[[Princess Zelda#The Wind Waker|Princess Zelda]] / [[Tetra]] |
||
| − | |voice actor(s) = |
||
}} |
}} |
||
| + | '''Dongorongo''' is a [[Dodongo]]-like [[boss]] in {{PH}}, and resides in the fifth dungeon, [[Goron Temple]]. |
||
| − | '''Daphnes Nohansen Hyrule''' (pronounced {{IPA|ˈdæf.nɛs noʊ.hæn.sɛn ˈhаɪ.ruːl}}, {{Respell|DAF|nes}} {{Respell|noh|HAN|sen}} {{Respell|HEYE|rewl}}){{fact}} is a prominent character in {{TWW}}. |
||
| − | == |
+ | ==Strategy== |
| + | [[File:Dongorongo Strategy.png|left|thumb|Sending a Bombchu into a stunned Dongorongo's mouth]] |
||
| − | Daphnes Nohansen Hyrule was once the king of Hyrule during the [[Zelda Timeline#The Era without a Hero|Era Without a Hero]]. When the goddesses unleashed the [[Great Flood]], he chose to remain in Hyrule which was to be sealed by the goddesses at the bottom of the sea. He split the [[Triforce#Triforce of Wisdom|Triforce of Wisdom]] into two parts and instructed the [[Princess Zelda#Antediluvian Princess|Princess]] of that era to keep one piece and flee to the mountaintops with her servants.<ref>{{cite book|quote=The gods chose which of the kingdom's subjects would ascend to the new land, telling them to escape to the tallest mountains. They then flooded the world, sinking Ganondorf and Hyrule to the bottom of the ocean and sealing them away. Though the king was sealed along with his kingdom, the princess took a piece of the Triforce that had been broken in two by the king and managed to escape to the ocean's surface with several of her retainers.|book=[[Hyrule Historia]]|publisher=Dark Horse Books|page=123}}</ref> |
||
| + | Link enters a room with quicksand surrounding the center platform. Link cannot cross the quicksand, as there is no bridge. However, [[Gongoron]] comes out of a hole in the wall behind Dongorongo and offers help to Link. The objective is to dodge the fireballs that Dongorongo blasts from his mouth and to avoid him when he charges at Gongoron. When the young goron dodges the charge attack and Dongorongo bashes his head against the wall, he gets stunned for a few seconds, Gongoron can slam him from his side into a state where he is stunned for several seconds, which can be done by either tapping the boss's back rapidly, or by simply rolling Gongoron around to Dongorongo's side, as well. During this [[Critical Point]], Link must send a Bombchu into Dongorongo's mouth, which will then explode inside of him. |
||
| + | As a word of caution, Link must occasionally take control of himself during Gongoron's battle against the boss as he can be attacked by monsters that assist the beast. |
||
| − | Hundreds of years later, Ganondorf managed to circumvent the Goddesses' seal and reach the surface of the [[Great Sea]]. In response, the Goddesses awakened the king from his seal, who assumed the form of a boat and rechristened himself as the [[King of Red Lions]]. In this new form, Daphnes began searching the Great Sea, looking for a hero to defeat Ganon and the descendant of the royal family.<ref>{{cite book|quote=King Daphnes Nohansen Hyrule, ordered by the gods to put an end to Ganondorf's ambitions, awoke from his slumber. His spirit took up residence in a small red boat known as the King of Red Lions, and he began searching for the new Hero and the descendent<!-- This is not a typo, it's spelled like that in the book--> of the royal family.|book=[[Hyrule Historia]]|publisher=Dark Horse Books|page=124}}</ref> After Link is captured by the [[Helmaroc King]] and thrown out to sea, the King of Red Lions rescues him and aids the young hero in his quest. |
||
| + | After three Bombchus, Dongorongo falls down, a bridge appears and Gongoron walks out of the room. However, just as Link crosses the bridge, Dongorongo wakes up, and some of its armor breaks revealing a large blue crystal, which is his [[Critical Point|weak point]]. Dongorongo will attempt to inhale Link and when he does this, the hero must throw a Bomb into his mouth. Once incapacitating the boss again, Link proceeds to attack his weak point until he stands up again. Repeating this a few times results in the true defeat of Dongorongo. |
||
| − | [[File:Kingtetra.png|thumb|left|200px|The King revealing Tetra's secret]] |
||
| − | After Link fails to defeat [[Ganon]]dorf in the [[Forsaken Fortress]] with the newly-obtained [[Master Sword]],<ref>{{cite|You cannot defeat me with a blade that does not sparkle with the power to repel evil! What you hold is useless.|Ganondorf|TWW}}</ref> he, along with the King of Red Lions and Tetra, retreat to the underwater vestige of [[Hyrule]], where the King of Red Lions reveals his identity as the former King of Hyrule and that he magically operates the boat to guide Link.<ref>{{cite|And I am its king: Daphnes Nohansen Hyrule. Link, do you not recognize my voice? Indeed, I am the one who guided you here. I am the King of Red Lions.|Daphnes Nohansen Hyrule|TWW}}</ref> |
||
| ⚫ | |||
| − | Daphnes reveals to [[Tetra]] that she is the heir to the kingdom of Hyrule by combining the two fragments of the Triforce of Wisdom, the one in his possession with the one in Tetra's necklace, restoring the Triforce of Wisdom which now dwelt within [[Princess Zelda|Zelda]]. He instructs Zelda to remain in [[Hyrule Castle]] to avoid detection from Ganondorf while he resumes his form as the King of Red Lions and proceeds to aid Link in his quest for restoring the evil-repelling power of the Master Sword. |
||
| + | *Dongorongo is somewhat similar in appearance to the Pokémon [[bp:Bastiodon|Bastiodon]] and [[bp:Heatran|Heatran]], from the ''Pokémon'' series. |
||
| + | *Just as the [[Boko Baba]]s from {{TWW}} are thought to have evolved from [[Deku Baba]]s, it's possible that Dongorongo is an evolutionary descendant of the classic Dodongo. |
||
| + | *The crystalline growth on Dongorongo's back is almost identical to the [[Pure Metal#Crimsonine|Crimsonine]] barring the color, suggesting that the Pure Metal may have somehow been extracted from it or another member of its species. However, [[Zauz]] mentions that there is only one of each Pure Metal in the world. |
||
| + | *Dongorongo's name is most likely a cross between "Dodongo" and "Goron" because it possesses the lizard-like body of a Dodongo, and the rock-formations of a Goron. |
||
| + | **The name is also one letter off from [[wikipedia:Rongorongo|Rongorongo]], a mysterious script found on stone tablets on Easter Island, perhaps owing to the tribal nature of the Gorons. |
||
| + | *The method to defeat Dongorongo is strikingly similar to the method used on [[King Dodongo]] from ''Ocarina of Time''. |
||
| + | *When Dongorongo is defeated, the sound it makes before falling over is the same as the one made by the dying [[Molgera]] in ''The Wind Waker'', although slowed down slightly and cut short by a few seconds. |
||
| ⚫ | |||
| − | [[File:King Daphnes Reaching Out.png|thumb|right|200px|Daphnes reaching out to Link during his final moments]] |
||
| ⚫ | |||
| − | Daphnes later appears in-person during the final encounter with Ganondorf. After Ganondorf brings together all three pieces of the [[Triforce]], Daphnes intervenes by using its power to flood what remains of his kingdom and give Link and Zelda a future.<ref>{{Cite|He who touches it will have whatever he desires granted... That is what you said, is it not, Ganondorf? Gods of the Triforce! Hear that which I desire! Hope! I desire hope for these children! Give them a future! Wash away this ancient land of Hyrule! Let a ray of hope shine on the future of the world!!!|Daphnes Nohansen Hyrule|TWW}}</ref><ref>{{Cite|And let our destinies finally be fulfilled... Ganondorf! May you drown with Hyrule!!!|Daphnes Nohansen Hyrule|TWW}}</ref> In response to this, Ganondorf attacks Link and Princess Zelda,<ref>{{Cite|Very well, then... Allow me to show you... Your future... Yes... Allow me to show you... Just what hope you have... See how much your precious Triforce is worth!|Ganondorf|TWW}}}</ref> intending to kill them. |
||
| + | File:Dongorongo 1.png|Dongorongo's first form |
||
| + | File:Dongorongo 2.png|Dongorongo with his weak point exposed |
||
| + | File:Dongorongo Title.png|Dongorongo appears |
||
| + | File:Dongorongo Attack.png|Dongorongo breathes fire at Link |
||
| + | File:Dongorongo Knock.png|Gongoron tipping Dongorongo over |
||
| ⚫ | |||
| − | Once Link and Zelda defeat Ganondorf, Daphnes laments to them his regret as he lived bound to the memory of Hyrule, comparing himself to Ganondorf in that regard. He goes on to encourage them to live for the future and not repeat his mistakes, ignoring Zelda's request to come with them and find a land to be the next Hyrule. As the kingdom floods, Link and Zelda are enclosed within bubbles and begin to ascend to the surface; the former attempts to reach out toward the king, who begins to raise his own hand to meet Link's. Though this seems to indicate the smallest desire to go with him, the king's hand ultimately falls to his side as he presumably drowns. |
||
| − | |||
| − | The King of Red Lions appears when Link is departing from [[Outset Island]] with Tetra and [[Tetra's Ship|her ship]], but it is completely lifeless, as the King himself has died. |
||
| − | |||
| − | The King can speak the [[Hylian Language#The Wind Waker|ancient Hylian tongue]], and often does so on Link's behalf, as the young hero cannot understand the language. However, in the [[Second Quest#The Wind Waker|Second Quest]], these words are translated, though Link still cannot understand them. |
||
| − | |||
| − | {{Figurine|TWW|King of Hyrule|The King of Hyrule was unable to protect his kingdom from evil and left its fate up to the gods. The King of Red Lions is merely his disguise. His full name is one that is truly fit for royalty: Daphnes Nohansen Hyrule. |[[File:Daphnes Figurine.png|79px]]}} |
||
| − | |||
| − | ==Non-canon Appearances== |
||
| − | {{Noncanon|start}} |
||
| − | ===''Super Smash Bros. Brawl''=== |
||
| − | Daphnes Nohsanen Hyrule appears as a collectible [[Sticker]] in {{SSBB}}. |
||
| − | |||
| − | {| class="wikitable" border="1" cellpadding="2" style="text-align:center;" |
||
| − | |- |
||
| − | !width="inherited"|Name |
||
| − | !width="50px"|Image |
||
| − | !Artwork from |
||
| − | !Effect in [[The Subspace Emissary]] |
||
| − | !Usable by |
||
| − | |- |
||
| − | |[[Daphnes Nohansen Hyrule]] |
||
| − | |[[File:Daphnes Nohansen Hyrule Sticker.png|50px]] |
||
| − | |''The Wind Waker'' |
||
| − | |align=left|[Electric] - Attack +31 |
||
| − | |[[File:LZGT.png|100px|This sticker is usable by Link, Zelda, Ganondorf, and Toon Link]] |
||
| ⚫ | |||
| − | |||
| − | ===''Hyrule Warriors'' Series=== |
||
| − | [[File:HWL King Daphnes Artwork.png|right|90px]] |
||
| − | King Daphnes makes his debut in the [[Nintendo 3DS]] port of {{HW}}: {{HWL}}. His fighting style shows him being able to transform into his boat form as well as using the [[Sail]] as his weapon, while summoning waves to ram into enemies. Both versions of the game can be synchronized together, resulting in King Daphnes appearing as a playable character in the original [[Wii U]] version. |
||
| − | {{clear}} |
||
| − | {{Noncanon|end}} |
||
| − | |||
| − | ==Theory== |
||
| − | {{theory|start}} |
||
| − | ===The Original Wind Waker=== |
||
| − | The Wind Sage [[Fado (The Wind Waker)|Fado]] mentions that it was the King of Hyrule who used to conduct the [[Sage]]s using the {{it|Wind Waker}}; this, coupled with the fact that the Wind God [[Zephos]] refers to [[Link]] as the new Wind Waker when he first meets him, seems to suggest that Daphnes himself may have once held the same title, in the days before [[Hyrule]] was flooded. |
||
| − | {{theory|end}} |
||
| − | |||
| ⚫ | |||
| − | *[[Rauru]] is similar to King Daphnes Nohansen Hyrule both in appearance and in the fact that he is a wise man who aids Link in his quest. |
||
| − | *Daphnes' wish came true when [[Tetra]] and [[Link]] founded the [[New Hyrule]] featured in {{ST}}. |
||
| − | *[[King Daltus]] who appears in {{TMC}} bears a great resemblance to Daphnes Nohansen Hyrule. |
||
| − | *Daphnes Nohansen Hyrule may be the first character in the Zelda series to have fully modeled expressions. |
||
| − | *Judging by how he fades in and out of existence, Daphnes Nohansen Hyrule may merely be an apparition. He may also be grounded spiritually to Hyrule, as Link only meets him in person while in Hyrule. |
||
| − | |||
| − | ==Etymology== |
||
{{Names |
{{Names |
||
| − | | |
+ | |en= |
| ⚫ | |||
| − | |ja= {{Romanize|ダフネス・ノハンセン・ハイラル|Dafunesu Nohansen Hairaru}} |
||
| + | |ja= {{Romanize|重機動鎧竜 ボンゴロンゴ|Juukido Gairyuu Bongorongo||3}} |
||
| − | |jaM= Daphnes Nohansen Hyrule |
||
| + | |jaM= Heavy Mobile Ankylosaur: Bongorongo |
||
|es= |
|es= |
||
| + | |esL= Dongorongo, Lagarto Blindado |
||
| ⚫ | |||
| + | |esLM= Dongorongo, Armored Lizard |
||
| − | |esS= Daphness Nohansen Hyrule |
||
| ⚫ | |||
|esSM= |
|esSM= |
||
| + | |fr= Stégoronsaure, Lézard Blindé |
||
| ⚫ | |||
| + | |frM= Stégoronsaure, Armored Lizard |
||
| − | |esLM= |
||
| + | |de= {{de|Bongorong|Bongorong, die Panzerechse}} |
||
| − | |fr= Daphnès Nohansen Hyrule |
||
| + | |deM= Bongorong, The Armored Lizard |
||
| − | |frM= |
||
| + | |it= Dongorongo, Rettile Corazza |
||
| − | |frF= |
||
| − | |frFM= |
||
| − | |frC= |
||
| − | |frCM= |
||
| − | |de= {{de|Daphnos Johanson von Hyrule}} |
||
| − | |deM= |
||
| − | |it= Dafnes Nohansen Hyrule |
||
|itM= |
|itM= |
||
|ko= |
|ko= |
||
| − | |koM= |
+ | |koM= |
| ⚫ | |||
| − | |||
| ⚫ | |||
| ⚫ | |||
| − | File:TriforceandDaphnes.jpg |
||
| − | File:Ganon and Daphnes.jpg |
||
| − | File:Ganon Battle Aftermath WW.png |
||
| − | File:King Daphnes Closeup.png |
||
| − | File:King Daphnes and Ganondorf Flood.png |
||
| − | File:Daphnes nohansen hyrule portrait.png |
||
| − | File:Pictograph King.png|Legendary Pictograph of Daphnes in ''The Wind Waker'' |
||
| − | File:LegendPicDaphnesWWHD.png|Legendary Pictograph of Daphnes in ''The Wind Waker HD'' |
||
| − | File:HWL The Wind Waker Cast Artbook Poster.png|King Daphnes (in his [[King of Red Lions|boat form]]), with the rest of {{TWW}} cast, in ''Hyrule Warriors Legends'' |
||
| − | File:HWL King Daphnes Sail Artwork.png|King Daphnes with his sail |
||
| − | File:HW Daphnes Portrait 1.png|King Daphnes portrait from ''Hyrule Warriors'' |
||
| − | File:HW Daphnes Portrait 2.png|King Daphnes portrait from ''Hyrule Warriors'' |
||
| − | File:HW Daphnes Portrait 3.png|King Daphnes portrait from ''Hyrule Warriors'' |
||
| − | File:HW Daphnes Portrait 4.png|King Daphnes portrait from ''Hyrule Warriors'' |
||
| − | File:HW Daphnes Portrait 5.png|King Daphnes portrait from ''Hyrule Warriors'' |
||
| − | File:HW Daphnes Portrait 6.png|King Daphnes portrait from ''Hyrule Warriors'' |
||
| − | File:HWL VS Daphnes Icon.png|VS King Daphnes icon from ''Hyrule Warriors'' |
||
| − | File:HW Adventure Mode Daphnes Icon.png|Adventure Mode King Daphnes icon from ''Hyrule Warriors'' |
||
| ⚫ | |||
| − | |||
| − | ===Video Gallery=== |
||
| − | {{Youtube|psvzdMNKg_w|200|Sail gameplay from ''Hyrule Warriors Legends''}} |
||
| − | |||
| − | {{Ref}} |
||
| + | {{Bosses|PH}} |
||
| − | [[Category:Hylians]] |
||
| + | {{SaurianEnemy}} |
||
| − | [[Category:Hyruleans]] |
||
| + | {{FireEnemy}} |
||
| − | [[Category:Hyrule]] |
||
| − | [[Category: |
+ | [[Category:Bosses]] |
| − | [[Category: |
+ | [[Category:Bosses in Phantom Hourglass]] |
| − | [[Category:Characters in Hyrule Warriors]] |
||
Revision as of 14:11, 14 May 2016
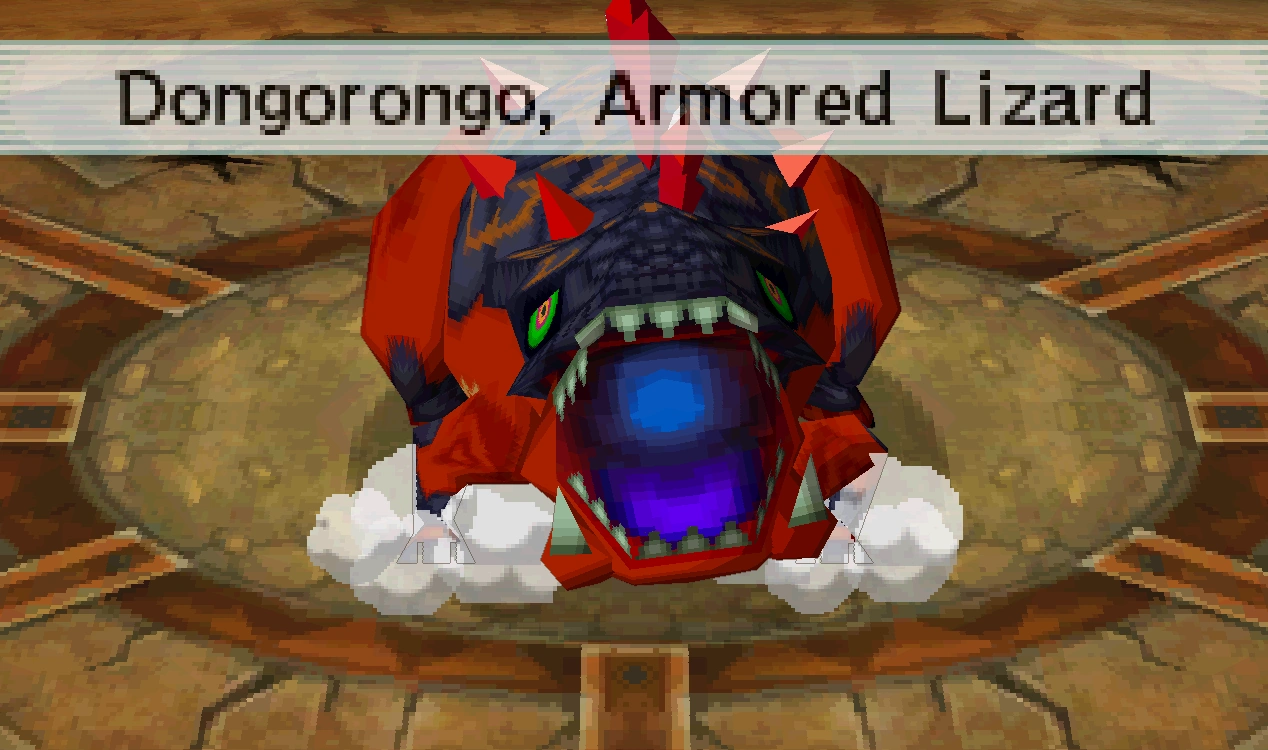
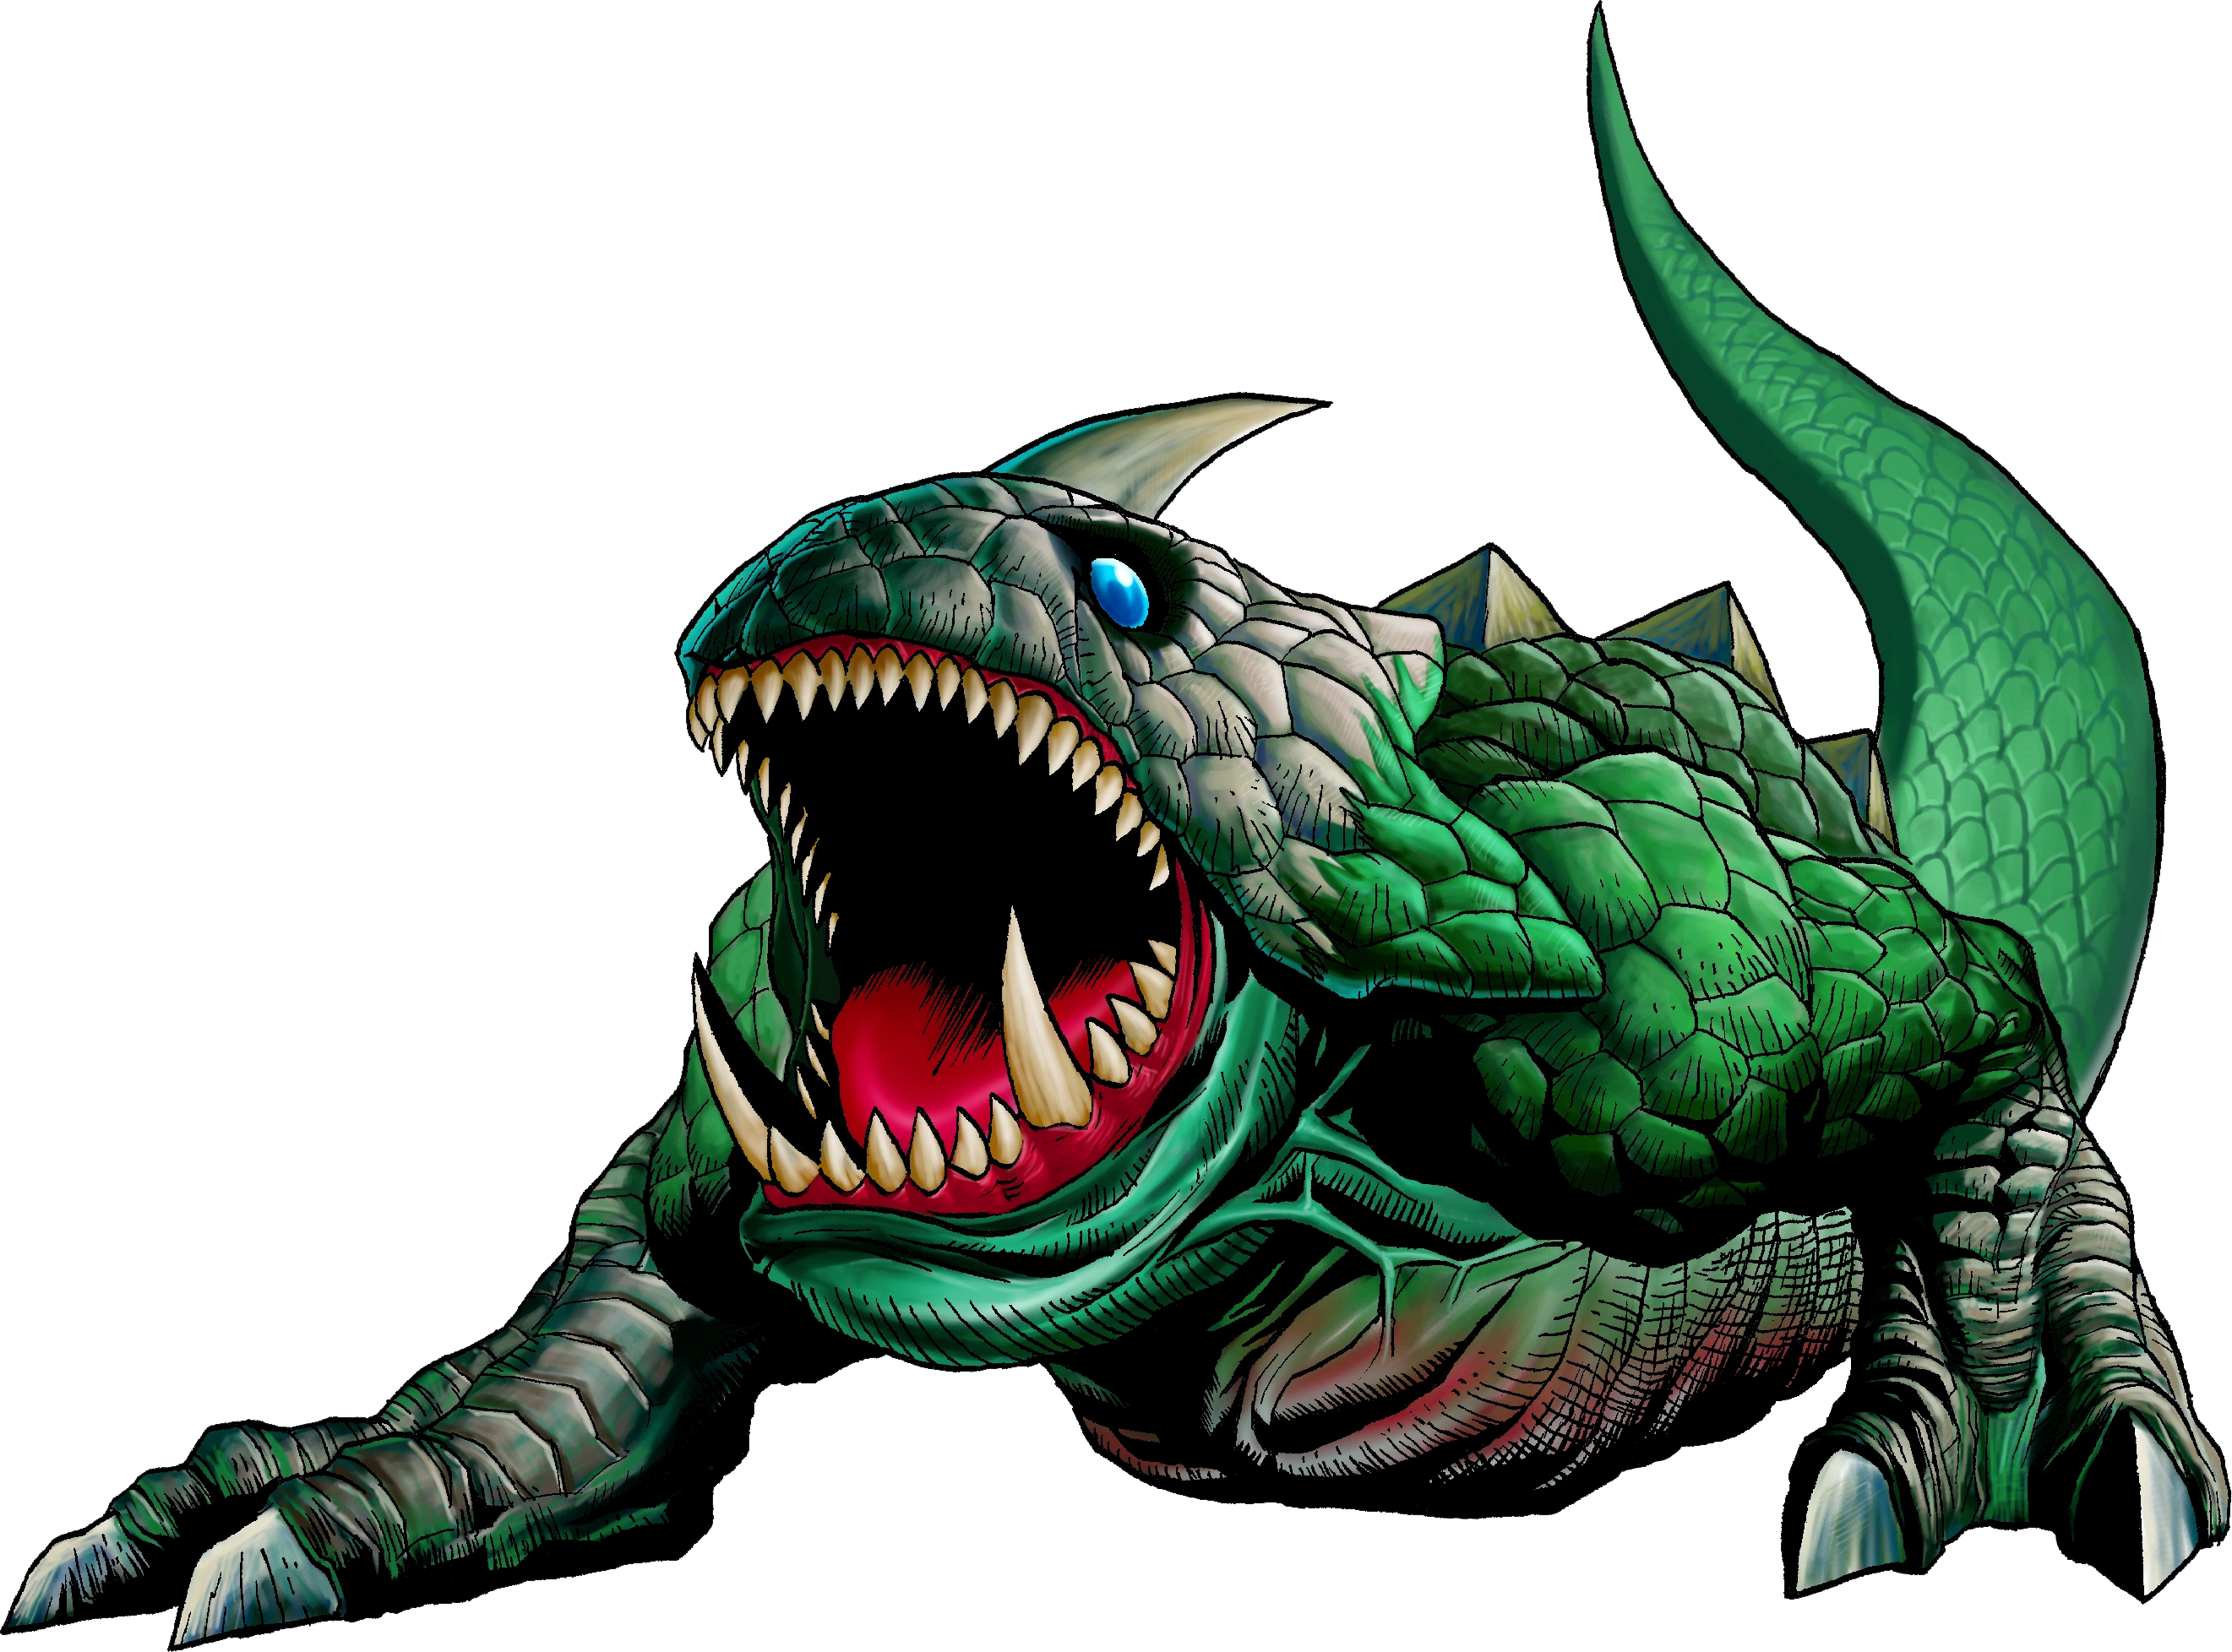
Template:Boss Dongorongo is a Dodongo-like boss in Phantom Hourglass, and resides in the fifth dungeon, Goron Temple.
Strategy

Sending a Bombchu into a stunned Dongorongo's mouth
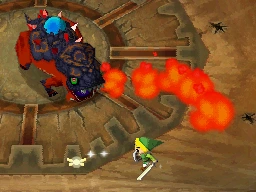
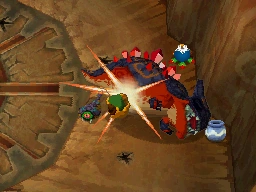
Link enters a room with quicksand surrounding the center platform. Link cannot cross the quicksand, as there is no bridge. However, Gongoron comes out of a hole in the wall behind Dongorongo and offers help to Link. The objective is to dodge the fireballs that Dongorongo blasts from his mouth and to avoid him when he charges at Gongoron. When the young goron dodges the charge attack and Dongorongo bashes his head against the wall, he gets stunned for a few seconds, Gongoron can slam him from his side into a state where he is stunned for several seconds, which can be done by either tapping the boss's back rapidly, or by simply rolling Gongoron around to Dongorongo's side, as well. During this Critical Point, Link must send a Bombchu into Dongorongo's mouth, which will then explode inside of him.
As a word of caution, Link must occasionally take control of himself during Gongoron's battle against the boss as he can be attacked by monsters that assist the beast.
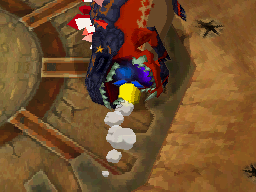
After three Bombchus, Dongorongo falls down, a bridge appears and Gongoron walks out of the room. However, just as Link crosses the bridge, Dongorongo wakes up, and some of its armor breaks revealing a large blue crystal, which is his weak point. Dongorongo will attempt to inhale Link and when he does this, the hero must throw a Bomb into his mouth. Once incapacitating the boss again, Link proceeds to attack his weak point until he stands up again. Repeating this a few times results in the true defeat of Dongorongo.
Trivia
- Dongorongo is somewhat similar in appearance to the Pokémon Bastiodon and Heatran, from the Pokémon series.
- Just as the Boko Babas from The Wind Waker are thought to have evolved from Deku Babas, it's possible that Dongorongo is an evolutionary descendant of the classic Dodongo.
- The crystalline growth on Dongorongo's back is almost identical to the Crimsonine barring the color, suggesting that the Pure Metal may have somehow been extracted from it or another member of its species. However, Zauz mentions that there is only one of each Pure Metal in the world.
- Dongorongo's name is most likely a cross between "Dodongo" and "Goron" because it possesses the lizard-like body of a Dodongo, and the rock-formations of a Goron.
- The name is also one letter off from Rongorongo, a mysterious script found on stone tablets on Easter Island, perhaps owing to the tribal nature of the Gorons.
- The method to defeat Dongorongo is strikingly similar to the method used on King Dodongo from Ocarina of Time.
- When Dongorongo is defeated, the sound it makes before falling over is the same as the one made by the dying Molgera in The Wind Waker, although slowed down slightly and cut short by a few seconds.
Gallery
- Dongorongo 1.png
Dongorongo's first form
- Dongorongo 2.png
Dongorongo with his weak point exposed

Dongorongo appears

Dongorongo breathes fire at Link

Gongoron tipping Dongorongo over
| Language | Name | Meaning | |
|---|---|---|---|
| Japanese | 重機動鎧竜 ボンゴロンゴ | Heavy Mobile Ankylosaur: Bongorongo | |
| French | Stégoronsaure, Lézard Blindé | Stégoronsaure, Armored Lizard | |
| German | Bongorong, die Panzerechse | Bongorong, The Armored Lizard | |
| Italian | Dongorongo, Rettile Corazza | ||
| SpanishLA | Dongorongo, Lagarto Blindado | Dongorongo, Armored Lizard | |
Mazura · Jermafenser · Rebonack · Carock · Gooma · Barba · Thunderbird ![]() · Link's Shadow
· Link's Shadow
Light World
Ball and Chain Trooper ![]() · Six Armos Knights · Lanmola Trio · Moldorm · Agahnim
· Six Armos Knights · Lanmola Trio · Moldorm · Agahnim ![]()
Dark World
Helmasaur King · Arrghus · Mothula · Blind the Thief · Kholdstare · Vitreous · Trinexx · Ganon
Super Helmasaur · Super Arrghus · Super Mothula · Super Blind · Dark Links![]()
Bosses
Moldorm · Genie · Slime Eye · Angler Fish (2D) · Slime Eel · Facade · Evil Eagle (2D) · Hot Head · Shadow Nightmares
Guardians
Rolling Bones ![]() · King Moblin
· King Moblin ![]() · Hinox
· Hinox ![]() · Dodongo Snakes x2
· Dodongo Snakes x2 ![]() · Lanmola
· Lanmola ![]() · Cue Ball
· Cue Ball ![]() · Master Stalfos x4 · Gohma Twins · Armos Knight
· Master Stalfos x4 · Gohma Twins · Armos Knight ![]() · Smasher
· Smasher ![]() · Grim Creeper · Turtle Rock · Blaino
· Grim Creeper · Turtle Rock · Blaino
Bosses
Gohma · King Dodongo · Barinade · Phantom Ganon · Volvagia · Morpha · Bongo Bongo · Twinrova · Ganondorf · Ganon
Middle Bosses
Lizalfos · Big Octo · Stalfos · Meg · Flare Dancer · White Wolfos · Dark Link · Dead Hand · Gerudo Thief · Iron Knuckle · Dynalfos
Bosses
Odolwa · Goht · Gyorg · Twinmold · Majora ![]()
Middle Bosses
Dinolfos · Gekko · Wizzrobe · Gerudo Pirate · Wart · Gekko and Mad Jelly
Captain Keeta · Iron Knuckle · Sharp · Igos du Ikana · Garo Master · Gomess · Eyegore
Bosses
Aquamentus · Dodongo · Mothula · Gohma · Digdogger · Manhandla · Gleeok · Medusa Head · General Onox ![]()
Sub-Bosses
Brother Goriyas · Facade ![]() · Omuai · Agunima · Great Moblin
· Omuai · Agunima · Great Moblin ![]() · Syger · Vire
· Syger · Vire ![]() · Poe Sisters · Frypolar
· Poe Sisters · Frypolar
Bosses
Pumpkin Head · Head Thwomp (2D) · Shadow Hag · Eyesoar · Smog · Octogon · Possessed Nayru · Plasmarine · Ramrock · Veran ![]()
Sub-Bosses
Giant Ghini · Swoop · Subterror · Armos Warrior · Great Moblin ![]() · Smasher · Vire
· Smasher · Vire ![]() · Angler Fish (2D) · Blue Stalfos
· Angler Fish (2D) · Blue Stalfos
Bosses
Gohma · Kalle Demos · Gohdan · Helmaroc King · Jalhalla · Molgera · Puppet Ganon ![]() · Ganondorf
· Ganondorf
Minibosses
Green Bokoblin · Moblin · Mothula · Darknut · Cyclos · Phantom Ganon · Stalfos · Wizzrobe · Mighty Darknut · Big Octo![]()
Bosses
Phantom Ganon ![]() · Stone Arrghus · Helmaroc King · Big Poe · Big Moldorm x2 · Frostare · Vaati · Ganon
· Stone Arrghus · Helmaroc King · Big Poe · Big Moldorm x2 · Frostare · Vaati · Ganon
Sub-Bosses
Chief Soldier · Shadow Link ![]() · Manhandla · Dodongos · Big Dark Stalfos · Gohma · Big Dodongo
· Manhandla · Dodongos · Big Dark Stalfos · Gohma · Big Dodongo
Bosses
Big Green Chuchu ![]() · Gleerok · Mazaal · Big Octorok
· Gleerok · Mazaal · Big Octorok ![]() · Gyorg Pair · Vaati
· Gyorg Pair · Vaati ![]()
Sub-Bosses
Madderpillar ![]() · Dark Nut · Big Blue Chuchu
· Dark Nut · Big Blue Chuchu ![]() · Red Dark Nut · Black Knight
· Red Dark Nut · Black Knight
Bosses
Diababa · Fyrus · Morpheel · Stallord · Blizzeta · Armogohma · Argorok · Zant · Puppet Zelda · Ganon · Ganondorf ![]()
Sub-Bosses
Ook · King Bulblin · Dangoro · Twilit Carrier Kargarok · Twilit Bloat · Deku Toad · Death Sword · Darkhammer · Darknut · Aeralfos · Phantom Zant
Bosses
Stagnox · Fraaz · Phytops · Cragma · Byrne · Skeldritch · Demon Train · Chancellor Cole · Malladus
Stagnox II · Fraaz II · Phytops II · Cragma II · Skeldritch II · Dark Link![]()
Sub-Bosses
Mothula · Geozard · Rocktite · Ice Keese · Freezard · White Wolfos · Geozard Chief · Big Blin ![]() · Snapper · Helmet Chuchu · Metal Chuchu · Stalfos · Heatoise · Stalfos Warrior · Gerune · Ergtorok ·
· Snapper · Helmet Chuchu · Metal Chuchu · Stalfos · Heatoise · Stalfos Warrior · Gerune · Ergtorok ·
Bosses
Ghirahim ![]() · Scaldera · Moldarach · The Imprisoned
· Scaldera · Moldarach · The Imprisoned ![]() · Koloktos · Tentalus · Levias
· Koloktos · Tentalus · Levias ![]() · Bilocyte
· Bilocyte ![]() · Demise
· Demise
Sub-Bosses
Stalfos · Lizalfos · Stalmaster · Moldarach · LD-002G Scervo · Dark Lizalfos · Magmanos · Moldorm · Dreadfuse
Bosses
Yuga ![]() · Moldorm · Margomill · Gemesaur King · Arrghus · Knucklemaster · Stalblind · Zaganaga · Dharkstare · Grinexx · Yuga Ganon
· Moldorm · Margomill · Gemesaur King · Arrghus · Knucklemaster · Stalblind · Zaganaga · Dharkstare · Grinexx · Yuga Ganon
Sub-Bosses
Armos · Red Stalfos · Heedles · Green & Red Goriyas · Gigabari · Gibdos & Purple Mini-Moldorms · Red Eyegores · Flying Tiles & Devalants · Big Pengator & Pengators · Fire Gimos · Moldorm · Lorule Ball and Chain Soldier · Arrghus
StreetPass Bosses
Bosses
Margoma · Arrghus · Moldorm · Blizzagia · The Lady's Pets ![]() · Stalchampion · Prismantus · The Lady
· Stalchampion · Prismantus · The Lady
Shadow Link x3![]()
Mini-Bosses
Electric Blob King · Electric Blob Queen · Hinox Brothers · Freezlord · Vulture Vizier · Grim Repoe · Gigaleon
Bosses
Windblight Ganon · Fireblight Ganon · Master Kohga · Thunderblight Ganon · Waterblight Ganon · Calamity Ganon · Dark Beast Ganon ![]()
Sub-Bosses
Stone Talus · Igneo Talus · Frost Talus · Molduga · Hinox · Blue Hinox · Black Hinox · Stalnox · Igneo Talus Titan · Molduking
Bosses
Colgera · Mucktorok · Marbled Gohma · Queen Gibdo · Phantom Ganon · Seized Construct · The Demon King's Army · Demon King Ganondorf · Demon Dragon ![]()
Sub-Bosses
Flame Gleeok · Frost Gleeok · Sludge Like · Thunder Gleeok · King Gleeok · Yunobo · Frox · Flux Construct · Moragia · Molduga · Hinox · Stalnox · Frost Talus · Igneo Talus · Stone Talus · Battle Talus · Stone Talus (Luminous) · Ganondorf · Master Kohga · Phantom Ganon
| |||||||||||||||||||||||
Template:FireEnemy