mNo edit summary |
|||
| Line 1: | Line 1: | ||
| + | {{Item |
||
| − | A '''Speed Run''' is a playthrough of a game with the intention of completing it in the shortest amount of time possible. Unlike the [[Three Heart Challenge]], optional upgrades are acceptable but are generally ignored if the amount of time they save is less than the time it takes to obtain them. Most speedrunners attempt to break record times by using a variety of glitches to save time. Additionally, many speed runners prefer to play with the NTSC version of the game over the PAL version as it usually runs faster (60Hz versus 50Hz). Japanese versions are also frequently used for Zelda games due to having less text to wait through. A video of the gameplay is usually required to verify that a record was truly broken. Most record breaking takes place on streaming services in recent years. |
||
| + | |name = Mirror of Twilight |
||
| + | |type = quest |
||
| + | |image = [[File:Mirror of Twilight.gif]] |
||
| + | |caption = The Mirror of Twilight's front and back view |
||
| + | |game = ''[[The Legend of Zelda: Twilight Princess|Twilight Princess]]'' |
||
| + | |other = |
||
| + | |cost = |
||
| + | |uses = Allows access to the [[Twilight Realm]] |
||
| + | |comp = [[Dark Mirror]]<br>[[Magic Mirror]] |
||
| + | }} |
||
| + | The '''Mirror of Twilight''' is one of the two main quest items in ''[[The Legend of Zelda: Twilight Princess|Twilight Princess]]'', along with the [[Fused Shadows]]. It is located in the northern section of the [[Gerudo Desert]] in a place aptly known as the [[Mirror Chamber]], which can only be accessed by passing through the [[Arbiter's Grounds]]. |
||
| − | '''Speed Runs''' prove to be difficult challenges for the players involved with no reward other than the Community-related bragging rights. |
||
| + | ==Background History== |
||
| − | Aside from ''Four Swords Adventures'', all runs listed are single-segment/real-time attack, meaning the run was completed in one take from start to finish. |
||
| + | Prior to the events of ''Twilight Princess'', the [[Golden Goddesses]] banished the [[Twili]] out of [[Hyrule]] and into the [[Twilight Realm]] through the Mirror of Twilight<ref>{{cite book|quote=The gods dispatched four Light Spirits, who sealed the usurpers’ magic into Fused Shadows. They then banished the offenders to the Twilight Realm using the Mirror of Twilight, so that they would never be able to return to the Light World. Those who lived in the Twilight came to be known as the Twili.|book=[[Hyrule Historia]]|publisher=Dark Horse Books|page=113}}</ref> for trying to establish dominion over the [[Sacred Realm]] in an event known as the [[Interloper War]].<ref>{{cite|What do you think happened to the magic wielders who tried to rule the Sacred Realm? They were banished. They were chased across the sacred lands of Hyrule and driven into another realm by the goddesses.|Midna|TP}}</ref> Although the goddesses forbade the Twili to return to Hyrule, the Mirror of Twilight was left as a potential link between Hyrule and the Twilight Realm.<ref name=mirror>{{cite|...But there's another tale told by my people. Though the goddesses forbade us to return to the world of light, they left one link between the light and the darkness. Something called the Mirror of Twilight was passed to the protectors of Hyrule... It's our only path to the Twilight Realm...and we must get there!|Midna|TP}}</ref> The [[Hyrulean]]s in turn used the mirror as a means to punish the worst criminals in the kingdom: since the mirror was kept in a prison in the Gerudo Desert, the criminals who were sentenced to death were sent away to the Twilight Realm using the power of the Mirror of Twilight.<ref name=criminals>{{cite|The Gerudo Desert once held a prison built to hold the worst criminals this land has ever known... The criminals who were sentenced to death were sent directly to the underworld by a cursed mirror that was kept in the prison...|Auru|TP}}</ref><ref>{{cite|A cursed mirror that sends people to another realm... That sounds like the Mirror of Twilight.|Midna|TP}}</ref> This means of punishment was used by the [[Sages]] when the execution of [[Ganon]]dorf went awry.<ref>{{cite|In all of his fury and might, he was blind to any danger, and thus was he exposed, subdued, and brought to justice. Yet... By some divine prank, he, too, had been blessed with the chosen power of the gods.|A Sage|TP}}</ref> After Ganondorf murdered the Sage of Water, one of the Sages activated the Mirror of Twilight and used it to send Ganondorf to the Twilight Realm. At that point the Sages were instructed by the goddesses to protect the Mirror of Twilight.<ref name=sages>{{cite|At the command of the goddesses, we sages have guarded the Mirror of Twilight since ancient times.|Sage|TP}}</ref><ref>{{cite book|quote=The Ancient Sages performed the execution of Ganondorf in the Arbiter’s Grounds. However, Ganondorf, who had been chosen by the Triforce of Power, did not perish, and managed to kill one of the sages. Thrown into a panic, the remainder of the sages used the Mirror of Twilight to banish Ganondorf to the Twilight Realm. They were then instructed by the gods to protect the mirror.|book=[[Hyrule Historia]]|publisher=Dark Horse Books|page=113}}</ref> |
||
| + | ==Quest Purpose== |
||
| − | ==Current RTA/SS Speed Run Records for the Zelda Series== |
||
| + | ===Composition and Functionality=== |
||
| − | {| class="wikitable" |
||
| + | [[File:Mirror.jpg|thumb|right|200px|The Mirror of Twilight activated]] |
||
| − | |- |
||
| + | The Mirror of Twilight was made so that only the [[Midna|true ruler of the Twilight Realm]] would be able to completely shatter it.<ref>{{cite|Only the true ruler of the Twili can destroy the Mirror of Twilight. Zant could only break the Mirror of Twilight into shards... He couldn't utterly shatter it. That's proof of his false kingship.|Midna|TP}}</ref> Should an [[Zant|usurper]] try to destroy the mirror, he would only be able to break it into shards, thus proving the false kingship. |
||
| − | ! Game |
||
| − | ! Time |
||
| − | ! Performer |
||
| − | ! Date |
||
| − | ! Notes |
||
| − | |- |
||
| − | | rowspan="3" | {{LOZ}} |
||
| − | | 31:39 <ref>{{cite web|url=http://www.twitch.tv/darkwing_duck_sda/c/2072748|title=The Legend of Zelda - Any% (Quest 1), no Up+A warps or deaths|site=TwitchTV}}</ref> |
||
| − | | Darkwing Duck |
||
| − | | March 25, 2013 |
||
| − | | Any% (Quest 1) - No Up+A warps or deaths |
||
| − | |- |
||
| − | | 31:37 |
||
| − | | Rodrigo Lopes |
||
| − | | June 12, 2006 |
||
| − | | Any% (Quest 1) - Used Up+A warps |
||
| − | |- |
||
| − | | 37:11 <ref>{{cite web|url=http://speeddemosarchive.com/Zelda1.html3|title=The Legend of Zelda - Any% (Quest 2), no Up+A warps|site=SpeedDemosArchive}}</ref> |
||
| − | | Darkwing Duck |
||
| − | | July 23, 2012 |
||
| − | | Any% (Quest 2) - No Up+A warps |
||
| − | |- |
||
| − | | rowspan="3" | {{AOL}} |
||
| − | | 1:01:54 <ref>{{cite web|url=http://nintendo-records.com/home/nes/Zelda2.html|title=Zelda II: The Adventure of Link|site=Nintendo-records}}</ref> |
||
| − | | John "Pro_JN" Nurminen |
||
| − | | March 27, 2013 |
||
| − | | Any% - No Up+A warps or deaths |
||
| − | |- |
||
| − | | 57:43 <ref>{{cite web|url=http://speeddemosarchive.com/Zelda2.html|title=Zelda II: The Adventure of Link|site=SpeedDemosArchive}}</ref> |
||
| − | | Kristian 'Arctic_Eagle' Emanuelsen |
||
| − | | January 11, 2011 |
||
| − | | Any% - Used Up+A warps and deaths |
||
| − | |- |
||
| − | | 1:10:46 <ref>{{cite web|url=http://nintendo-records.com/home/nes/Zelda2.html|title=Zelda II: The Adventure of Link|site=Nintendo-records}}</ref> |
||
| − | | John "Pro_JN" Nurminen |
||
| − | | March 23, 2013 |
||
| − | | 100% - No Up+A warps or deaths |
||
| − | |- |
||
| − | | rowspan="2" | {{ALTTP}} |
||
| − | | 1:26:33 <ref>{{cite web|url=http://zeldaspeedruns.com/leaderboards/alttp/any-no-sq|title=The Legend of Zelda: A Link to the Past - Any%, No savewarps, deaths, or out of bounds|site=ZeldaSpeedRuns}}</ref> |
||
| − | | Kryssstal |
||
| − | | October 8, 2011 |
||
| − | | Any% - No savewarps, deaths, or out of bounds |
||
| − | |- |
||
| − | | 1:45:40 <ref>{{cite web|url=http://zeldaspeedruns.com/leaderboards/alttp/100|title=The Legend of Zelda: A Link to the Past - 100%, No savewarps, deaths, or out of bounds|site=ZeldaSpeedRuns}}</ref> |
||
| − | | Kryssstal |
||
| − | | August 9, 2012 |
||
| − | | 100% - No savewarps, deaths, or out of bounds |
||
| − | |- |
||
| − | | {{LA}} |
||
| − | | 1:15:00 <ref>{{cite web|url=http://zeldaspeedruns.com/leaderboards/la/any|title=The Legend of Zelda: Link's Awakening - Any%, Used savewarps|site=ZeldaSpeedRuns}}</ref> |
||
| − | | ExoSDA |
||
| − | | February 23, 2012 |
||
| − | | Any% - Used savewarps |
||
| − | |- |
||
| − | | rowspan="4" | {{OOT}} |
||
| − | | 21:18 <ref>{{cite web|url=http://www.twitch.tv/pydoyks/c/17602444|title=The Legend of Zelda: Ocarina of Time - any%|site=TwitchTV}}</ref> |
||
| − | | Pydoyks |
||
| − | | December 5, 2012 |
||
| − | | Any%, used a glitch to skip to Ganon's Tower |
||
| − | |- |
||
| − | | 2:11:05 <ref>{{cite web|url=http://www.twitch.tv/pydoyks/c/1740807|title=The Legend of Zelda: Ocarina of Time - MST|site=TwitchTV}}</ref> |
||
| − | | Pydoyks |
||
| − | | November 20, 2012 |
||
| − | | Medallions/Stones/Trials |
||
| − | |- |
||
| − | | 4:46:00 <ref>{{cite web|url=http://archive.org/details/ZeldaOoT_eu_SS_446|title=The Legend of Zelda: Ocarina of Time - minor glitches exploited|site=Internet Archive}}</ref> |
||
| − | | Mauri Mustonen |
||
| − | | November 15, 2006 |
||
| − | | Minor glitches exploited |
||
| − | |- |
||
| − | | 4:57:36 <ref>{{cite web|url=http://zeldaspeedruns.com/leaderboards/oot/100|title=The Legend of Zelda: Ocarina of Time - 100%|site=ZeldaSpeedRuns}}</ref> |
||
| − | | Sva |
||
| − | | March 14, 2013 |
||
| − | | 100% |
||
| − | |- |
||
| − | | rowspan="3" | {{MM}} |
||
| − | | 1:40:01 <ref>{{cite web|url=http://zeldaspeedruns.com/leaderboards/mm/any|title=The Legend of Zelda: Majora's Mask - Any%|site=ZeldaSpeedRuns}}</ref> |
||
| − | | EnNopp112 |
||
| − | | February 11, 2013 |
||
| − | | Any% |
||
| − | |- |
||
| − | | 2:35:43 <ref>{{cite web|url=http://zeldaspeedruns.com/leaderboards/mm/allmasks|title=The Legend of Zelda: Majora's Mask - All masks|site=ZeldaSpeedRuns}}</ref> |
||
| − | | GoronGuy |
||
| − | | April 11, 2013 |
||
| − | | All masks |
||
| − | |- |
||
| − | | 5:27:21 <ref>{{cite web|url=http://zeldaspeedruns.com/leaderboards/mm/100|title=The Legend of Zelda: Majora's Mask - 100%|site=ZeldaSpeedRuns}}</ref> |
||
| − | | EnNopp112 |
||
| − | | April 10, 2013 |
||
| − | | 100% |
||
| − | |- |
||
| − | | {{OOA}} |
||
| − | | 2:43:59 <ref>{{cite web|url=http://zeldaspeedruns.com/leaderboards/ooa/any|title=The Legend of Zelda: Oracle of Ages - Any%|site=ZeldaSpeedRuns}}</ref> |
||
| − | | rainbowism |
||
| − | | October 25, 2012 |
||
| − | | Any% |
||
| − | |- |
||
| − | | {{OOS}} |
||
| − | | 1:52:49 <ref>{{cite web|url=http://zeldaspeedruns.com/leaderboards/oos/any|title=The Legend of Zelda: Oracle of Seasons - Any%|site=ZeldaSpeedRuns}}</ref> |
||
| − | | Paladrima |
||
| − | | July 26, 2012 |
||
| − | | Any% |
||
| − | |- |
||
| − | | rowspan="2" | {{TWW}} |
||
| − | | 4:36:55 <ref>{{cite web|url=http://zeldaspeedruns.com/leaderboards/tww/jp_tuner|title=The Legend of Zelda: The Wind Waker - Any% Japanese, With Tingle Tuner|site=ZeldaSpeedRuns}}</ref> |
||
| − | | Cosmo |
||
| − | | April 4, 2013 |
||
| − | | Any% Japanese - With Tingle Tuner |
||
| − | |- |
||
| − | | 8:15:21 <ref>{{cite web|url=http://zeldaspeedruns.com/leaderboards/tww/100|title=The Legend of Zelda: The Wind Waker - 100%|site=ZeldaSpeedRuns}}</ref> |
||
| − | | Demon9 |
||
| − | | April 6, 2013 |
||
| − | | 100% |
||
| − | |- |
||
| − | | {{FSA}} |
||
| − | | 2:31:20 <ref>{{cite web|url=http://speeddemosarchive.com/ZeldaFourSwordsAdventures.html|title=The Legend of Zelda: Four Sword Adventures|site=SpeedDemosArchive}}</ref><br>(Total) |
||
| − | | colspan="3" | Each level was done separately by different people. The fastest times of each can be seen [http://speeddemosarchive.com/ZeldaFourSwordsAdventures.html here] |
||
| − | |- |
||
| − | | {{TMC}} |
||
| − | | 2:08:15 <ref>{{cite web|url=http://zeldaspeedruns.com/leaderboards/tmc/any|title=The Legend of Zelda: The Minish Cap - Any%, Used deaths and Ocarina glitch|site=ZeldaSpeedRuns}}</ref> |
||
| − | | Mbrules |
||
| − | | December 29, 2012 |
||
| − | | Any% - Used deaths and Ocarina glitch |
||
| − | |- |
||
| − | | rowspan="2" | {{TP}} |
||
| − | | 3:22:57 <ref>{{cite web|url=http://zeldaspeedruns.com/leaderboards/tp/any|title=The Legend of Zelda: Twilight Princess - Any%, Used savewarps|site=ZeldaSpeedRuns}}</ref> |
||
| − | | Pheenoh |
||
| − | | November 20, 2012 |
||
| − | | Any% - Used savewarps |
||
| − | |- |
||
| − | | 8:02:40 <ref>{{cite web|url=http://www.twitch.tv/pheenoh/b/308954343|title=The Legend of Zelda: Twilight Princess - 100%, Used savewarps|site=TwitchTV}}</ref> |
||
| − | | Pheenoh |
||
| − | | July 4, 2012 |
||
| − | | 100% - Used savewarps |
||
| − | |- |
||
| − | | {{PH}} |
||
| − | | 3:30:04 <ref>{{cite web|url=http://www.twitch.tv/greenalinksda/b/391651180|title=The Legend of Zelda: Phantom Hourglass - Any%|site=TwitchTV}}</ref> |
||
| − | | Greenalink |
||
| − | | April 16, 2013 |
||
| − | | Any% |
||
| − | |- |
||
| − | | {{SS}} |
||
| − | | 5:34:08 <ref>{{cite web|url=http://zeldaspeedruns.com/leaderboards/ss/any|title=The Legend of Zelda: Skyward Sword - Any%|site=ZeldaSpeedRuns}}</ref> |
||
| − | | Tlozsr |
||
| − | | February 3, 2013 |
||
| − | | Any% |
||
| − | |- |
||
| − | |} |
||
| + | The mirror functions along with a black stone otherwise known as the [[Portal Stone]]. The mirror itself acts as a kind of projector that emits light into the Portal Stone, which activates the portal to the Twilight Realm.<ref>{{cite|The mirror connecting light and shadow. The light emerging from it opens the way to the Twilight Realm.|Item description|TP}}</ref> When a person steps on the [[:File:MirrorFloorPlate.png|plate]] in front of the Mirror of Twilight, it will create a set of stairways that will allow said person to walk up to the circular platform that will [[warp]] them to the Twilight Realm with the help of the light transmitted by the mirror. |
||
| − | == See Also == |
||
| − | *[[100% Completion]] |
||
| − | *[[Three Heart Challenge]] |
||
| − | *[[Challenges]] |
||
| + | ===Quest for the Mirror Chamber=== |
||
| − | {{Refbar}} |
||
| + | The Mirror of Twilight is first mentioned in the game when Link as a [[Wolf Link|wolf]] takes the gravely injured [[Midna]] to [[Princess Zelda]] at [[Hyrule Castle]]. Thinking that she is about to pass away, Midna asks that Princess Zelda tell Link where to find the Mirror of Twilight.<ref>{{cite|Princess... I have one last request... Can you tell him...where to find the Mirror of Twilight?|Midna|TP}}</ref> Midna, after having been saved by Zelda's powers, asks Link to help her find the Mirror of Twilight upon reaching the Gerudo Desert. She explains that the mirror is their last link to enter the Twilight Realm and defeat [[Zant]]. However, once they reach the Mirror Chamber after having defeated [[Stallord]] in the [[Arbiter's Grounds]], they find that the Mirror of Twilight and the Portal Stone are nowhere to be found. After riding atop the statue and using the [[Spinner]] at the apex of the large structure, the statue itself dips into the sand, raising not only the black stone, but the Mirror of Twilight itself. Midna, however, realizes that only one fourth of the Mirror is intact, and it is at this point that the Sages make their appearance and explain that Zant has fragmented the mirror with the help of Ganondorf's "mighty magic", not having been able to completely shatter it due to him being the false king of the Twilight Realm.<ref>{{cite|You seek it...but the Mirror of Twilight has been fragmented by mighty magic. That magic is a dark power that only he possesses... His name is... Ganondorf.|A Sage|TP}}</ref> |
||
| + | ===Quest for the Mirror Shards=== |
||
| + | Learning that the mirror has been broken in pieces, the pair is unable to enter the Twilight Realm, but the Sages inform them of the location of the remaining three mirror shards: [[Snowpeak]], [[Sacred Grove]], and the [[City in the Sky]].<ref>{{cite|Only the true leader of the Twili can utterly destroy the Mirror of Twilight...so Zant could merely break it into pieces. Once broken by magic, the Mirror of Twilight became fragments, which even now lie hidden across the land of Hyrule. One is in the snowy mountain heights... One is in an ancient grove... And one is in the heavens...|A Sage|TP}}</ref> |
||
| + | [[File:The_Mirror_destroyed.jpg|The Mirror of Twilight is destroyed.|thumb|right]] |
||
| − | {{Real World}} |
||
| + | Once Link and Midna succeed in finding the three missing Mirror Shards, they place them in the Mirror of Twilight and transport themselves to the Twilight Realm, where they ultimately defeat Zant, the Usurper King. After defeating Ganondorf, Link, Midna and Princess Zelda gather around the Mirror Chamber to bid farewell to the Twilight Princess as she returns to her realm. Midna mentions that as long as the mirror is around, they could always meet again, saying that it was the goddess's "design" that they should meet.<ref>{{cite|I know now the reason the goddesses left the Mirror of Twilight in this world... They left it because it was their design that we should meet.|Midna|TP}}</ref> However, just as she is about to depart, she sheds a tear and uses it to completely shatter the Mirror of Twilight, thus destroying the only known connection between Hyrule and the Twilight Realm.<ref>{{cite|Well, the princess spoke truly: as long as that mirror's around, we could meet again...|Midna|TP}}</ref> |
||
| + | {{theory}} |
||
| − | [[Category:Community]] |
||
| + | Despite the fact that the mirror is utterly destroyed by Midna, there may be other ways of traveling between the two worlds. Evidence supporting the idea of other methods of travel between worlds is plentiful, the most obvious piece being that Zant is able to travel between worlds without the benefit of the Mirror. There is fan speculation that the [[Triforce]] is somehow related to travel between the worlds, as Zant's power was borrowed from the Triforce of Power. Also, only those characters bearing one of the Triforce could reside in the Twilight Realm without becoming a spirit. |
||
| + | |||
| + | ==Mirror Shard== |
||
| + | [[File:Mirrorshards.png|right]] |
||
| + | A '''Mirror Shard''' is a piece of the Mirror of Twilight, which Zant broke so that Link and Midna could not reach the Twilight Realm. Only one Mirror Shard is intact in the Mirror of Twilight when Link first visits the Mirror Chamber. The Sages reveal to the young heroes the locations of the remaining shards: one is "in the mountains", which is where the [[Snowpeak Ruins]] are; another is in a "ancient grove" which is actually the [[Temple of Time]] in the [[Sacred Grove]]. The last shard is "in the heavens", meaning the [[City in the Sky]].<ref>{{cite|The mirror shards lie in deep mountain snows, within an ancient wood, and somewhere in the sky...|Midna|TP}}</ref> Link must retrieve all three missing shards and head back to the Mirror Chamber to reassemble it. When the Mirror is repaired, Link is able to enter the Twilight Realm and confront Zant. |
||
| + | |||
| + | The Mirror Shards can cause misfortune to those who happen upon them. [[Yeta]] of [[Snowpeak]] mentions that ever since [[Yeto]] found a Mirror Shard, monsters have started to appear around the mansion and she has fallen sick.<ref>{{cite|But...since I get mirror, I get sick, and then bad monsters appear... So many bad things happen since mirror...|Yeta|TP}}</ref> The power of the Mirror Shards is enough to completely transform the others around them, much like how the [[Fused Shadow]]s drastically changed [[Darbus]] into [[Fyrus]]. This is shown when Yeta shows Link the Mirror Shard that Yeto found: when she looks at the Mirror, she mentions how beautiful it is, but shortly after its powers cause for Yeta to transform into a monster known as [[Blizzeta]].<ref>{{cite|Still... I feel bad about the way we treated that girl. To think the Mirror of Twilight has the power to change people like that...|Midna|TP}}</ref> |
||
| + | |||
| + | == Trivia == |
||
| + | *According to the [http://forums.legendsalliance.com/topic/14202-translation-of-japanese-game-texts/page__st__180#entry383194 original Japanese text], Ganondorf's banishment in the Twilight Realm seems to have been a special case, since there is no mention of the mirror being used in each execution. |
||
| + | *When the Mirror is first activated, it broadcasts strange shapes and the symbol of the [[Triforce]]. At the opening of ''[[Link's Crossbow Training]]'', similar shapes appear and twirl around. |
||
| + | *In ''[[wk:Kirby & the Amazing Mirror|Kirby & the Amazing Mirror]]'', [[wk:Kirby|Kirby]] had to assemble a mirror to defeat [[wk:Dark Mind|Dark Mind]], much like how Link had to assemble the Mirror of Twilight to defeat Zant. |
||
| + | |||
| + | ==See Also== |
||
| + | *[[Dark Mirror]] |
||
| + | *[[Magic Mirror]] |
||
| + | |||
| + | ==Gallery== |
||
| + | <gallery> |
||
| + | File:Twilight Mirror.png|The Mirror of Twilight, as seen in-game |
||
| + | File:MirrorFloorPlate.png|The floor plate Link must step on before the Mirror transfers him to the Twilight Realm |
||
| + | File:Mirror of Twilight.jpg|The Mirror of Twilight |
||
| + | File:Portal_Stone.jpg|The portal to the [[Palace of Twilight]] |
||
| + | File:Mirror of Twilight (Front).png|The front of the Mirror of Twilight. |
||
| + | File:Mirror of Twilight (Back).png|The backside of the Mirror of Twlight. |
||
| + | File:HW Midna Twili Mirror.png|[[Midna|Twili Midna]] wielding the Mirror of Twilight as a weapon in {{HW}}. |
||
| + | </gallery> |
||
| + | |||
| + | {{Ref}} |
||
| + | <br> |
||
| + | {{Names Table |
||
| + | |name1= Mirror of Twilight |
||
| + | |name2= Mirror Shard |
||
| + | |||
| + | |en1= |
||
| + | |en2= |
||
| + | |||
| + | |ja1= {{Japanese|陰りの鏡|???|Shade Mirror}} |
||
| + | |ja2= |
||
| + | |||
| + | |es1= |
||
| + | |es2= |
||
| + | |||
| + | |esS1= {{exp|Mirror of Twilight|Espejo del Crepúsculo}} |
||
| + | |esS2= {{exp|Mirror Shards|Fragmentos del Espejo}} |
||
| + | |||
| + | |esL1= |
||
| + | |esL2= |
||
| + | |||
| + | |fr1= |
||
| + | |fr2= |
||
| + | |||
| + | |frF1= {{exp|Mirror of Shadows|Miroir des Ombres}} |
||
| + | |frF2= |
||
| + | |||
| + | |frC1= |
||
| + | |frC2= |
||
| + | |||
| + | |de1= {{de|Schattenspiegel}} |
||
| + | |de2= |
||
| + | |||
| + | |it1= Specchio oscuro |
||
| + | |it2= |
||
| + | |||
| + | |pt1= |
||
| + | |pt2= |
||
| + | |||
| + | |ptP1= |
||
| + | |ptP2= |
||
| + | |||
| + | |ptB1= |
||
| + | |ptB2= |
||
| + | |||
| + | |nl1= |
||
| + | |nl2= |
||
| + | |||
| + | |ru1= |
||
| + | |ru2= |
||
| + | |||
| + | |ko1= |
||
| + | |ko2= |
||
| + | |||
| + | |ch1= |
||
| + | |ch2= |
||
| + | |||
| + | |chT1= |
||
| + | |chT2= |
||
| + | |||
| + | |chS1= |
||
| + | |chS2= |
||
| + | }} |
||
Revision as of 00:22, 22 November 2014
[[File: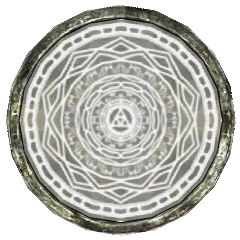 .png|20x20px]] [[|]]
The Mirror of Twilight is one of the two main quest items in Twilight Princess, along with the Fused Shadows. It is located in the northern section of the Gerudo Desert in a place aptly known as the Mirror Chamber, which can only be accessed by passing through the Arbiter's Grounds.
Background History
Prior to the events of Twilight Princess, the Golden Goddesses banished the Twili out of Hyrule and into the Twilight Realm through the Mirror of Twilight[1] for trying to establish dominion over the Sacred Realm in an event known as the Interloper War.[2] Although the goddesses forbade the Twili to return to Hyrule, the Mirror of Twilight was left as a potential link between Hyrule and the Twilight Realm.[3] The Hyruleans in turn used the mirror as a means to punish the worst criminals in the kingdom: since the mirror was kept in a prison in the Gerudo Desert, the criminals who were sentenced to death were sent away to the Twilight Realm using the power of the Mirror of Twilight.[4][5] This means of punishment was used by the Sages when the execution of Ganondorf went awry.[6] After Ganondorf murdered the Sage of Water, one of the Sages activated the Mirror of Twilight and used it to send Ganondorf to the Twilight Realm. At that point the Sages were instructed by the goddesses to protect the Mirror of Twilight.[7][8]
Quest Purpose
Composition and Functionality
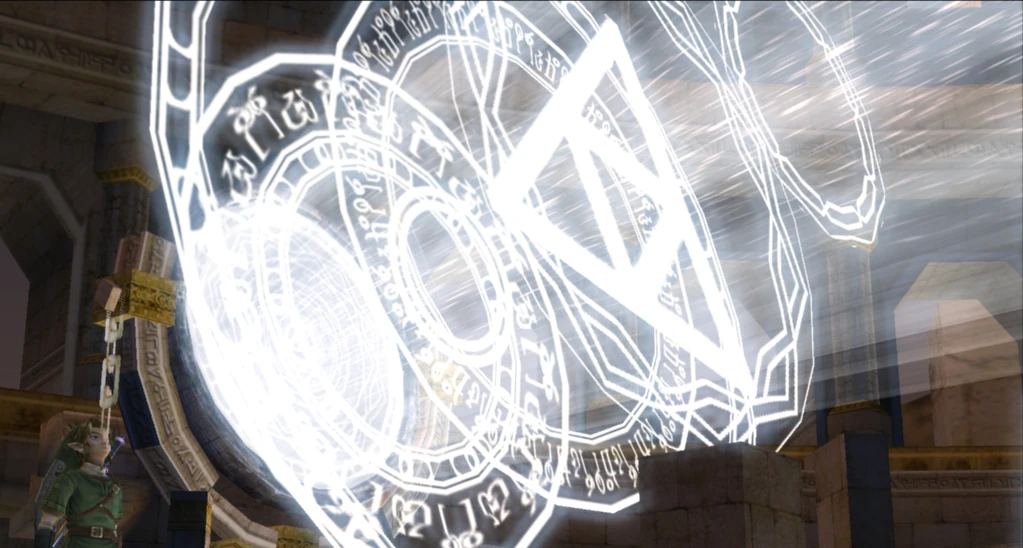
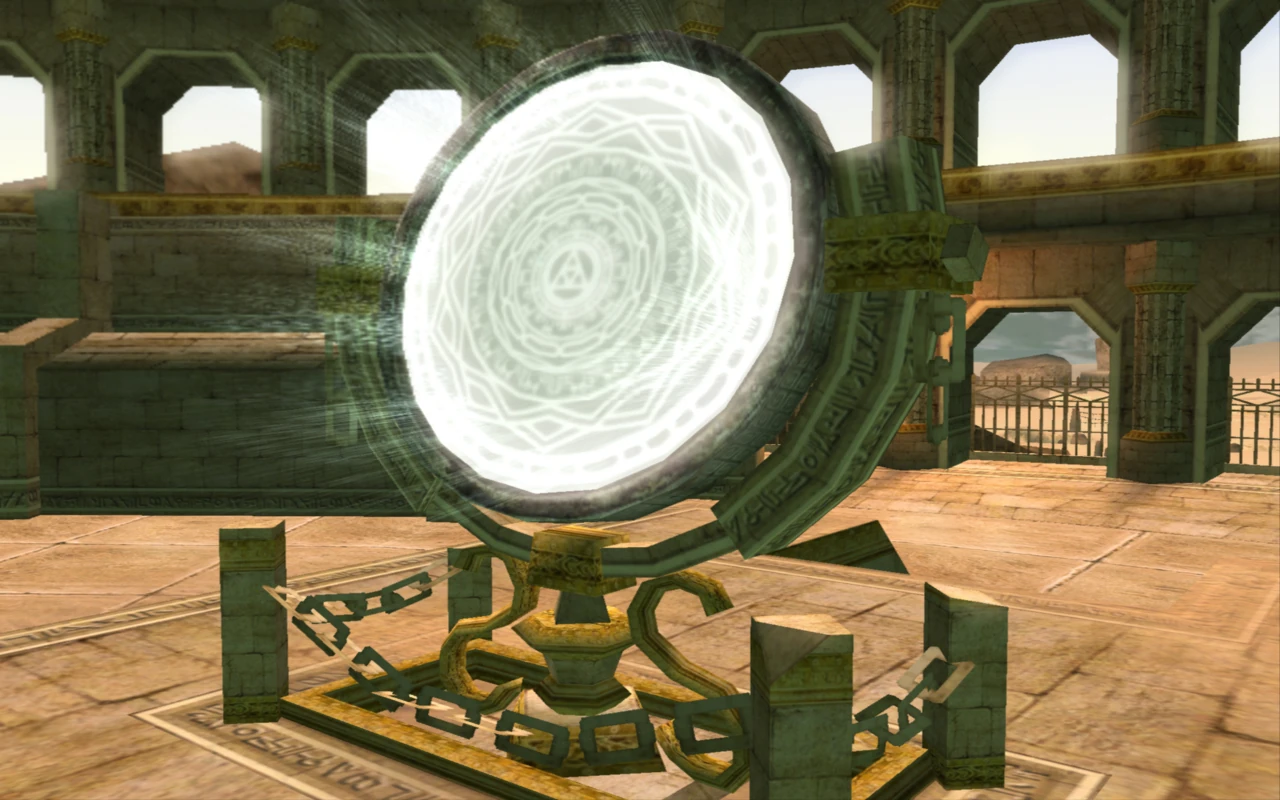
The Mirror of Twilight activated
The Mirror of Twilight was made so that only the true ruler of the Twilight Realm would be able to completely shatter it.[9] Should an usurper try to destroy the mirror, he would only be able to break it into shards, thus proving the false kingship.
The mirror functions along with a black stone otherwise known as the Portal Stone. The mirror itself acts as a kind of projector that emits light into the Portal Stone, which activates the portal to the Twilight Realm.[10] When a person steps on the plate in front of the Mirror of Twilight, it will create a set of stairways that will allow said person to walk up to the circular platform that will warp them to the Twilight Realm with the help of the light transmitted by the mirror.
Quest for the Mirror Chamber
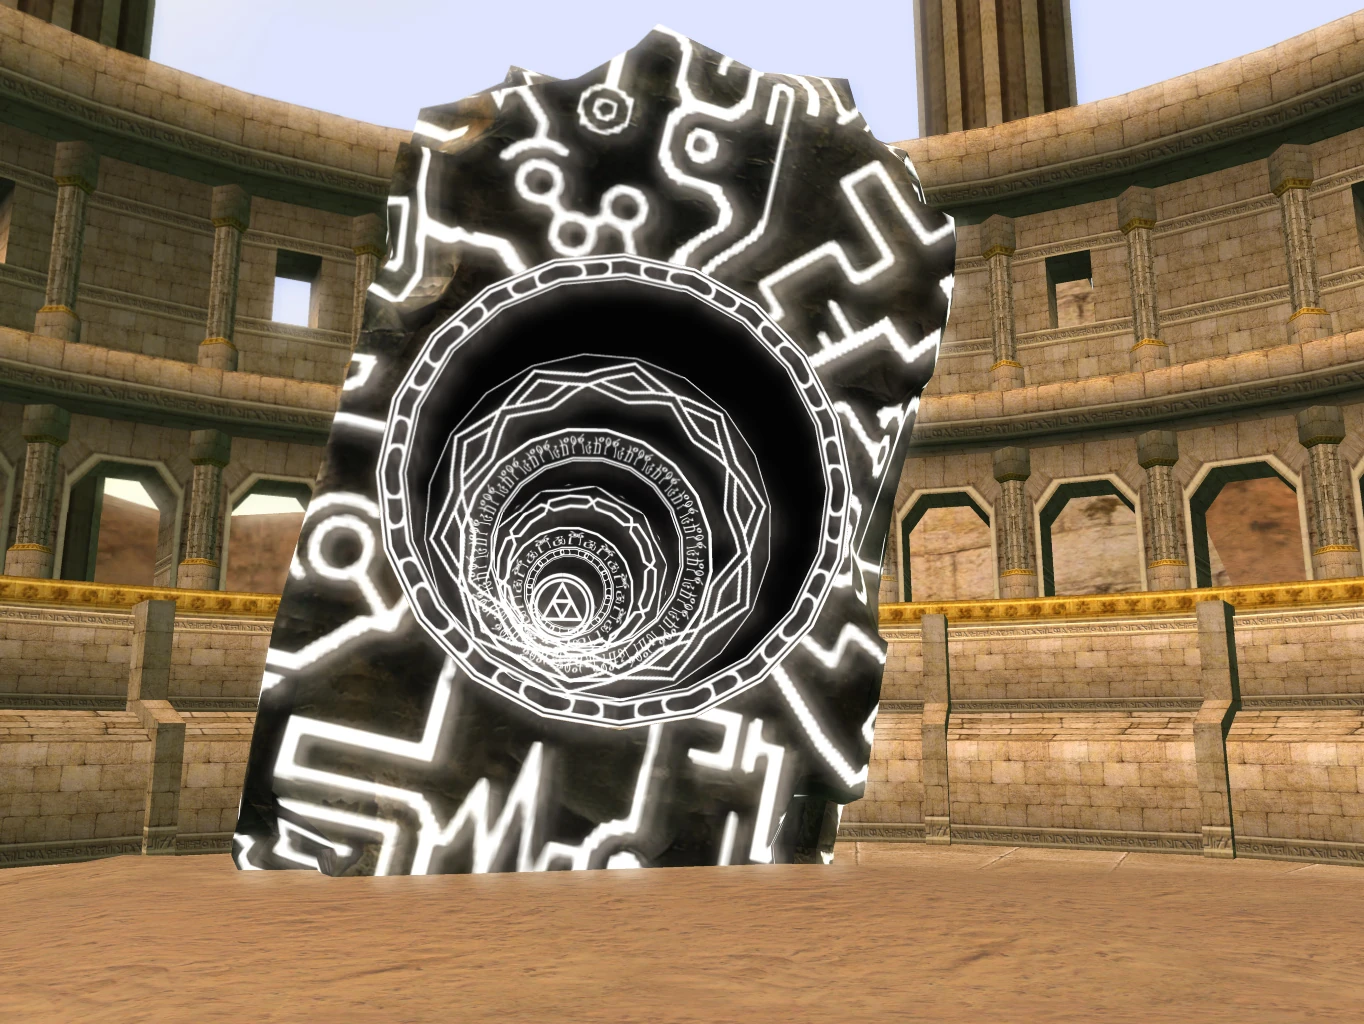
The Mirror of Twilight is first mentioned in the game when Link as a wolf takes the gravely injured Midna to Princess Zelda at Hyrule Castle. Thinking that she is about to pass away, Midna asks that Princess Zelda tell Link where to find the Mirror of Twilight.[11] Midna, after having been saved by Zelda's powers, asks Link to help her find the Mirror of Twilight upon reaching the Gerudo Desert. She explains that the mirror is their last link to enter the Twilight Realm and defeat Zant. However, once they reach the Mirror Chamber after having defeated Stallord in the Arbiter's Grounds, they find that the Mirror of Twilight and the Portal Stone are nowhere to be found. After riding atop the statue and using the Spinner at the apex of the large structure, the statue itself dips into the sand, raising not only the black stone, but the Mirror of Twilight itself. Midna, however, realizes that only one fourth of the Mirror is intact, and it is at this point that the Sages make their appearance and explain that Zant has fragmented the mirror with the help of Ganondorf's "mighty magic", not having been able to completely shatter it due to him being the false king of the Twilight Realm.[12]
Quest for the Mirror Shards
Learning that the mirror has been broken in pieces, the pair is unable to enter the Twilight Realm, but the Sages inform them of the location of the remaining three mirror shards: Snowpeak, Sacred Grove, and the City in the Sky.[13]
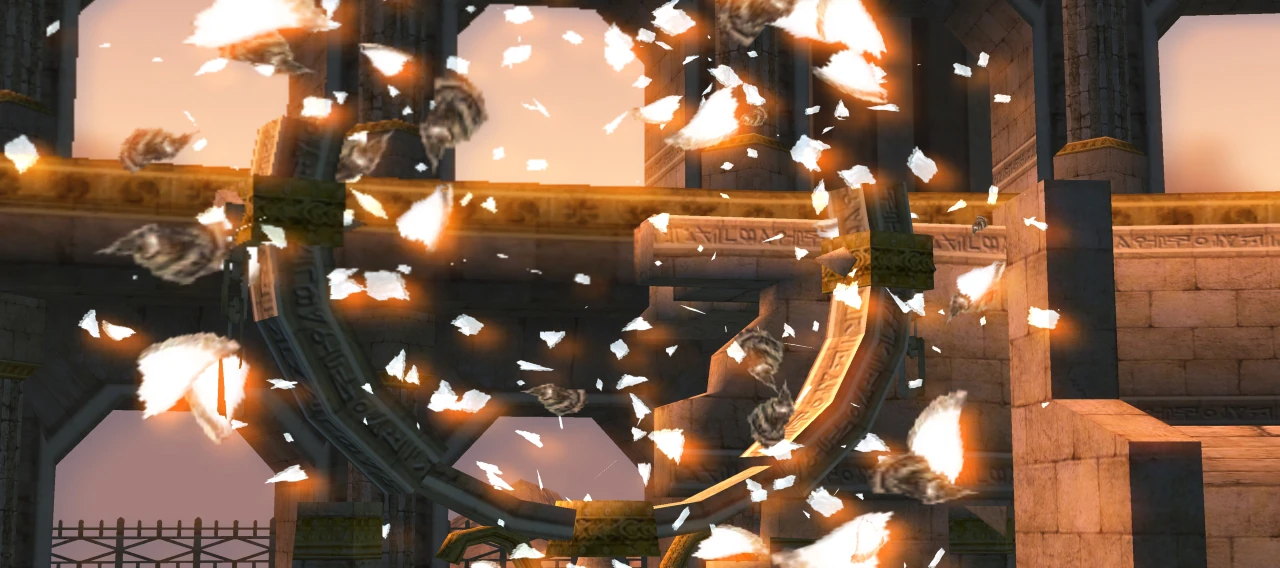

The Mirror of Twilight is destroyed.
Once Link and Midna succeed in finding the three missing Mirror Shards, they place them in the Mirror of Twilight and transport themselves to the Twilight Realm, where they ultimately defeat Zant, the Usurper King. After defeating Ganondorf, Link, Midna and Princess Zelda gather around the Mirror Chamber to bid farewell to the Twilight Princess as she returns to her realm. Midna mentions that as long as the mirror is around, they could always meet again, saying that it was the goddess's "design" that they should meet.[14] However, just as she is about to depart, she sheds a tear and uses it to completely shatter the Mirror of Twilight, thus destroying the only known connection between Hyrule and the Twilight Realm.[15]
Despite the fact that the mirror is utterly destroyed by Midna, there may be other ways of traveling between the two worlds. Evidence supporting the idea of other methods of travel between worlds is plentiful, the most obvious piece being that Zant is able to travel between worlds without the benefit of the Mirror. There is fan speculation that the Triforce is somehow related to travel between the worlds, as Zant's power was borrowed from the Triforce of Power. Also, only those characters bearing one of the Triforce could reside in the Twilight Realm without becoming a spirit.
Mirror Shard
A Mirror Shard is a piece of the Mirror of Twilight, which Zant broke so that Link and Midna could not reach the Twilight Realm. Only one Mirror Shard is intact in the Mirror of Twilight when Link first visits the Mirror Chamber. The Sages reveal to the young heroes the locations of the remaining shards: one is "in the mountains", which is where the Snowpeak Ruins are; another is in a "ancient grove" which is actually the Temple of Time in the Sacred Grove. The last shard is "in the heavens", meaning the City in the Sky.[16] Link must retrieve all three missing shards and head back to the Mirror Chamber to reassemble it. When the Mirror is repaired, Link is able to enter the Twilight Realm and confront Zant.
The Mirror Shards can cause misfortune to those who happen upon them. Yeta of Snowpeak mentions that ever since Yeto found a Mirror Shard, monsters have started to appear around the mansion and she has fallen sick.[17] The power of the Mirror Shards is enough to completely transform the others around them, much like how the Fused Shadows drastically changed Darbus into Fyrus. This is shown when Yeta shows Link the Mirror Shard that Yeto found: when she looks at the Mirror, she mentions how beautiful it is, but shortly after its powers cause for Yeta to transform into a monster known as Blizzeta.[18]
Trivia
- According to the original Japanese text, Ganondorf's banishment in the Twilight Realm seems to have been a special case, since there is no mention of the mirror being used in each execution.
- When the Mirror is first activated, it broadcasts strange shapes and the symbol of the Triforce. At the opening of Link's Crossbow Training, similar shapes appear and twirl around.
- In Kirby & the Amazing Mirror, Kirby had to assemble a mirror to defeat Dark Mind, much like how Link had to assemble the Mirror of Twilight to defeat Zant.
See Also
Gallery

The Mirror of Twilight, as seen in-game

The floor plate Link must step on before the Mirror transfers him to the Twilight Realm

The Mirror of Twilight

The portal to the Palace of Twilight
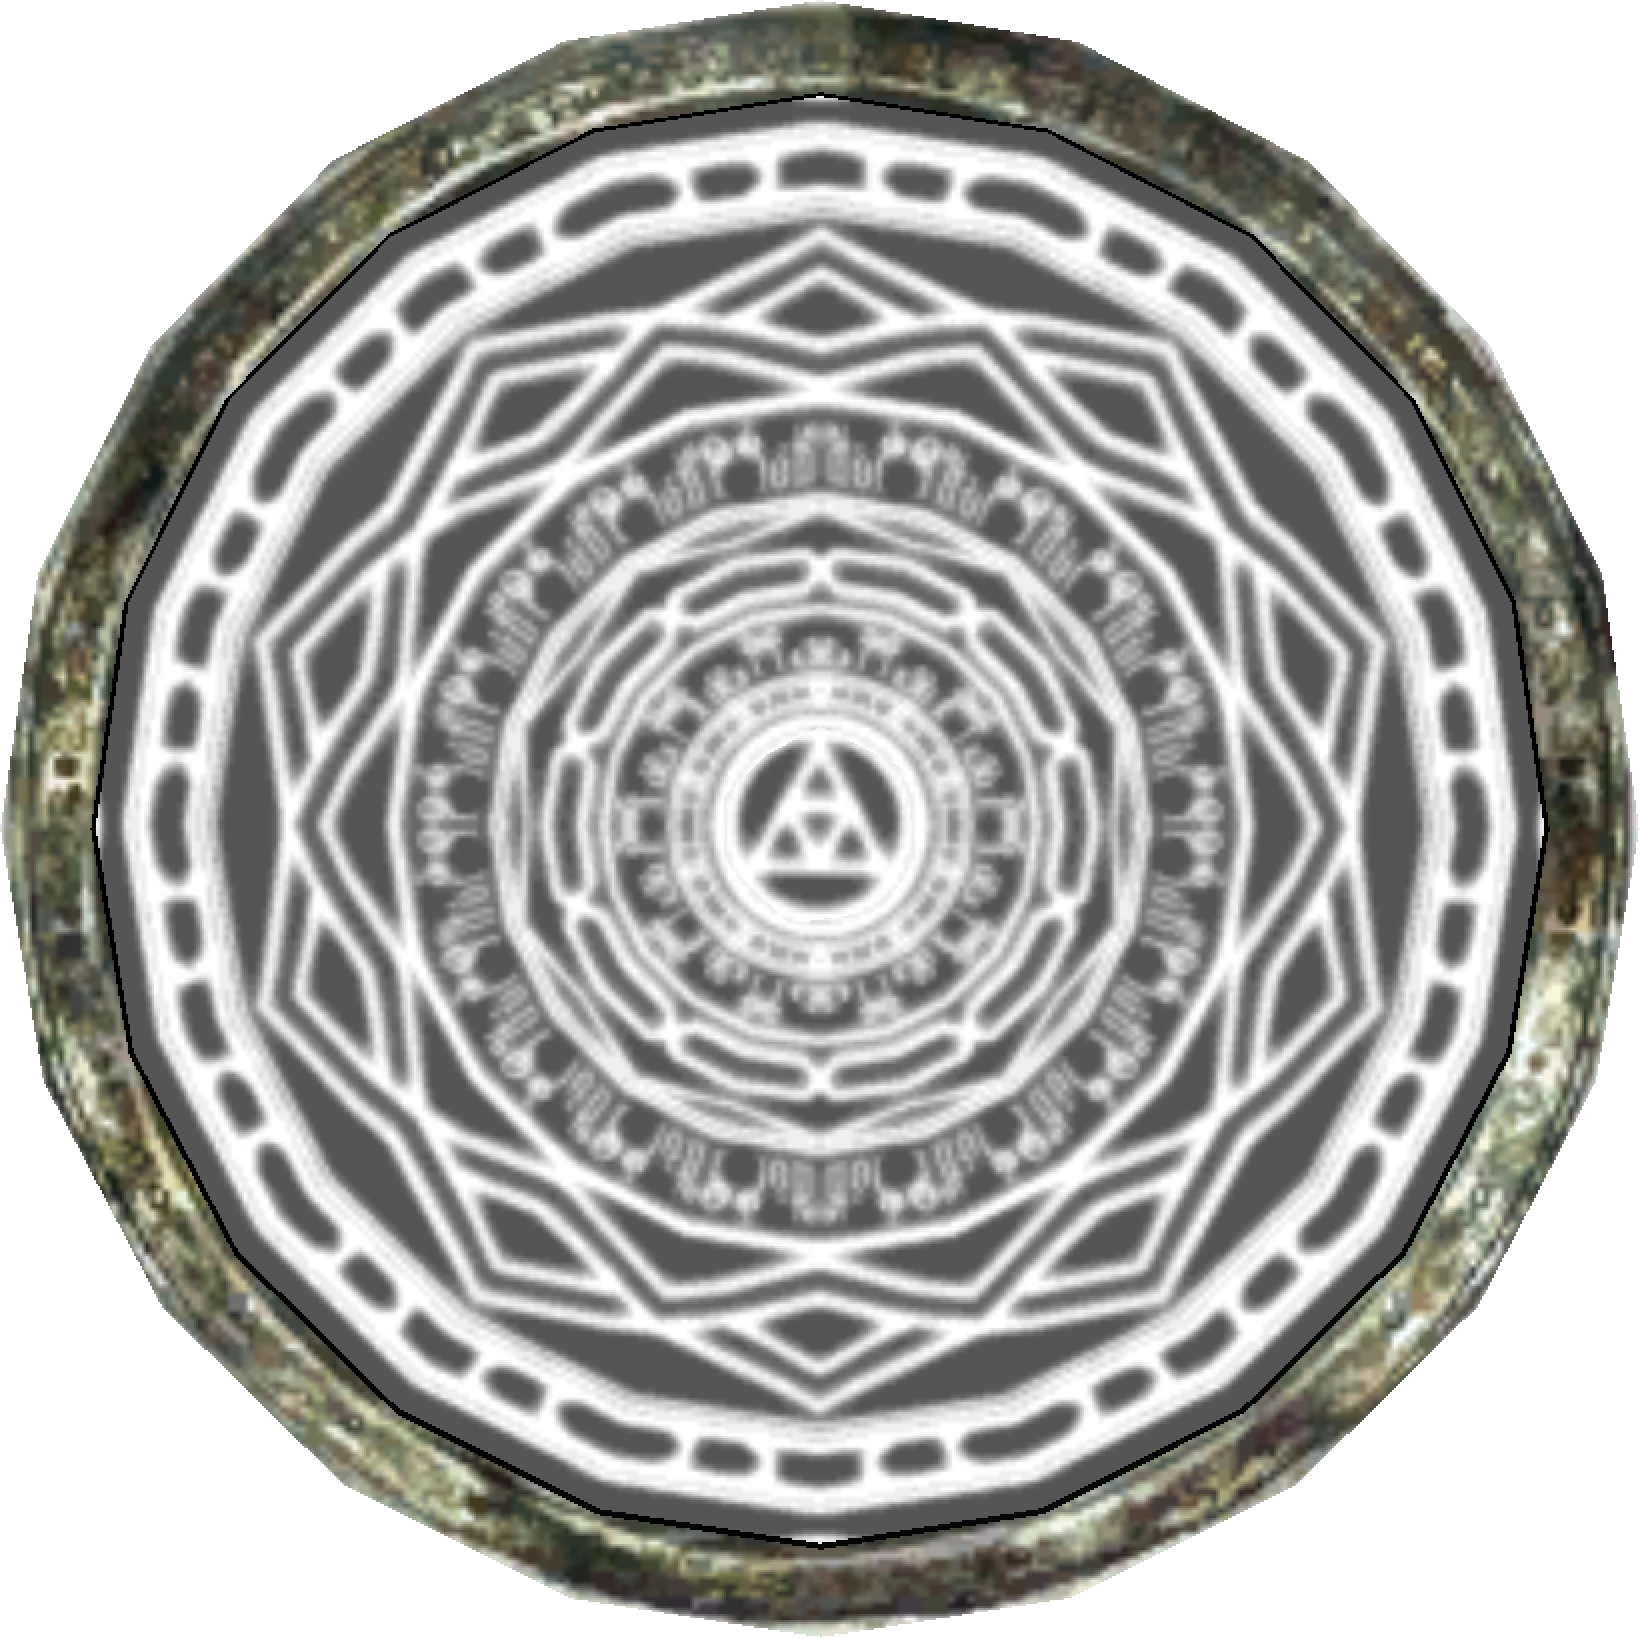
The front of the Mirror of Twilight.
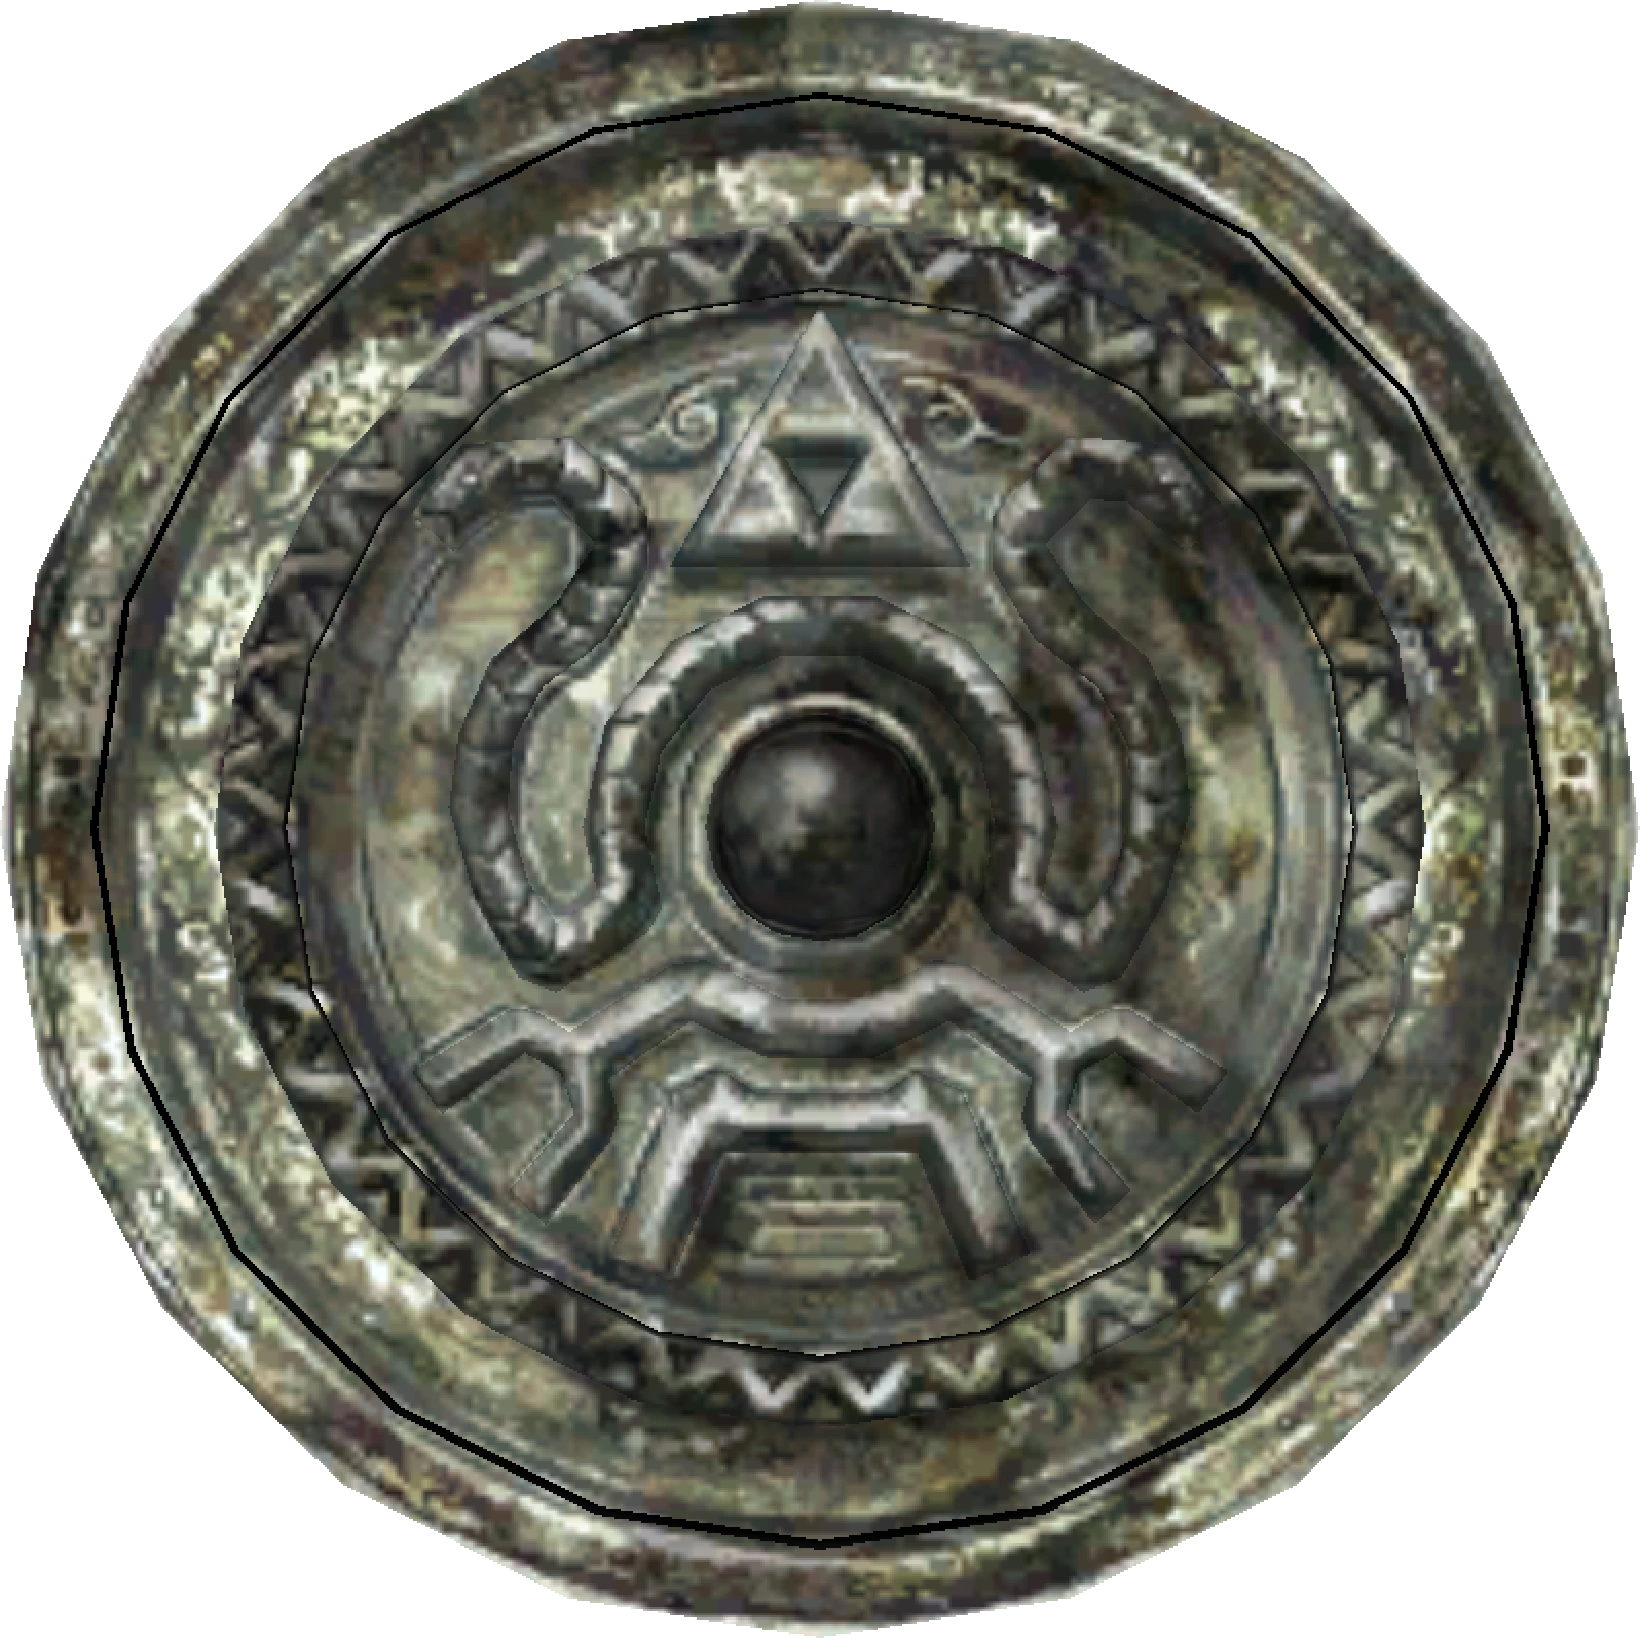
The backside of the Mirror of Twlight.
Twili Midna wielding the Mirror of Twilight as a weapon in Hyrule Warriors.

References
- ↑ Template:Cite book
- ↑ "What do you think happened to the magic wielders who tried to rule the Sacred Realm? They were banished. They were chased across the sacred lands of Hyrule and driven into another realm by the goddesses." — Princess Midna (Twilight Princess)
- ↑ "...But there's another tale told by my people. Though the goddesses forbade us to return to the world of light, they left one link between the light and the darkness. Something called the Mirror of Twilight was passed to the protectors of Hyrule... It's our only path to the Twilight Realm...and we must get there!" — Princess Midna (Twilight Princess)
- ↑ "The Gerudo Desert once held a prison built to hold the worst criminals this land has ever known... The criminals who were sentenced to death were sent directly to the underworld by a cursed mirror that was kept in the prison..." — Auru (Twilight Princess)
- ↑ "A cursed mirror that sends people to another realm... That sounds like the Mirror of Twilight." — Princess Midna (Twilight Princess)
- ↑ "In all of his fury and might, he was blind to any danger, and thus was he exposed, subdued, and brought to justice. Yet... By some divine prank, he, too, had been blessed with the chosen power of the gods." — A Sage (Twilight Princess)
- ↑ "At the command of the goddesses, we sages have guarded the Mirror of Twilight since ancient times." — Sage (Twilight Princess)
- ↑ Template:Cite book
- ↑ "Only the true ruler of the Twili can destroy the Mirror of Twilight. Zant could only break the Mirror of Twilight into shards... He couldn't utterly shatter it. That's proof of his false kingship." — Princess Midna (Twilight Princess)
- ↑ "The mirror connecting light and shadow. The light emerging from it opens the way to the Twilight Realm." — Item description (Twilight Princess)
- ↑ "Princess... I have one last request... Can you tell him...where to find the Mirror of Twilight?" — Princess Midna (Twilight Princess)
- ↑ "You seek it...but the Mirror of Twilight has been fragmented by mighty magic. That magic is a dark power that only he possesses... His name is... Ganondorf." — A Sage (Twilight Princess)
- ↑ "Only the true leader of the Twili can utterly destroy the Mirror of Twilight...so Zant could merely break it into pieces. Once broken by magic, the Mirror of Twilight became fragments, which even now lie hidden across the land of Hyrule. One is in the snowy mountain heights... One is in an ancient grove... And one is in the heavens..." — A Sage (Twilight Princess)
- ↑ "I know now the reason the goddesses left the Mirror of Twilight in this world... They left it because it was their design that we should meet." — Princess Midna (Twilight Princess)
- ↑ "Well, the princess spoke truly: as long as that mirror's around, we could meet again..." — Princess Midna (Twilight Princess)
- ↑ "The mirror shards lie in deep mountain snows, within an ancient wood, and somewhere in the sky..." — Princess Midna (Twilight Princess)
- ↑ "But...since I get mirror, I get sick, and then bad monsters appear... So many bad things happen since mirror..." — Yeta (Twilight Princess)
- ↑ "Still... I feel bad about the way we treated that girl. To think the Mirror of Twilight has the power to change people like that..." — Princess Midna (Twilight Princess)
| Language | Name | ||
|---|---|---|---|
| Mirror of Twilight | Mirror Shard | ||
| Japanese | Template:Japanese | ||
| FrenchEU | Miroir des Ombres | ||
| German | Schattenspiegel | ||
| Italian | Specchio oscuro | ||
| SpanishEU | Espejo del Crepúsculo | Fragmentos del Espejo | |