m (→Gallery) |
m (→Trivia) |
||
| Line 1: | Line 1: | ||
| + | {{Dungeons |
||
| − | {{Enemy |
||
| − | |name = |
+ | |name = Lanayru Mining Facility |
| − | |image = [[File: |
+ | |image = [[File:LanayruMiningFacility.png|240px]] |
| − | |caption = |
+ | |caption = One of the rooms in the dungeon |
| + | |location = [[Lanayru Desert]] |
||
| − | |race = |
||
| + | |game = ''[[The Legend of Zelda: Skyward Sword|Skyward Sword]]'' |
||
| − | |game = {{SS}} |
||
| + | |item = [[Gust Bellows]] |
||
| − | |habitat = [[Lanayru Mining Facility]]<br>[[Sky Keep]] |
||
| + | |mini-boss = |
||
| − | |attack = Missile bomb, Sentrobe Bomb |
||
| − | | |
+ | |boss = [[Moldarach]] |
| + | |quest = [[Goddess's Harp]]<br>[[Heart Container]] |
||
| + | |element = {{Element|Desert}}{{Element|Electric}} |
||
| + | |theme music = |
||
}} |
}} |
||
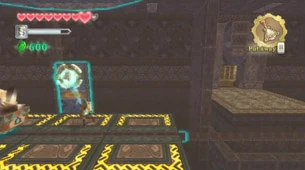
| + | '''Lanayru Mining Facility''' is the third [[dungeon]] to appear in ''[[The Legend of Zelda: Skyward Sword|Skyward Sword]]''. It is very unique among most dungeons in the ''[[The Legend of Zelda (Series)|Zelda]]'' franchise's history, being a technologically advanced facility run by [[Ancient Robot|robots]] and containing within it conveyor belts and frequent use of electricity in a world that is typically shown to be medieval-themed. The facility itself seems to be a refinery or a factory of some kind for Timeshift Stones. |
||
| − | '''Sentrobes''' are enemies in {{SS}}. |
||
| + | ==Entrance to the Facility== |
||
| − | {{Fi|Sentrobe|This security drone was built in ancient times. It is armed with missiles fired from a central turret and flying bombs fired from both of its sides. Analysis suggests you can repel the missiles fired from the central turret with certain items at your disposal, such as your shield.}} |
||
| + | The dungeon is located within [[Lanayru Desert]], at first sunken beneath the large pool of sand in the east frontier of the [[Temple of Time#The Era of the Goddess Hylia and the Era of the Sky|ancient Temple of Time]]. It was the main industrial complex of an unnamed civilization or corporation that had died out. The dungeon is full of sand that has built up over time. |
||
| − | {{clear|left}} |
||
| + | Link initially proceeds to the location of the Temple of Time, only to discover that the entrance is blocked. He then learns from an [[Ancient Robot]] that the Lanayru Mining Facility and the temple are connected underground. To unveil the facility, Link proceeds to activate three [[power node]]s placed strategically in the areas close to its entrance. Two power nodes are located inside caches, and one is hidden behind a bombable |
||
| − | ==Sentrobe Bomb== |
||
| + | statue. In the three cases, the nodes can only be activated when a [[Timeshift Stone]] is activated nearby, and to do so Link stabs at the center of each of them so he can proceed to rotate the pointer up to a certain angle. Each pointer has a symbol: a lightning bolt, a water droplet, and a flame. When all three nodes are activated, Link goes to the [[power generator]] that is in front of the facility's resting area, and proceeds to input its three pointers in an order that is indicated by the order of placement of the symbols, which in turn is based on the position of the original power nodes (this can be seen on the map, where the three symbols are shown). The facility is then revealed, and Link proceeds to enter. |
||
| ⚫ | |||
| − | After one of their missiles is deflected back at them, they will launch '''Sentrobe Bombs''', which are smaller, more easily destructible versions of the Sentrobes. |
||
| + | ==Themes and Navigation== |
||
| − | {{Fi|Sentrobe Bomb|This is a bomb projectile fired from a Sentrobe. It will follow its target anywhere, although a timed fuse ensures it will explode after a set time.}} |
||
| + | [[File:Windmill Switch.jpg|thumb|right|280px|Link blowing a windmill with the [[Gust Bellows]] before a moving [[Timeshift Stone|Timeshift cart]] gets past his standing platform.]] |
||
| − | {{clear|left}} |
||
| + | Compared to the previous dungeons in the game, and the majority of the dungeons in the ''Zelda'' franchise, Lanayru Mining Facility shows a significantly more advanced technology within. Neon lights and luminous platforms and stairs are only some examples. The facility also contains a large number of Timeshift Stones that were mined from the earth, as well as many ruined and disused systems that come to life when the Timeshift Stones are activated. |
||
| + | Inside the facility, the sand proves as difficult to navigate as outside, requiring plenty of stamina to dash across the various sand-filled rooms. Also found inside the facility's walls are a number of minecarts and conveyor systems that have fallen into disrepair. The use of Timeshift Stones allow Link to restore these systems to life and help him trigger switches in order to further proceed into the dungeon. However, Link must evade the rugged piles of unrefined minerals and electric barriers as he navigates the conveyor belts. Stamina fruits are occasionally dropped, allowing Link to continue running across the belts. The past also contains several mechanical sentries, powered by ancient and relatively unknown technology, which Link must defeat in order to proceed. |
||
| − | ==Characteristics and Weaknesses== |
||
| − | ===Sentrobe=== |
||
| − | Sentrobes are round, flying robots found mainly in the [[Lanayru Mining Facility]], only becoming active when under the effects of a [[Timeshift Stone]]. They have eyes in the center of their bodies and they fly around using a propeller attached to its inner body. They are separated vertically by their metallic shell, which opens to shoot missiles at [[Link]]. These missiles can be reflected with a Shield Attack or sword strike to damage the Sentrobe. They can only withstand being struck by their missiles twice before they blow up, jettisoning [[Rupee]]s in all directions. |
||
| + | Large piles of softer sand frequently appears alongside the dangerous sinksand, and although they rarely impede movement (one of them blocks a door), the piles frequently hide switches, treasures, or enemies. Link must use the [[Gust Bellow]] to blow away the sand and reveal what it hides. [[Link]] will have to continue to activate Timeshift Stones and use the Gust Bellows as he travels deeper into the dungeon. Several mechanical platforms must be moved by using the Gust Bellows to make them move, and some switches are triggered in this fashion as well. Timeshift Stones on moving minecarts have to be used at some points, meaning the young hero must move quickly and precisely to ensure that tasks they need to do in the small past area are completed. |
||
| − | ===Sentrobe Bomb=== |
||
| − | When deployed, Sentrobe Bombs follow Link around and blow up after a set time limit. Link can safely destroy them by slicing them alongside their opening, either vertically or horizontally. Unlike their larger counterparts, they cannot fire missiles at Link. When Sentrobe Bombs are following Link, they are accompanied by a high-pitch, mechanical theme. |
||
| + | Interestingly, this dungeon doesn't have a miniboss, and the boss doesn't directly guard any [[:Category:Quest Items|quest reward]] other than its [[Heart Container]]. Instead, after Link defeats it, he crosses a railroad that takes him to a scene at the Temple of Time where he has to protect [[Princess Zelda|Zelda]] and [[Impa]] from [[Ghirahim|Ghirahim's]] reaches, and receives from his childhood friend the [[Goddess's Harp]]. |
||
| − | ==Gallery== |
||
| + | |||
| + | ==Minor Enemies== |
||
| + | {{sectstub}} |
||
<gallery> |
<gallery> |
||
| + | File:Scorpion Larva.png|[[Aracha]] |
||
| − | File:SentrobeBallSS.png|A Sentrobe in surveilance ball mode |
||
| + | File:SS Armos.png|[[Armos]] |
||
| − | File:SentrobePresentSS.png|An inactive Sentrobe from the present |
||
| + | File:Beamos SS.png|[[Beamos]] |
||
| − | File:SentrobeDeploySS.png|A Sentrobe deploying Sentrobe Bombs |
||
| + | File:ElectroSpumeSS.png|[[Spume#Electro Spume|Electro Spume]] |
||
| + | File:Fugu.png|[[Froak]] |
||
| + | File:SentrobeSS.png|[[Sentrobe]] |
||
| ⚫ | |||
| + | File:SS Staldra.png|[[Staldra]] |
||
| + | File:ThunderKeeseSS.png|[[Keese#Thunder Keese|Thunder Keese]] |
||
| + | File:YellowChuChuSS.png|[[Chuchu|Yellow Chuchu]] |
||
</gallery> |
</gallery> |
||
| − | <br> |
||
| − | <center>{{AdFilter|Start}} |
||
| − | {| class="wikitable" style="text-align: left; margin: 0 0 1em 1em; border: 1px solid #{{ZWborder}}; background-color: #{{ZWbgcolor}}; border-collapse: collapse; font-size: 95%;" cellpadding="2" |
||
| − | |- |
||
| − | ! colspan="7" style="font-size:110%; text-align: center; background-color: #{{ZWheader}}; border: 1px solid #{{ZWborder}}" | [[File:Forest minish.png|20px]] Names in Other Regions [[File:Jabber Nut MC.gif]] |
||
| − | |- |
||
| − | ! rowspan="2" colspan=2 |Language |
||
| − | ! colspan="5" |Name |
||
| − | </font> |
||
| − | |- |
||
| − | ! Sentrobe |
||
| − | ! Sentrobe Bomb |
||
| − | |- |
||
| − | | '''Japanese''' |
||
| − | | [[File:Japan Flag.png|20px|Japan]] |
||
| − | | |
||
| − | | |
||
| − | |- |
||
| − | | '''Spanish''' |
||
| − | | [[File:CELAC Flag.png|20px|Latin America]] |
||
| − | | Helicobot |
||
| − | | Bomba de helicobot |
||
| − | |- |
||
| − | | '''French''' |
||
| − | | [[File:Canada Flag.png|20px|Canada]] |
||
| − | | Sphérodrone |
||
| − | | Bombe de sphérodrone |
||
| − | |- |
||
| − | | '''German''' |
||
| − | | [[File:Germany Flag.png|20px|Germany]] |
||
| − | | |
||
| − | | |
||
| − | |- |
||
| − | | '''Italian''' |
||
| − | | [[File:Italy Flag.png|20px|Italy]] |
||
| − | | |
||
| − | | |
||
| − | |- |
||
| − | | '''Korean''' |
||
| − | | [[File:South Korea.png|20px|South Korea]] |
||
| − | | |
||
| − | | |
||
| − | |- |
||
| − | |} |
||
| − | {{AdFilter|Finish}}</center> |
||
| + | ==Trivia== |
||
| − | {{InorganicEnemy}} |
||
| + | *The Lanayru Mining Facility is [[Eiji Aonuma]]'s favorite dungeon in ''Skyward Sword''.<ref>{{Cite person|quote=There is a part where you use an item called the Timeshift Stone that enables you to switch between the past and present. I think that this is something that can only be done in games and I believe it utilises the interactive quality of games brilliantly.|name=[[Eiji Aonuma]]|url=http://www.officialnintendomagazine.co.uk/33721/aonumas-best-zelda-skyward-sword-dungeon-revealed/|title=Aonuma's best Zelda Skyward Sword dungeon revealed}}</ref> |
||
| ⚫ | |||
| + | *The railroad leading to the Temple of Time is linked to the Facility via a turntable, which is located underneath the sand of the boss room. Surrounding the turntable are several closed tunnels, which could lead to other parts of the Lanayru area. |
||
| + | |||
| + | {{ref}} |
||
| + | |||
| + | {{Names |
||
| + | |en= |
||
| + | |enM= |
||
| + | |ja= {{Japanese|ラネール錬石場|Ranēru Ren Seki Jou}} |
||
| + | |jaM= Lanayru Stone Refinery |
||
| + | |es= |
||
| + | |esM= |
||
| + | |esL= Refinería de Lanayru |
||
| + | |esLM= Lanayru Refinery |
||
| + | |esS= |
||
| + | |esSM= |
||
| + | |fr= Raffinerie de Lanelle |
||
| + | |frM= |
||
| + | |de= {{de|Ranelle-Steinwerk}} |
||
| + | |deM= |
||
| + | |it= Opificio di Ranel |
||
| + | |itM= |
||
| + | |ko= 라넬 연석장 |
||
| + | |koM= }} |
||
| + | |||
| + | {{SSNavMap}} |
||
| + | {{DungeonNav2|SS}} |
||
| + | |||
| + | [[Category:Dungeons]] |
||
| ⚫ | |||
Revision as of 22:14, 15 December 2012
Template:Dungeons
Lanayru Mining Facility is the third dungeon to appear in Skyward Sword. It is very unique among most dungeons in the Zelda franchise's history, being a technologically advanced facility run by robots and containing within it conveyor belts and frequent use of electricity in a world that is typically shown to be medieval-themed. The facility itself seems to be a refinery or a factory of some kind for Timeshift Stones.
Entrance to the Facility
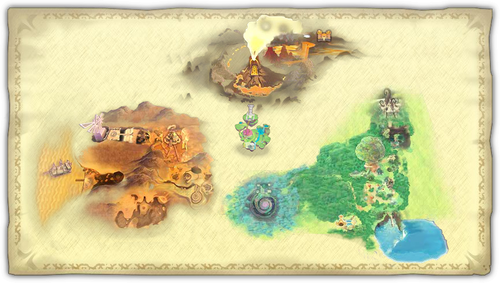
The dungeon is located within Lanayru Desert, at first sunken beneath the large pool of sand in the east frontier of the ancient Temple of Time. It was the main industrial complex of an unnamed civilization or corporation that had died out. The dungeon is full of sand that has built up over time.
Link initially proceeds to the location of the Temple of Time, only to discover that the entrance is blocked. He then learns from an Ancient Robot that the Lanayru Mining Facility and the temple are connected underground. To unveil the facility, Link proceeds to activate three power nodes placed strategically in the areas close to its entrance. Two power nodes are located inside caches, and one is hidden behind a bombable statue. In the three cases, the nodes can only be activated when a Timeshift Stone is activated nearby, and to do so Link stabs at the center of each of them so he can proceed to rotate the pointer up to a certain angle. Each pointer has a symbol: a lightning bolt, a water droplet, and a flame. When all three nodes are activated, Link goes to the power generator that is in front of the facility's resting area, and proceeds to input its three pointers in an order that is indicated by the order of placement of the symbols, which in turn is based on the position of the original power nodes (this can be seen on the map, where the three symbols are shown). The facility is then revealed, and Link proceeds to enter.
Link blowing a windmill with the Gust Bellows before a moving Timeshift cart gets past his standing platform.
Compared to the previous dungeons in the game, and the majority of the dungeons in the Zelda franchise, Lanayru Mining Facility shows a significantly more advanced technology within. Neon lights and luminous platforms and stairs are only some examples. The facility also contains a large number of Timeshift Stones that were mined from the earth, as well as many ruined and disused systems that come to life when the Timeshift Stones are activated.
Inside the facility, the sand proves as difficult to navigate as outside, requiring plenty of stamina to dash across the various sand-filled rooms. Also found inside the facility's walls are a number of minecarts and conveyor systems that have fallen into disrepair. The use of Timeshift Stones allow Link to restore these systems to life and help him trigger switches in order to further proceed into the dungeon. However, Link must evade the rugged piles of unrefined minerals and electric barriers as he navigates the conveyor belts. Stamina fruits are occasionally dropped, allowing Link to continue running across the belts. The past also contains several mechanical sentries, powered by ancient and relatively unknown technology, which Link must defeat in order to proceed.
Large piles of softer sand frequently appears alongside the dangerous sinksand, and although they rarely impede movement (one of them blocks a door), the piles frequently hide switches, treasures, or enemies. Link must use the Gust Bellow to blow away the sand and reveal what it hides. Link will have to continue to activate Timeshift Stones and use the Gust Bellows as he travels deeper into the dungeon. Several mechanical platforms must be moved by using the Gust Bellows to make them move, and some switches are triggered in this fashion as well. Timeshift Stones on moving minecarts have to be used at some points, meaning the young hero must move quickly and precisely to ensure that tasks they need to do in the small past area are completed.
Interestingly, this dungeon doesn't have a miniboss, and the boss doesn't directly guard any quest reward other than its Heart Container. Instead, after Link defeats it, he crosses a railroad that takes him to a scene at the Temple of Time where he has to protect Zelda and Impa from Ghirahim's reaches, and receives from his childhood friend the Goddess's Harp.
Minor Enemies
Template:Sectstub
- Scorpion Larva.png
- SS Armos.png
- Beamos SS.png
- ElectroSpumeSS.png
- Fugu.png
- SentrobeSS.png
- SentrobeBombsSS.png
- SS Staldra.png
- ThunderKeeseSS.png
- YellowChuChuSS.png
Trivia
- The Lanayru Mining Facility is Eiji Aonuma's favorite dungeon in Skyward Sword.[1]
- The railroad leading to the Temple of Time is linked to the Facility via a turntable, which is located underneath the sand of the boss room. Surrounding the turntable are several closed tunnels, which could lead to other parts of the Lanayru area.
References
- ↑ Template:Cite person
| Language | Name | Meaning | |
|---|---|---|---|
| Japanese | Template:Japanese | Lanayru Stone Refinery | |
| French | Raffinerie de Lanelle | ||
| German | Ranelle-Steinwerk | ||
| Italian | Opificio di Ranel | ||
| Korean | 라넬 연석장 | ||
| SpanishLA | Refinería de Lanayru | Lanayru Refinery | |
| Hyrule in Skyward Sword | |
|---|---|
 | |
| Click on a location | |
Dungeons in The Legend of Zelda Series
Parapa Palace · Midoro Palace · Island Palace · Maze Island Palace
Palace on the Sea · Three-Eye Rock Palace ![]() · Great Palace
· Great Palace ![]()
Light World
Sewer Passageway · Eastern Palace · Desert Palace · Tower of Hera · Hyrule Castle Tower ![]()
Dark World
Palace of Darkness · Swamp Palace · Skull Woods · Thieves' Town · Ice Palace · Misery Mire · Turtle Rock · Ganon's Tower ![]()
Palace of the Four Sword![]()
Main Dungeons
Tail Cave · Bottle Grotto · Key Cavern · Angler's Tunnel · Catfish's Maw · Face Shrine · Eagle's Tower · Turtle Rock · Wind Fish's Egg ![]()
Mini-Dungeons
Moblin Cave · Kanalet Castle · Ancient Ruins
Optional Dungeons
Color Dungeon (LADX | LANS) · Chamber Dungeon (LANS)
Child Dungeons
Inside the Deku Tree · Dodongo's Cavern · Inside Jabu-Jabu's Belly
Adult Dungeons'
Forest Temple · Fire Temple · Water Temple · Shadow Temple · Spirit Temple · Ganon's Castle ![]()
Mini-Dungeons
Main Dungeons
Woodfall Temple · Snowhead Temple · Great Bay Temple · Stone Tower Temple
Mini-Dungeons
Swamp Spider House · Pirates' Fortress · Oceanside Spider House · Beneath the Well · Ancient Castle of Ikana
Moon Dungeons ![]()
Main Dungeons
Spirit's Grave · Wing Dungeon · Moonlit Grotto · Skull Dungeon · Crown Dungeon · Mermaid's Cave · Jabu-Jabu's Belly · Ancient Tomb · Black Tower (Turret) ![]() · Room of Rites(OoS | OoA)
· Room of Rites(OoS | OoA)
Mini-Dungeons
Maku Road · Great Moblin's Keep · Ambi's Palace · Black Tower (Rescue Zelda) ![]() · Hero's Cave
· Hero's Cave![]()
Main Dungeons
Gnarled Root Dungeon · Snake's Remains · Poison Moth's Lair · Dancing Dragon Dungeon · Unicorn's Cave · Ancient Ruins · Explorer's Crypt · Sword & Shield Maze · Onox's Castle ![]() · Room of Rites(OoS | OoA)
· Room of Rites(OoS | OoA)
Mini-Dungeons
Chambers of Insight · Sea of Trees · Talus Cave · Death Mountain · Vaati's Palace ![]()
Anniversary Edition
Main Dungeons
Forsaken Fortress · Dragon Roost Cavern · Forbidden Woods · Tower of the Gods
Earth Temple · Wind Temple · Ganon's Tower
Mini-Dungeons
Whereabouts of the Wind — Lake Hylia · Cave of No Return · Hyrule Castle
Eastern Hyrule — The Coast · Village of the Blue Maiden · Eastern Temple
Death Mountain — Death Mountain Foothills · The Mountain Path · Tower of Flames
Near the Fields — The Field · The Swamp · Infiltration of Hyrule Castle
The Dark World — Lost Woods · Kakariko Village · Temple of Darkness
Desert of Doubt — Desert of Doubt · Desert Temple · Pyramid
Frozen Hyrule — Frozen Hyrule · Temple of Ice · Tower of Winds
Realm of the Heavens — Realm of the Heavens · The Dark Cloud · Palace of Winds
Main Dungeons
Deepwood Shrine ![]() · Cave of Flames · Fortress of Winds · Temple of Droplets
· Cave of Flames · Fortress of Winds · Temple of Droplets ![]() · Palace of Winds · Dark Hyrule Castle
· Palace of Winds · Dark Hyrule Castle ![]()
Mini-Dungeons
Main Dungeons
Forest Temple · Goron Mines · Lakebed Temple · Arbiter's Grounds ![]() · Snowpeak Ruins
· Snowpeak Ruins
Temple of Time · City in the Sky · Palace of Twilight ![]() · Hyrule Castle
· Hyrule Castle
Mini-Dungeons
Lantern Caverns · Cave of Ordeals · Cave of Shadows (TPHD)
Dungeons
Temple of Fire · Temple of Wind · Temple of Courage · Ghost Ship · Goron Temple · Temple of Ice · Mutoh's Temple
Master Dungeon
Dungeons
Forest Temple · Snow Temple · Ocean Temple · Fire Temple · Sand Temple
Master Dungeon
Mini-Dungeon
Lost at Sea Station · Tunnel to the Tower · Take 'Em All On!![]()
Main Dungeons
Skyview Temple · Earth Temple · Lanayru Mining Facility · Ancient Cistern · Sandship · Fire Sanctuary · Sky Keep
Mini-Dungeons
Hyrule
Eastern Palace · Tower of Hera · House of Gales · Inside Hyrule Castle ![]()
Desert Palace ![]()
Lorule
Ice Ruins · Swamp Palace · Thieves' Hideout · Dark Palace
Skull Woods · Turtle Rock · Lorule Castle ![]()
Woodlands — Deku Forest · Buzz Blob Cave · Moblin Base · Forest Temple
Riverside — Secret Fortress · Abyss of Agony · Cove of Transition · Water Temple
Volcano — Blazing Trail · Hinox Mine · Den of Flames · Fire Temple
Ice Cavern — Frozen Plateau · Snowball Ravine · Silver Shrine · Ice Temple
Fortress — Sealed Gateway · Bomb Storage · Training Ground · The Lady's Lair
The Dunes — Infinity Dunes · Stone Corridors · Gibdo Mausoleum · Desert Temple
The Ruins — Illusory Mansion · Palace Noir · Lone Labyrinth · Grim Temple
Sky Realm — Floating Garden · Deception Castle · Dragon Citadel · Sky Temple
Forest Zone · Flooded Zone · Scorching Zone · Frozen Zone · Fortified Zone · Desert Zone · Shadow Zone · Baneful Zone
Main Dungeons
Divine Beast Vah Ruta · Divine Beast Vah Rudania · Divine Beast Vah Medoh · Divine Beast Vah Naboris · Hyrule Castle · Final Trial![]() (TCB)
(TCB)
Mini-Dungeons
Trial of the Sword (TMT ) · Yiga Clan Hideout
Ancient Shrines
Akh Va'quot ·
Bosh Kala ·
Chaas Qeta ·
Daag Chokah ·
Dagah Keek ·
Dah Kaso ·
Dah Hesho ·
Daka Tuss ·
Dako Tah ·
Daqa Koh ·
Daqo Chisay ·
Dila Maag ·
Dow Na'eh ·
Dunba Taag ·
Gee Ha'rah ·
Gorae Torr ·
Ha Dahamar ·
Hawa Koth ·
Hia Miu ·
Hila Rao ·
Ishto Soh ·
Ja Baij ·
Jee Noh ·
Jitan Sa'mi ·
Joloo Nah ·
Ka'o Makagh ·
Kaam Ya'tak ·
Kah Mael Shrine ·
Kah Okeo Shrine ·
Kah Yah Shrine ·
Kam Urog Shrine ·
Katah Chuki ·
Katosa Aug ·
Kay Noh ·
Kaya Wan ·
Kayra Mah ·
Ke'nai Shakah ·
Keeha Yoog ·
Keh Namut ·
Kema Kosassa ·
Kema Zoos ·
Keo Ruug ·
Ketoh Wawai ·
Korgu Chideh ·
Korsh O'hu ·
Kuh Takkar ·
Kuhn Sidajj ·
Lakna Rokee ·
Lanno Kooh ·
Maag Halan ·
Maag No'rah ·
Maka Rah ·
Mezza Lo ·
Mijah Rokee ·
Mirro Shaz ·
Misae Suma ·
Mo'a Keet ·
Mogg Latan ·
Monya Toma ·
Mozo Shenno ·
Muwo Jeem ·
Myahm Agana ·
Namika Ozz ·
Ne'ez Yohma ·
Noya Neha ·
Oman Au ·
Owa Daim ·
Pumaag Nitae ·
Qua Raym ·
Qaza Tokki ·
Qukah Nata ·
Raqa Zunzo ·
Ree Dahee ·
Rin Oyaa ·
Ritaag Zumo ·
Rok Uwog ·
Rona Kachta ·
Rota Ooh ·
Rucco Maag ·
Saas Ko'sah ·
Sah Dahaj ·
Sasa Kai ·
Sha Gehma ·
Sha Warvo ·
Shada Naw ·
Shae Katha ·
Shae Loya ·
Shae Mo'sah ·
Shai Utoh ·
Shai Yota ·
Shee Vaneer ·
Shee Venath ·
Sheem Dagoze ·
Sheh Rata ·
Sho Dantu ·
Shoda Sah ·
Shoqa Tatone ·
Shora Hah ·
Soh Kofi ·
Suma Sahma ·
Ta'loh Naeg ·
Tah Muhl ·
Tahno O'ah ·
Tawa Jinn ·
Tena Ko'sah ·
Tho Kayu ·
To Quomo ·
Toh Yahsa ·
Toto Sah ·
Tu Ka'loh ·
Tutsuwa Nima ·
Voo Lota ·
Wahgo Katta ·
Ya Naga ·
Yah Rin ·
Zalta Wa ·
Ze Kahso ·
Zuna Kai
Ancient Shrines (TCB)
Etsu Korima · Kamia Omuna · Kee Dafunia · Keive Tala · Kiah Toza · Kihiro Moh · Mah Eliya · Noe Rajee · Rinu Honika · Rohta Chigah · Ruvo Korbah · Sato Koda · Sharo Lun · Shira Gomar · Takama Shiri · Yowaka Ita
Main Dungeons
Wind Temple · Fire Temple · Water Temple · Lightning Temple · Hyrule Castle · Spirit Temple · Gloom's Lair
Level 1 — Ordon Target Practice · Gerudo Stalfos: Defender · Arbiter's Grounds: Ranger
Level 2 — Goron Target Practice · Zora River: Defender · Skull Shooting
Level 3 — Kakariko Target Practice · Fruit Balloons · The Great Bridge: Defender
Level 4 — Zora River Target Practice · Hyrule Castle: Defender · Skulltula Forest: Ranger
Level 5 — Oocca Target Practice · Gerudo Moldorm: Defender · The Shootout
Level 6 — Ordon Target Practice 2 · Bridge of Eldin: Defender · Snowpeak Ruins: Ranger
Level 7 — Underground Target Practice · City in the Sky: Defender · Temple of Time: Ranger
Level 8 — Horseback Target Practice · Snowpeak Ruins: Defender · Darknut Battle
Finale — Ranch Target Practice · Sacred Grove: Defender · Fossil Stallord Battle