ItaLink@legacy41971275 (talk | contribs) |
m (Display Title) |
||
| (45 intermediate revisions by 14 users not shown) | |||
| Line 1: | Line 1: | ||
| + | {{DISPLAYTITLE:{{OoT|-}} Translations/Locations}} |
||
| − | <noinclude>{{BasePageLink}} |
||
| + | The following page is a list of the names of every named location appearing in {{OoT}} in every release of the game. {{#section:Ocarina of Time Translations|Lead}} |
||
| − | *Empty cells indicate there is no given name for the particular location in that language.</noinclude> |
||
| − | ==Locations== |
||
| − | ===Map Screen=== |
||
| − | {| class="wikitable sortable" border="1" cellpadding="2" |
||
| − | |- |
||
| − | !width=100 class="unsortable"| Image |
||
| − | !width=180| Japanese |
||
| − | !width=140| English |
||
| − | !width=140| French |
||
| − | !width=140| German |
||
| − | !width=140| Spanish |
||
| − | !width=140| Italian |
||
| − | !width=140| Portuguese |
||
| − | |- |
||
| − | | |
||
| − | | {{Japanese|マップ画面|Mappu Gamen|Map Screen}} || Map Subscreen || Sous-Menu de la Carte || {{exp|Map Screen|Karten-Bildschirm}} || || Mappa || Subtela de Mapas |
||
| − | |- |
||
| − | | [[File:Hyrule Map OoT.jpg|center|100px]] |
||
| − | | {{Japanese|ハイラル|Hairaru|Hyrule}} || [[Hyrule]] || Hyrule || Hyrule || || Hyrule || Hyrule |
||
| − | |- |
||
| − | | [[File:Fairyfountainoot.png|center|100px]] |
||
| − | | {{Japanese|妖精の泉|Yōsei no Izumi|Fairy Fountain}} || [[Fairy Fountain#Ocarina of Time|Fairy Fountain]] || || {{exp|Fairy Fountain|Feen-Brunnen}} || || Fonte delle Fate || Fonte da Fada |
||
| − | |- |
||
| − | | [[File:FairyFountainOoTTop.jpg|center|100px]] |
||
| − | | {{Japanese|大妖精の泉|Daiyōsei no Izumi|Great Fairy Fountain}} || [[Great Fairy Fountain#Ocarina of Time|Great Fairy Fountain]] || || {{exp|Fairy Spring|Feen-Quelle}}|| || Fonte della Fata Radiosa || Fonte da Grande Fada |
||
| − | |- |
||
| − | | [[File:Triforce (Ocarina of Time).png|center|100px]] |
||
| − | | {{Japanese|聖地|Seichi|Sacred Realm}} || [[Sacred Realm]] || Saint Royaume || {{exp|Holy Realm|Heiliges Reich}} || || Sacro Reame || Templo Sagrado |
||
| − | |- |
||
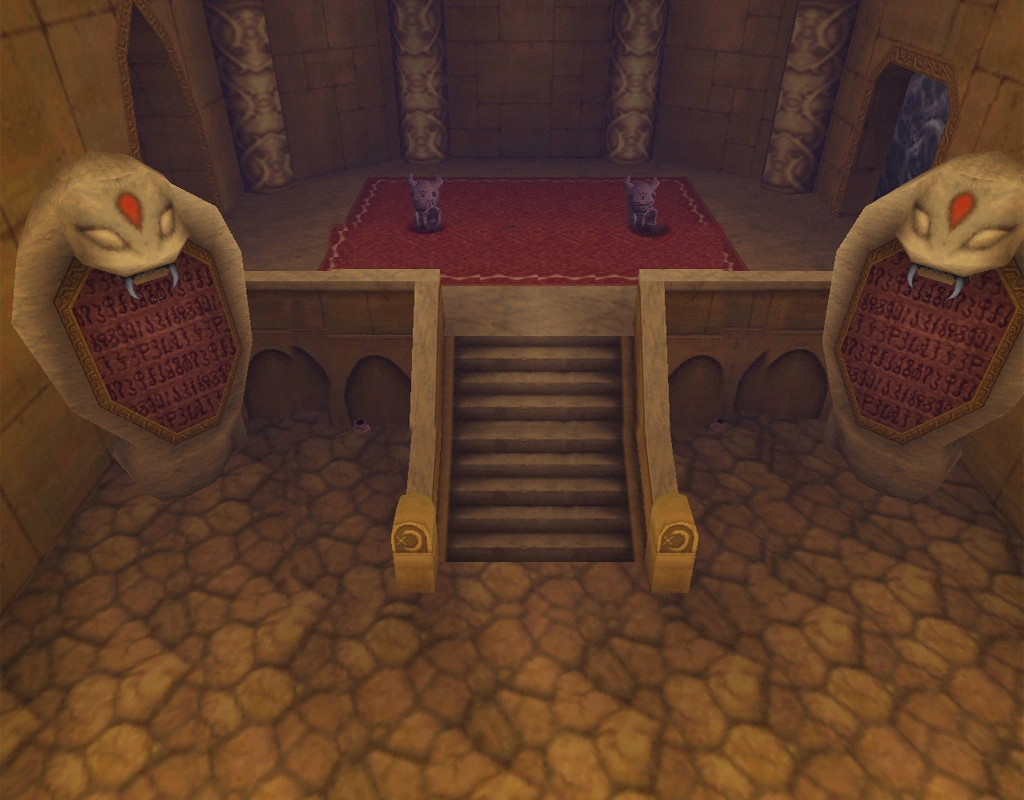
| − | | [[File:Chamberofsages.jpg|center|100px]] |
||
| − | | {{Japanese|賢者の間|Kenja no Ma|Chamber of Sages}} || [[Temple of Light#Chamber of Sages|Chamber of Sages]] || Sanctuaire des Sages || {{exp|Hall of Sages|Halle der Weisen}} || || Sala dei Saggi || Sala dos Sabios |
||
| − | |- |
||
| − | | |
||
| − | | {{Japanese|光の神殿|Hikari no Shinden|Temple of Light}} || [[Temple of Light]] || Temple de la Lumière|| {{exp|Temple of Light|Tempel des Lichts}} || || Tempio della Luce || Templo da Luz |
||
| − | |- |
||
| − | | |
||
| − | | {{Japanese|魔界|Makai|Demon World}} || World of Evil || || n/a || || Mondo del Male || Mundo do Mal |
||
| − | |- |
||
| − | | |
||
| − | | {{Japanese|闇の世界|Yami no Sekai|Dark World}} || The Evil Realm || || {{exp|The Depth of Hell|Abgrund der Hölle}}||| || Regno del Male || Templo do Mal |
||
| − | |- |
||
| − | |} |
||
| + | <onlyinclude>==Locations== |
||
| − | ===Kokiri Forest=== |
||
| + | {{Translation Page |
||
| − | {| class="wikitable sortable" border="1" cellpadding="2" |
||
| + | |game= OoT |
||
| − | |- |
||
| + | |filetype= Screenshot |
||
| − | !width=100 class="unsortable"| Image |
||
| + | |header= Location |
||
| − | !width=180| Japanese |
||
| + | |tab1= {{#var:Table 1}} |
||
| − | !width=140| English |
||
| + | |tab2= {{#var:Table 2}} |
||
| − | !width=140| French |
||
| + | |subjects= ?, Bazaar, Bombchu Bowling Alley, Bombchu Shop, Bottom of the Well, Chamber of Sages, Dampé's Shack, Death Mountain, Death Mountain Crater, Death Mountain Trail, Desert Colossus, Dodongo's Cavern, Fairy Fountain, Fire Temple, Fishing Hole, Forest Stage, Forest Temple, Forest Training Center, Gerudo's Fortress, Gerudo Training Ground, Gerudo Valley, Ghost Shop, Goron City, Goron Shop, Granny's Potion Shop, Graveyard, Great Fairy Fountain, Guard House, Happy Mask Shop, Haunted Wasteland, High-Dive Practice Spot, Horseback Archery Range, House of Skulltula, Hyrule, Hyrule/Appearances by Game, Hyrule Castle, Hyrule Castle Town, Impa's House, Inside Jabu-Jabu's Belly, Kakariko Village, Kakariko Village Graveyard, Kakariko Windmill, King Zora's Throne Room, Kokiri Forest, Kokiri Shop, Lake Hylia, Lakeside Laboratory, Link's House, Lon Lon Ranch, Lost Woods, Medigoron's Blade Store, Potion Shop, Rainbow Bridge, Royal Family's Tomb, Sacred Forest Meadow, Sacred Realm, Shadow Temple, Sleepless Waterfall, Spirit Temple, Temple, Temple of Light, Temple of Time, Water Temple, Zora's Domain, Zora's Fountain, Zora Shop}}</onlyinclude> |
||
| − | !width=140| German |
||
| − | !width=140| Spanish |
||
| − | !width=140| Italian |
||
| − | !width=140| Portuguese |
||
| − | |- |
||
| − | | [[File:KokiriVillage1.jpg|center|100px]] |
||
| − | | {{Japanese|コキリの森|Kokiri no Mori|Kokiri Forest}} || [[Kokiri Forest]] || Forêt Kokiri || {{exp|Kokiri Forest|Kokiri-Wald}} || || Foresta dei Kokiri || Floresta Kokiri |
||
| − | |- |
||
| − | | [[File:Great Deku Tree OoT3D.jpg|center|100px]] |
||
| − | | {{Japanese|デクの樹サマの広場|Deku no Ki-sama no Hiroba|Great Deku Tree's Square}} || Great Deku Tree's Meadow || Clairière du Vénérable Arbre Mojo || {{exp|Deku Tree Grove|Hain des Deku-Baumes}} || || Distesa del Grande Albero Deku || Praça da Grande Arvore Deku |
||
| − | |- |
||
| − | | [[File:Foresttrainingcenter.jpg|center|100px]] |
||
| − | | {{Japanese|森のれんしゅうじょう|Mori no Renshūjō|Forest Practice Ground}} || [[Forest Training Center]] || Aire d'Entraînement Sylvestre || {{exp|Kokiri Trainings Camp|Kokiri Trainingslager}} || || Zona di Addestramento || Centro de Treinamento da Floresta |
||
| − | |- |
||
| − | | [[File:Kokirishop.jpg|center|100px]] |
||
| − | | {{Japanese|コキリのお店|Kokiri no O-Mise|Kokiri Shop}} || [[Kokiri Shop]] || Boutique Kokiri || {{exp|Kokiri Shop|Kokiri-Laden}} || || Negozio dei Kokiri || Loja Kokiri |
||
| − | |- |
||
| − | | [[File:Link's House.png|center|100px]] |
||
| − | | {{Japanese|リンクのおうち|Rinku no O-Uchi|Link's House}} || [[Link's House]] || Cabane de Link || {{exp|Here lives Link|Hier wohnt Link}}|| || Casa di Link || Casa do Link |
||
| − | |- |
||
| − | | [[File:OoTSariasHouse.jpg|center|100px]] |
||
| − | | {{Japanese|サリアのおうち|Saria no O-Uchi|Saria's House}} || Saria's House || Cabane de Saria || {{exp|Salia's House|Salias Haus}} || || Casa di Saria || Casa da Saria |
||
| − | |- |
||
| − | | [[File:OoTTwinsHouse.jpg|center|100px]] |
||
| − | | {{Japanese|ふたごのおうち|Futago no O-Uchi|House of Twins}} || House of Twins || Cabane des Jumelles || {{exp|House of the Twins|Haus der Zwillinge}} || || Casa delle Gemelle || Casa dos Gemeos |
||
| − | |- |
||
| − | | [[File:OoTBrothersHouse.jpg|center|100px]] |
||
| − | | {{Japanese|ものしり兄弟のおうち|Monoshiri Kyōdai no O-Uchi|House of the All-Knowing Brothers}} || House of the Know-it-All Brothers || Cabane des Frères Je-Sais-Tout || {{exp|House of the All-Knowing Brothers|Haus der Allwissenden Brüder}} || || Casa dei Fratelli So-Tutto-Io || Casa dos Irmãos Sabe-Tudo |
||
| − | |- |
||
| − | | [[File:OoTMidosHouse.jpg|center|100px]] |
||
| − | | {{Japanese|コキリぞくのボスミドさまのおやしき|Kokirizoku no Bosu Mido-sama no O-Yashiki|House of the Great Mido, Boss of the Kokiri Tribe}} || House of the Great Mido, Boss of the Kokiri || Cabane du Grand Mido Chef des Kokiris || {{exp|House of Mido, Leader of the Kokiri|Haus von Mido Anführer der Kokiri}} || || Casa di Mido il grande sovrano di tutti i Kokiri || Casa do Mido,Lider dos Kokiris |
||
| − | |- |
||
| − | | [[File:OoTKokiriPond.jpg|center|100px]] |
||
| − | | {{Japanese|池のとび石|Ike no Tobi Ishi|The Leaping-Stone Pond}} || Stepping Stones in the Pond || Sauter sur les pierres || {{exp|Jump from stone to stone|Springe von Stein zu Stein}} || || Pietre || Rio das pedras Puladoras |
||
| − | |- |
||
| − | |} |
||
| + | {{Translations}} |
||
| − | ===Hyrule Field=== |
||
| − | {| class="wikitable sortable" border="1" cellpadding="2" |
||
| − | |- |
||
| − | !width=100 class="unsortable"| Image |
||
| − | !width=180| Japanese |
||
| − | !width=140| English |
||
| − | !width=140| French |
||
| − | !width=140| German |
||
| − | !width=140| Spanish |
||
| − | !width=140| Italian |
||
| − | !width=140| Portuguese |
||
| − | |- |
||
| − | | [[File:Hyrule field.jpg|center|100px]] |
||
| − | | {{Japanese|ハイラル平原|Hairaru Heigen|Hyrule Field}} || [[Hyrule Field]] || Plaine d'Hyrule || {{exp|Hylian Steppe|Hylianische Steppe}}{{exp|N64}}<br>Ebene von Hyrule{{exp|3DS}} || || Piana di Hyrule || Terra de Hyrule |
||
| − | |- |
||
| − | | [[File:Lonlr.jpg|center|100px]] |
||
| − | | {{Japanese|ロンロン牧場|Ron Ron Bokujō|Lon Lon Ranch}} || [[Lon Lon Ranch]] || Lon Lon Ranch || Lon Lon-Farm || || Fattoria Lon-Lon || Fazenda Lon-Lon |
||
| − | |- |
||
| − | | [[File:OoTStable.jpg|center|100px]] |
||
| − | | {{Japanese|馬小屋|Uma Koya|Horse Pen}} || [[Lon Lon Ranch|Stable]] || || {{exp|Stable|Stall}} || || Stalla || ??? |
||
| − | |- |
||
| − | |} |
||
| − | |||
| − | ===Hyrule Castle Town=== |
||
| − | {| class="wikitable sortable" border="1" cellpadding="2" |
||
| − | |- |
||
| − | !width=100 class="unsortable"| Image |
||
| − | !width=180| Japanese |
||
| − | !width=140| English |
||
| − | !width=140| French |
||
| − | !width=140| German |
||
| − | !width=140| Spanish |
||
| − | !width=140| Italian |
||
| − | !width=140| Portuguese |
||
| − | |- |
||
| − | | [[File:Ootmarket.jpg|center|100px]] |
||
| − | | {{Japanese|城下町|Jōka Machi|Castle Town}}<br>{{Japanese|ハイラルの町|Hairaru no Machi|Hyrule Town}}{{exp|Man in the city}} || [[Hyrule Castle Town#Ocarina of Time|Market]]<br>City of Hyrule || || {{exp|Market|Marktplatz}}<br>Hyrule || || Mercato || Cidade de Hyrule |
||
| − | |- |
||
| − | | [[File:Bazaar.png|center|100px]] |
||
| − | | {{Japanese|なンでもや|Nandemo Ya|General Store}} || [[Bazaar (Ocarina of Time)|Bazaar]] || Bazar || Basar || || Bazar || Mercearia |
||
| − | |- |
||
| − | | [[File:Backalley2.jpg|center|100px]] |
||
| − | | {{Japanese|路地裏|Rojiura|Back Alley}} || [[Hyrule Castle Town#Back Alley|Back Alley]] || || {{exp|Side Street|Seitenstraße}}|| || Vicolo Laterale || ??? |
||
| − | |- |
||
| − | | [[File:Market Medicine Shop.jpg|center|100px]] |
||
| − | | {{Japanese|クスリ屋|Kusuri Ya|Medicine Shop}} || [[Medicine Shop]] || Apothicaire || {{exp|Magic Shop|Magie-Laden}} || || Negozio di Pozioni || Farmacia |
||
| − | |- |
||
| − | | [[File:Shooting Gallery OOT.png|center|100px]] |
||
| − | | {{Japanese|的あて屋|Mato Ate Ya|Target-aiming Shop}} || [[Shooting Gallery]] || Jeu d'adresse || {{exp|Shooting Gallery|Schießbude}}|| || Sala del Tirassegno || Galeria de Mira-ao-Alvo |
||
| − | |- |
||
| − | | [[File:Treasure Chest Game OoT.png|center|100px]] |
||
| − | | {{Japanese|宝箱屋|Takara Bako Ya|Treasure Chest Shop}}<br>{{Japanese|たからばこクジ|Takara Bako Kuji|Treasure Chest Lottery}}{{exp|Sign on the door}} || [[Treasure Chest Game]]<br>Treasure Chest Contest || Chasse aux trésors<br>Chasse aux trésors || {{exp|Treasure Chest Lottery|Truhenlotterie}}<br>{{exp|Treasure Chest Poker|Schatzkisten-Poker}} || || Sala della Fortuna || Jogo do Tesouro |
||
| − | |- |
||
| − | | [[File:BombchuBowlingOoT.png|center|100px]] |
||
| − | | {{Japanese|ボムチュウボウリング|Bomuchū Bōringu|Bombchu Bowling}} || [[Bombchu Bowling Alley]] || Bowling Teigneux || {{exp|Mine Bowling Alley|Minenbowlingbahn}} || || Sala da Bowling || Boliche de Bombchu |
||
| − | |- |
||
| − | | [[File:Bombchushop.jpg|center|100px]] |
||
| − | | {{Japanese|ボムチュウ屋|Bomuchū Ya|Bombchu Shop}} || [[Bombchu Shop]] || || {{exp|Crawling-Mine Shop|Krabbelminen-Laden}} || || Negozio di Radiomine || Loja de Bombchus |
||
| − | |- |
||
| − | | [[File:Happy Mask Shop.jpg|center|100px]] |
||
| − | | {{Japanese|おめん屋|O-Men Ya|Mask Shop}}<br>{{Japanese|しあわせのお面屋|Shiawase no O-Men Ya|Happy Mask Shop}}{{exp|Sign}} || [[Happy Mask Shop]]<br>Happy Mask Shop || Foire aux Masques || {{exp|Mask Shop|Maskenhändler}}<br>Maskenhändler|| || Negozio delle Maschere della Felicità || Loja Mascara-Feliz |
||
| − | |- |
||
| − | | [[File:TempleofTime.jpg|center|100px]] |
||
| − | | {{Japanese|時の神殿|Toki no Shinden|Temple of Time}} || [[Temple of Time]] || Temple du Temps || {{exp|Citadel of Time|Zitadelle der Zeit}} || || Tempio del Tempo || Templo do Tempo |
||
| − | |- |
||
| − | | [[File:DoorOfTime1.jpg|center|100px]] |
||
| − | | {{Japanese|時の扉|Toki no Tobira|Door of Time}} || [[Temple of Time#Door of Time|Door of Time]] || Porte du Temps || {{exp|Time Portal|Zeitportal}} || || Porta del Tempo || Porta do Tempo |
||
| − | |- |
||
| − | | [[File:Ootcastle.png|center|100px]] |
||
| − | | {{Japanese|ハイラル城|Hairarujō|Hyrule Castle}} || [[Hyrule Castle]] || || {{exp|Hyrule Castle|Schloß Hyrule}} || || Castello di Hyrule || Castelo Hyrule |
||
| − | |- |
||
| − | | [[File:Hyrule Castle Courtyard.jpg|center|100px]] |
||
| − | | {{Japanese|城の中庭|Shiro no Nakaniwa|Castle Courtyard}} || [[Hyrule Castle#Princess Zelda's Courtyard|Castle Courtyard]] || || {{exp|Castle Courtyard|Burghof}} || || Cortile del Castello || Jardim da Princesa Zelda |
||
| − | |- |
||
| − | | [[File:Zeldaganonscastle.jpg|center|100px]] |
||
| − | | {{Japanese|ガノンの城|Ganon no jō|Ganon's Castle}}<br>{{Japanese|ガノンドロフの城|Ganondorofu no jō|Ganondorf's Castle}}{{exp|Rauru}} || [[Ganon's Tower|Ganon's Castle]]<br>[[Ganon's Tower]]{{exp|Rauru}} || || {{exp|Ganon's Castle|Ganons Schloß}} || || Castello di Ganon || Torre do Ganon |
||
| − | |- |
||
| − | | [[File:Ganonscaaastle.jpg|center|100px]] |
||
| − | | {{Japanese|ガノン城 内部|Ganonjō Naibu|Ganon's Castle Interior}} || [[Ganon's Tower|Inside Ganon's Castle]] || || {{exp|Devil's Tower|Teufelsturm}} || || Interno del Castello di Ganon || Interior do Castelo do Ganon |
||
| − | |- |
||
| − | | [[File:Ghostshop.jpg|center|100px]] |
||
| − | | {{Japanese|ゴーストショップ|Gōsuto Shoppu|Ghost Shop}} || [[Ghost Shop]] || Marchand d'Ames || {{exp|Spectre Market|Gespenstermarkt}} || || Negozio di Spettri || Loja de Fantasmas |
||
| − | |- |
||
| − | |} |
||
| − | |||
| − | ===Kakariko Village=== |
||
| − | {| class="wikitable sortable" border="1" cellpadding="2" |
||
| − | |- |
||
| − | !width=100 class="unsortable"| Image |
||
| − | !width=180| Japanese |
||
| − | !width=140| English |
||
| − | !width=140| French |
||
| − | !width=140| German |
||
| − | !width=140| Spanish |
||
| − | !width=140| Italian |
||
| − | !width=140| Portuguese |
||
| − | |- |
||
| − | | [[File:Kakarikovillageoot.jpg|center|100px]] |
||
| − | | {{Japanese|カカリコ村|Kakariko Mura|Kakariko Village}} || [[Kakariko Village#Ocarina of Time|Kakariko Village]] || Village Cocorico || Kakariko || || Villaggio Kakariko<br>Villaggio Calbarico || Vila Kakariko |
||
| − | |- |
||
| − | | [[File:Kakarikowindmill.jpg|center|100px]] |
||
| − | | {{Japanese|風車|Fūsha|Windmill}} || [[Kakariko Windmill|Windmill]] || Moulin || {{exp|Mill|Mühle}} || || Mulino || Moinho |
||
| − | |- |
||
| − | | [[File:Btww.jpg|center|100px]] |
||
| − | | {{Japanese|三拍子の井戸|Sanbyōshi no Ido|Water Well of Three Features}} || [[Bottom of the Well|Well of Three Features]] || Le puits du mystère || {{exp|Well of Horror|Brunnen des Grauens}} || || Pozzo del Mistero || Moinho de Tres Lados |
||
| − | |- |
||
| − | | [[File:Houseofskulltula.jpg|center|100px]] |
||
| − | | {{Japanese|スタルチュラハウス|Sutaruchura Hausu|Staltula House}} || [[House of Skulltula]] || || {{exp|Skulltula's House|Skulltulas Haus}} || || Casa delle Aracnule || Casa Skulltula |
||
| − | |- |
||
| − | | [[File:Impa's House Interior.png|center|100px]] |
||
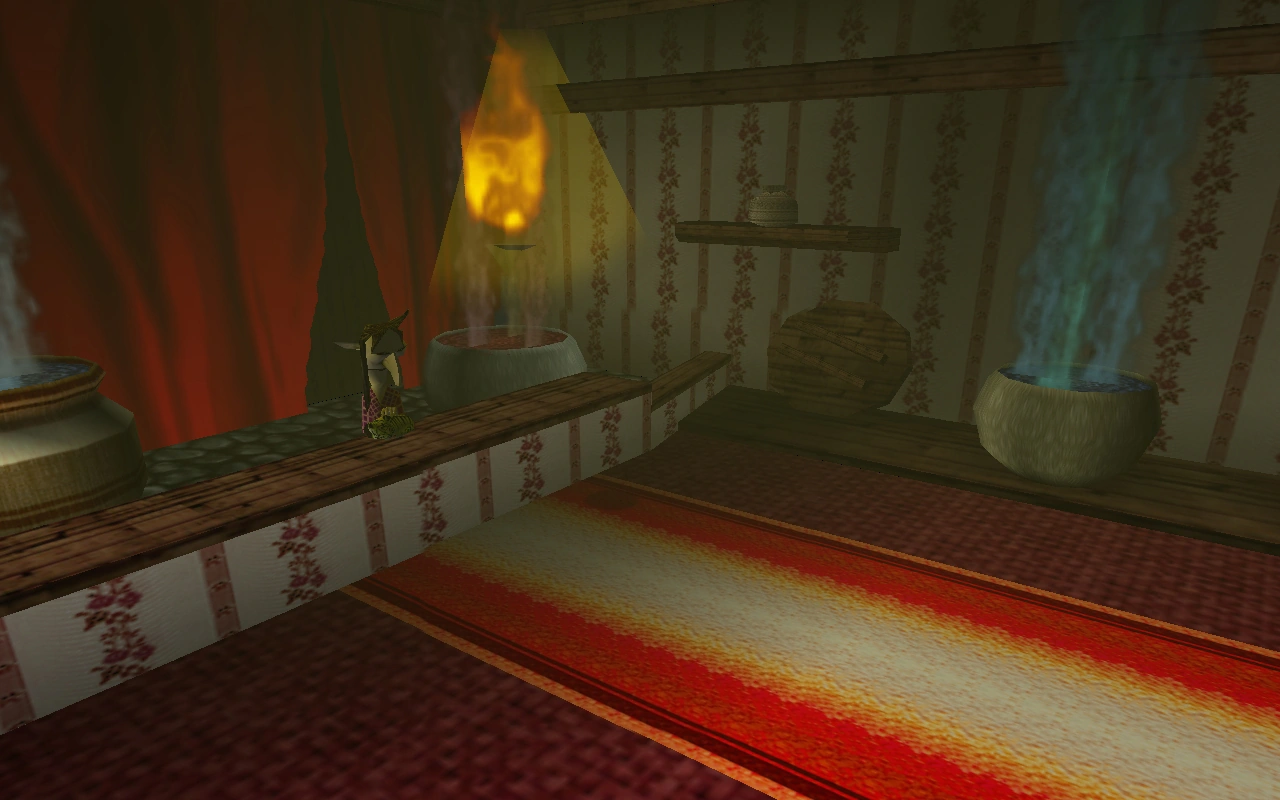
| − | | {{Japanese|インパ様のおやしき|Inpa-sama no O-Yashiki|The Great Impa's House}} || The Great Impa's House || Maison de la noble Impa || {{exp|House of the mighty Impa|Haus der mächtigen Impa}} || || Casa della Grande Impa || Residencia da Grande Impa |
||
| − | |- |
||
| − | | [[File:Potionshop2.jpg|center|100px]] |
||
| − | | {{Japanese|クスリ屋|Kusuri Ya|Medicine Shop}} || [[Medicine Shop]] || Apothicaire || {{exp|Magic Shop|Magie-Laden}} || || Negozio di Pozioni || Farmacia |
||
| − | |- |
||
| − | | [[File:Potionshop.jpg|center|100px]] |
||
| − | | {{Japanese|オババのクスリ屋|O-Baba no Kusuri Ya|Granny's Medicine Shop}} || [[Granny|Granny's Potion Shop]] || Apothicaire || {{exp|Asa's Witch Store|Asas Hexenladen}} || || Negozio della Nonna || Loja de Poçoes |
||
| − | |- |
||
| − | | [[File:Kakariko Bazaar.png|center|100px]] |
||
| − | | {{Japanese|なンでもや|Nandemo Ya|General Shop}} || [[Bazaar (Ocarina of Time)|Bazaar]] || Bazar || Basar || || Bazar || Mercearia |
||
| − | |- |
||
| − | | [[File:Shooting Gallery OOT.jpg|center|100px]] |
||
| − | | {{Japanese|的あて屋|Mato Ate Ya|Target-aiming Shop}} || [[Shooting Gallery]] || Jeu d'adresse || {{exp|Shooting Gallery|Schießbude}}|| || Sala del Tirassegno || Galeria de Arco-e-flecha |
||
| − | |- |
||
| − | | [[File:Ootgraveyard.jpg|center|100px]] |
||
| − | | {{Japanese|墓地|Bochi|Graveyard}} || [[Kakariko Village Graveyard|Graveyard]] || Cimetière || {{exp|Graveyard|Friedhof}} || || Cimitero || Cemiterio da Vila Kakariko |
||
| − | |- |
||
| − | | [[File:Royalfamilytomb.png|center|100px]] |
||
| − | | {{Japanese|王家の墓穴|Ōke no Boketsu|Royal Family's Grave}} || [[Royal Family's Tomb]] || || {{exp|King's Tomb|Königsgrab}} || || Tomba della Famiglia Reale || Tumba da Familia Real |
||
| − | |- |
||
| − | | [[File:Gravekeeper's Hut.png|center|100px]] |
||
| − | | {{Japanese|墓守りの小屋|Hakamori no Koya|Gravekeeper's Hut}} || [[Dampé's Shack#Ocarina of Time|Gravekeeper's Hut]] || || {{exp|Hut of the Gravekeeper|Hütte des Totengräbers}} || || Casa di Dampé || Casa de Dampe |
||
| − | |- |
||
| − | | [[File:Dampesgrave.jpg|center|100px]] |
||
| − | | ? || [[Dampé's Grave|?]] || || ? || || ?<br>Tomba di Dampé || Tumba de Dampe |
||
| − | |- |
||
| − | |} |
||
| − | |||
| − | ===Lost Woods=== |
||
| − | {| class="wikitable sortable" border="1" cellpadding="2" |
||
| − | |- |
||
| − | !width=100 class="unsortable"| Image |
||
| − | !width=180| Japanese |
||
| − | !width=140| English |
||
| − | !width=140| French |
||
| − | !width=140| German |
||
| − | !width=140| Spanish |
||
| − | !width=140| Italian |
||
| − | !width=140| Portuguese |
||
| − | |- |
||
| − | | [[File:Lost Woods.png|center|100px]] |
||
| − | | {{Japanese|迷いの森|Mayoi no Mori|Lost Woods}} || [[Lost Woods]] || Les Bois Perdus || {{exp|Lost Woods|Verlorene Wälder}} || || Bosco Perduto || Troncos Perdidos |
||
| − | |- |
||
| − | | [[File:Foreststage2.jpg|center|100px]] |
||
| − | | {{Japanese|森のステージ|Mori no Sutēji|Forest Stage}} || [[Forest Stage]] || Théâtre Sylvestre || {{exp|Forest Stage|Waldbühne}} || || Teatro Verde || Estagio da Floresta |
||
| − | |- |
||
| − | | [[File:Sfmeadow.jpg|center|100px]] |
||
| − | | {{Japanese|森の聖域|Mori no Sei Iki|Sacred Forest Ground}} || [[Sacred Forest Meadow]] || Bosquet Sacré || {{exp|Sacred Clearing|Heilige Lichtung}} || || Radura Sacra || Calabouço Sagrado da Floresta |
||
| − | |- |
||
| − | |} |
||
| − | |||
| − | ===Death Mountain=== |
||
| − | {| class="wikitable sortable" border="1" cellpadding="2" |
||
| − | |- |
||
| − | !width=100 class="unsortable"| Image |
||
| − | !width=180| Japanese |
||
| − | !width=140| English |
||
| − | !width=140| French |
||
| − | !width=140| German |
||
| − | !width=140| Spanish |
||
| − | !width=140| Italian |
||
| − | !width=140| Portuguese |
||
| − | |- |
||
| − | | [[File:Death Mountain OoT.png|center|100px]] |
||
| − | | {{Japanese|デスマウンテン|Desumaunten|Death Mountain}}<br>{{Japanese|デスマウンテンの山頂|Desumaunten no Sanchō|Death Mountain Summit}} || [[Death Mountain#Ocarina of Time|Death Mountain]]<br>Death Mountain Summit || Mont du Péril<br>Sommet du Péril || {{exp|Death Mountain|Todesberg}}<br>{{exp|Summit of the Death Mountain|Gipfel des Todesberges}} || || Monte Morte || Montanha da Morte |
||
| − | |- |
||
| − | | [[File:EDMT.jpg|center|100px]] |
||
| − | | {{Japanese|デスマウンテン登山道|Desumaunten Tozandō|Death Mountain Trail}}<br>{{Japanese|デスマウンテン登山口|Desumaunten Tozanguchi|Death Mountain Trailhead}} || [[Death Mountain#Death Mountain Trail|Death Mountain Trail]]<br>Death Mountain Trail Starting Point || Chemin du Péril || {{exp|Mountain Trail|Gebirgspfad}}<br>{{exp|Path to Death Mountain|Pfad zum Todesberg}} || || Sentiero del Monte Morte || Trilha da Montanha da Morte |
||
| − | |- |
||
| − | | [[File:Deathcrater.jpg|center|100px]] |
||
| − | | {{Japanese|デスマウンテン火口|Desumaunten Kakō|Death Mountain Crater}} || [[Death Mountain Crater]] || Cratère du Péril || {{exp|Death Crater|Todeskrater}} || || Cratere del Monte Morte || Cratera da Montanha da Morte |
||
| − | |- |
||
| − | | [[File:OoT Goron City Interior.jpg|center|100px]] |
||
| − | | {{Japanese|ゴロンシティ|Goron Shiti|Goron City}} || [[Goron City]] || Village Goron || Goronia || || Città dei Goron || Vila Goron |
||
| − | |- |
||
| − | | [[File:Goronshop.png|center|100px]] |
||
| − | | {{Japanese|ゴロンのお店|Goron no O-Mise|Goron Shop}} || [[Goron Shop]] || Boutique Goron || {{exp|Goron Shop|Goronen-Laden}} || || Negozio dei Goron || Loja dos Gorons |
||
| − | |- |
||
| − | |} |
||
| − | |||
| − | ===Zora's Domain=== |
||
| − | {| class="wikitable sortable" border="1" cellpadding="2" |
||
| − | |- |
||
| − | !width=100 class="unsortable"| Image |
||
| − | !width=180| Japanese |
||
| − | !width=140| English |
||
| − | !width=140| French |
||
| − | !width=140| German |
||
| − | !width=140| Spanish |
||
| − | !width=140| Italian |
||
| − | !width=140| Portuguese |
||
| − | |- |
||
| − | | [[File:ZoraDomain.jpg|center|100px]] |
||
| − | | {{Japanese|ゾーラの里|Zōra no Sato|Zora's Domain}} || [[Zora's Domain]] || Domaine Zora || {{exp|Zora's Realm|Zoras Reich}} || || Villaggio degli Zora || Dominio Zora |
||
| − | |- |
||
| − | | [[File:Zorariver.jpg|center|100px]] |
||
| − | | {{Japanese|ゾーラ川|Zōra Kawa|Zora's River}} || [[Zora's River#Ocarina of Time|Zora's River]] || Fleuve Zora || {{exp|Zora River|Zora-Fluß}} || || Fiume Zora || Rio Zora |
||
| − | |- |
||
| − | | [[File:Sleeplesswaterfall.jpg|center|100px]] |
||
| − | | {{Japanese|ねむらずの滝|Nemurazu no Taki|Sleepless Waterfall}} || [[Sleepless Waterfall]] || Cascade Insomniaque || {{exp|Restless Waterfall|Rastloser Wasserfall}} || || Cascata Insonne || Cascata Dormente |
||
| − | |- |
||
| − | | [[File:ZoraShop.jpg|center|100px]] |
||
| − | | {{Japanese|ゾーラのお店|Zōra no O-Mise|Zora Shop}} || [[Zora Shop]] || Boutique Zora || {{exp|Zora Shop|Zora-Laden}} || || Negozio degli Zora || Loja Zora |
||
| − | |- |
||
| − | | [[File:ZoraThroneRoomOoT.png|center|100px]] |
||
| − | | {{Japanese|キングゾーラの間|Kingu Zōra no Ma|King Zora's Room}} || King Zora's Throne Room || Salle d'Audience du Roi Zora || {{exp|King Zora's Throne Room|König Zoras Thronsaal}} || || Stanza del Re Zora || Quarto do Rei Zora |
||
| − | |- |
||
| − | | [[File:ZoraWaterfallTopOoT.png|center|100px]] |
||
| − | | {{Japanese|スキュウバダイビング練習所|Sukyūba Daibingu Renshūjo|Scuba Diving Training School}} || [[Diving Game|High Dive Practice Spot]] || Jeu du plongeon || {{exp|Extreme Cliff Diving|Extrem-Klippenspringen}} || || Cascata dei Tuffi || Jogo de Afundar |
||
| − | |- |
||
| − | | [[File:Zfountain.jpg|center|100px]] |
||
| − | | {{Japanese|ゾーラの泉|Zōra no Izumi|Zora's Fountain}} || [[Zora's Fountain]] || Fontaine Zora || {{exp|Zora's Spring|Zoras Quelle}} || || Sorgente Zora || Fonte Zora |
||
| − | |- |
||
| − | |} |
||
| − | |||
| − | ===Lake Hylia=== |
||
| − | {| class="wikitable sortable" border="1" cellpadding="2" |
||
| − | |- |
||
| − | !width=100 class="unsortable"| Image |
||
| − | !width=180| Japanese |
||
| − | !width=140| English |
||
| − | !width=140| French |
||
| − | !width=140| German |
||
| − | !width=140| Spanish |
||
| − | !width=140| Italian |
||
| − | !width=140| Portuguese |
||
| − | |- |
||
| − | | [[File:Lakehyliaoot.jpg|center|100px]] |
||
| − | | {{Japanese|ハイリア湖|Hairiako|Lake Hylia}}<br>{{Japanese|ハイリア湖畔|Hairia Kohan|Hylia Lake Shore}} || [[Lake Hylia#Ocarina of Time|Lake Hylia]]<br>Lake Hylia || Lac Hylia || {{exp|Lake Hylia|Hylia-See}}<br>Hylia-See || || || Lago Hylia |
||
| − | |- |
||
| − | | [[File:Lakesidelaboratory.jpg|center|100px]] |
||
| − | | {{Japanese|みずうみ研究所|Mizūmi Kenkyūjo|Lake Research Institute}} || [[Lakeside Laboratory]] || Laboratoire du Lac || {{exp|Laboratory at the Lake|Labor am See}}|| || || Instituto de Pesquisa do Lago |
||
| − | |- |
||
| − | | [[File:Fishingpondoot.jpg|center|100px]] |
||
| − | | {{Japanese|つりぼり|Tsuribori|Fish Pond}} || [[Fishing Hole#Ocarina of Time|Fishing Pond]] || Etang || {{exp|Fishing Pond|Fischweiher}} || || || Rio da Pescaria<br>Jogo da Pescaria |
||
| − | |- |
||
| − | |} |
||
| − | |||
| − | ===Gerudo Dersert=== |
||
| − | {| class="wikitable sortable" border="1" cellpadding="2" |
||
| − | |- |
||
| − | !width=100 class="unsortable"| Image |
||
| − | !width=180| Japanese |
||
| − | !width=140| English |
||
| − | !width=140| French |
||
| − | !width=140| German |
||
| − | !width=140| Spanish |
||
| − | !width=140| Italian |
||
| − | !width=140| Portuguese |
||
| − | |- |
||
| − | | [[File:Gerudo Valley.jpg|center|100px]] |
||
| − | | {{Japanese|ゲルドの谷|Gerudo no Tani|Gerudo Valley}} || [[Gerudo Valley]] || Vallée Gerudo || {{exp|Gerudo Valley|Gerudotal}} || || || Vale Gerudo |
||
| − | |- |
||
| − | | [[File:Gerudo Fortress.png|center|100px]] |
||
| − | | {{Japanese|ゲルドの砦|Gerudo no Toride|Gerudo's Fortress}} || [[Gerudo's Fortress]] || || {{exp|Gerudo Fortress|Gerudo-Festung}} || || || Forte Gerudo |
||
| − | |- |
||
| − | | [[File:OoTHideout.jpg|center|100px]] |
||
| − | | {{Japanese|盗賊団のアジト|Tōzokudan no Ajito|Thieves' Hideout}} || [[Gerudo's Fortress|Thieves' Hideout]] || || {{exp|Thieves' Hideout|Diebesversteck}} || || || Esconderijo dos Ladroes |
||
| − | |- |
||
| − | | [[File:Gerudo Training Ground Entrance.jpg|center|100px]] |
||
| − | | {{Japanese|ゲルドの修練場|Gerudo no Shurenjō|Gerudo's Training Ground}} || [[Gerudo's Training Ground]] || Gymnase Gerudo || {{exp|Gerudo Training Arena|Gerudo Trainingsarena}} || || || Campo de Treino Gerudo |
||
| − | |- |
||
| − | | [[File:Range.jpg|center|100px]] |
||
| − | | {{Japanese|やぶさめ場|Yabusame Ba|Horseback Archery Range}} || [[Horseback Archery Range]] || Archerie Montée || {{exp|Horseback Archery|Bogenschießen zu Pferde}} || || || Arqueria Garupante |
||
| − | |- |
||
| − | | [[File:Haunted Wasteland.jpg|center|100px]] |
||
| − | | {{Japanese|幻影の砂漠|Genei no Sabaku|Desert of Illusion}} || [[Haunted Wasteland]] || || {{exp|Spectre Desert|Gespensterwüste}} || || || Deserto da Ilusao |
||
| − | |- |
||
| − | | [[File:Desertcolossus2.jpg|center|100px]] |
||
| − | | {{Japanese|巨大邪神像|Kyodai Jashinzō|Giant Evil God Statue}} || [[Desert Colossus]] ||Colosse du Désert || {{exp|Desert Colossus|Wüstenkoloss}} || || || Colosso do Deserto |
||
| − | |- |
||
| − | |} |
||
| − | |||
| − | ===Dungeons=== |
||
| − | {| class="wikitable sortable" border="1" cellpadding="2" |
||
| − | |- |
||
| − | !width=100 class="unsortable"| Image |
||
| − | !width=180| Japanese |
||
| − | !width=140| English |
||
| − | !width=140| French |
||
| − | !width=140| German |
||
| − | !width=140| Spanish |
||
| − | !width=140| Italian |
||
| − | !width=140| Portuguese |
||
| − | |- |
||
| − | | [[File:Inside the Deku Tree.jpg|center|100px]] |
||
| − | | {{Japanese|デクの樹サマの中|Deku no Ki-sama no Naka|Inside the Deku Tree}} || [[Inside the Deku Tree]] || || {{exp|Inside the Deku Tree|Im Deku-Baum}} || All'interno dell'albero Deku|| || Dentro da Grande Arvore Deku |
||
| − | |- |
||
| − | | [[File:DCC.jpg|center|100px]] |
||
| − | | {{Japanese|ドドンゴの洞窟|Dodongo no Dōkutsu|Dodongo's Cavern}} || [[Dodongo's Cavern]] || || {{exp|Dodongo's Cave|Dodongos Höhle}} || Caverna Dodongo || || Caverna Dodongo |
||
| − | |- |
||
| − | | [[File:Jabu.jpg|center|100px]] |
||
| − | | {{Japanese|ジャブジャブ様のお腹|Jabu-Jabu-sama no Onaka|Jabu-Jabu’s Belly}} || [[Inside Jabu-Jabu's Belly]] || || {{exp|Jabu-Jabu's Belly|Jabu-Jabus Bauch}} || || || Estomago do Lorde Jabu-Jabu |
||
| − | |- |
||
| − | | [[File:Ft.jpg|center|100px]] |
||
| − | | {{Japanese|森の神殿|Mori no Shinden|Forest Temple}} || [[Forest Temple (Ocarina of Time)|Forest Temple]] || Temple de la Forêt || {{exp|Forest Temple|Waldtempel}} || Tempio della Foresta || || Templo da Floresta |
||
| − | |- |
||
| − | | [[File:Fft.jpg|center|100px]] |
||
| − | | {{Japanese|炎の神殿|Honō no Shinden|Flame Temple}} || [[Fire Temple (Ocarina of Time)|Fire Temple]] || Temple du Feu || {{exp|Fire Temple|Feuertempel}} || Tempio del fuoco || || Templo do Fogo |
||
| − | |- |
||
| − | | [[File:Ice Cavern222.jpg|center|100px]] |
||
| − | | {{Japanese|氷の洞窟|Kōri no Dōkutsu|Ice Cavern}} || [[Ice Cavern]] || || {{exp|Ice Cave|Eishöhle}} || || || Caverna de Gelo |
||
| − | |- |
||
| − | | [[File:Wtt.jpg|center|100px]] |
||
| − | | {{Japanese|水の神殿|Mizu no Shinden|Water Temple}} || [[Water Temple]] || Temple de l'Eau || {{exp|Water Temple|Wassertempel}} || Tempio dell'acqua || || Templo da Agua |
||
| − | |- |
||
| − | | [[File:Btww.jpg|center|100px]] |
||
| − | | {{Japanese|井戸の底|Ido no Soko|Bottom of the Well}} || [[Bottom of the Well]] || || {{exp|Bottom of the Well|Grund des Brunnens}} || || || Fundo do Poço |
||
| − | |- |
||
| − | | [[File:Shadowtempleinside.jpg|center|100px]] |
||
| − | | {{Japanese|闇の神殿|Yami no Shinden|Dark Temple}} || [[Shadow Temple]] || Temple de l'Ombre || {{exp|Shadow Temple|Schattentempel}} || Tempio dell'ombra || || Templo da Escuridao |
||
| − | |- |
||
| − | | [[File:Spirit Temple.jpg|center|100px]] |
||
| − | | {{Japanese|魂の神殿|Tamashī no Shinden|Spirit Temple}} || [[Spirit Temple]] || Temple de l'Esprit || {{exp|Spirit Temple|Geistertempel}} || Tempio dello spirito || || Templo Espiritual |
||
| − | |- |
||
| − | |}<noinclude>{{translations}}</noinclude> |
||
Latest revision as of 22:03, 28 January 2021
The following page is a list of the names of every named location appearing in Ocarina of Time in every release of the game. Ocarina of Time has been released in the following languages: English, Japanese, Simplified Chinese, Traditional Chinese, Canadian French, European French, German, Italian, Korean, Brazilian Portuguese, European Portuguese, European Spanish, and Latin American Spanish.[verification needed]
- Empty cells indicate that a name has not yet been found for that particular term in that language.
- Darkened cells (■) indicate there is no given name for that particular term in that language.
Locations
Link's Awakening (Nintendo Switch)
Bosses · Characters · Enemies · Items · Locations · Miscellaneous
Ocarina of Time 3D
Characters · Enemies · Items · Locations · Miscellaneous
Four Swords Anniversary Edition
Characters · Enemies · Items · Locations · Miscellaneous
The Wind Waker HD
Characters · Enemies · Items · Locations · Miscellaneous
Twilight Princess HD
Characters · Enemies · Items · Locations · Miscellaneous
Freshly-Picked Tingle's Rosy Rupeeland
Characters · Enemies · Items · Locations · Miscellaneous
Characters · Enemies · Items · Locations · Miscellaneous
Ocarina of Time · Ocarina of Time 3D · Majora's Mask · Majora's Mask 3D · The Wind Waker · The Minish Cap · Four Swords Adventures · Twilight Princess · Phantom Hourglass · Spirit Tracks · Skyward Sword · A Link Between Worlds · Tri Force Heroes · Breath of the Wild
Freshly-Picked Tingle's Rosy Rupeeland · Link's Crossbow Training