Important Disclaimer! While many of these glitches have been tested by editors, we cannot promise that these glitches won't harm your game data or game console. We ask that you please read the Glitch Disclaimer Notes before attempting any of these glitches.
The following is a large list of all the known glitches that can be performed in Breath of the Wild. Each glitch will come with instructions on what the glitch does, how to perform the glitch, and if the glitch has been patched (i.e. fixed) or not.
Makes Link sprint at almost top speed without losing Stamina.
Requirements
None
Instructions
While moving, hold down on the D-Pad and repeatedly tap the sprint button (B).
Notes
Ideally, the player should alternate between normal sprinting and whistle sprinting for on-foot traversal, since normal sprinting is still slightly faster.
Even when no audible sound is being made, the game still treats this as constantly whistling; because of this, whistle sprinting will alert nearby enemies and other wildlife of your presence.
A similar glitch — "Throw Sprinting" — can be performed by simultaneously pressing B and R repeatedly with a weapon equipped. This has the advantage of not making as much noise, but it is also more awkward to perform and gives less consistent speed.
Fast Travel Softlock[]
This glitch has been patched.
Fast-Travel Softlock
Effect
Softlocks the game.
Requirements
Must has a registered Horse and access to an Ancient Shrine saved as a travel point on the map.
Instructions
Position your Horse on the travel point in front of a shrine entrance. Then, travel to the same Shrine as the one the Horse is positioned on. If done correctly, Link will show up at the travel point but will be placed on the Horse at an incorrect angle, softlocking the game.
Notes
To get out of the softlock, the game must be closed out of or reset, so make sure to save before trying this.
Position your Horse so it's parallel to a wall. Once this is done, jump off of it by pressing X and save your game before you touch the ground, then reload that save. You should spawn inside the wall behind the Horse, allowing you to move around out of bounds.
Notes
If you're trying this glitch in a place like Hyrule Castle, which allows exploration of the ground beneath it, it's recommended you save beforehand as otherwise you may have to backtrack to find and get back your Horse. Otherwise, stick to areas with at least a travel point (ancient shrines, Sheikah Towers, etc) nearby.
If the player tries to climb a steep cliff or wall with a Horse, it will start to fall. If the player quickly turns around as the Horse is falling, but still on the cliff, the Horse will begin to slide downward slanted, seemingly leaning against the air. The Horse will continue to slide until the lower half of it moves through the ground.
Notes
Once Link reaches ground point, he will jump off automatically and the Horse will return to normal. Jumping off at any point will end the glitch sooner.
Missing Chief Softlock[]
This glitch has not been patched.
Missing Chief Softlock
Effect
Makes Riju disappear from a cutscene, softlocking the game.
Requirements
Must have access to Gerudo Town but haven't met Riju yet.
Instructions
Not yet thoroughly tested. Approaching the throne to start the cutscene while Riju is not sitting on it seems to be the most likely cause. On Wii U it might be triggered by repeatedly switching the game view from TV Screen to Wii U gamepad during the cutscene with voice acting.
Notes
To get out of the softlock, the game must be closed out of or reset or the game console must be shut off, so make sure to save before trying this. Works on both Wii U and Switch versions of the game.
Endless Magnesis[]
Endless Magnesis
Effect
Magnesis will attempt to attach to a metal object but can't so it will get stuck endlessly trying to reach the object.
Requirements
Instructions
Go to any metal block anywhere in Hyrule or spawn one in with an amiibo. Start using Magnesis and stand as far back as it can reach the block. Activate Magnesis and simultaneously rotate the camera so it faces Link. If done right, Magnesis should get stuck trying to reach the block but not able to attach to it. As long as the camera is kept facing away from the block, Link can walk around holding the endless chain of Magnesis. The glitch will be cancelled if Link is hit by an Monster, manually cancels the Magnesis, or if the camera is turned back to face the block. Sometimes it will be canceled automatically after a random time period.
Dark Beast Ganon Out of Bounds[]
Effect: Allows Link to explore Hyrule outside of the Dark Beast Ganon fight. Also allows Link to use the Bow of Light where he normally isn't supposed to.
Notes: You can even use your horse outside of the border. However, during exploration certain NPCs may not exist (e.g. staff members at stables, etc). Note that if you save in this state, you may not be able to get back in bounds, potentially softlocking your game (although you could still move around out of bounds). You'll either be forced to reload from a previous save or start a new game.
How To: There are three ways to do this.
Method One[]
This method was patched.
How To: Ride your horse up to the light border which normally is supposed to prevent Link from leaving the fight. Line your horse up so it's walking along the border, and dismount it. If Link dismounts on the correct side, he'll clip outside of the border allowing him to explore Hyrule at a time he normally isn't supposed to.
Method Two[]
How To: Activate Minigame storage with the Birdman Minigame (disable water physics.) Then fight and beat Ganon. When you go to Dark Beast Ganon, mess around. Unfortunately, we're not sure exactly how we got out of bounds, but it appears to be climbing in a certain spot.
Notes: If the NPC that offers the minigame says, "Huh? You're supposed to be gliding as far away from the tower as possible!" and teleports you back, the glitch worked.
After you are in the Dark Beast Ganon fight, climb anything. This will cause Branli to bring you back to the tower, however the Bow of Light will remain in your inventory.
Method Three[]
How To: At the start of the battle, collect the bow of light and do a U-Turn then go to the barrier straight behind of where you originally spawn. Find the metal box to the right and use it to launch yourself with stasis through the barrier. This is best done by using magnesis to put the box next to the barrier with a bit of space for Link to go. Then place a square bomb on the opposite side of the barrier and walk into the gap between the box and the barrier. Activate stasis, then hit the box until the time is almost up, then switch to your bomb and activate it, switching the direction of stasis.
Notes: This is best done on the road to the right of the boxes, sometimes part of the ground will glow as well. Lining up the box so Link is pressed into the wall and the game says "You can't go any farther." should be a good place.
Method Four[]
How To: Get the bow of light, then head to Mabe Village Ruins. Then go to the big rock behind. You'll find that you can't go to the rock behind, so find the three trees near it. Go to the leftmost tree. Take your shield out, backflip, and then shield surf onto the tree. To check if you have a good skew, go to the side, shield surf, and remove your shield mid-air and keep pressing the right directional button. If link tilts to the right while doing this, then you have a good skew. Next, go between the tree and the barrier, and shield surf onto the light barrier, then unequip you shield once you hit the barrier.
Notes: Before you do this, make sure to undo any other skew you might have done, or else this might not work.
Calamity Ganon Softlock[]
Method One[]
Effect: Softlocks the Calamity Ganon battle.
How To: Perform the Minigame Storage glitch with the Birdman minigame, then get to Zelda's castle. Finish the fight against Calamity Ganon. Once the Dark Beast Ganon battle starts, Branli will pull you out of bounds. From there, retrace back to Zelda's castle and start the Calamity Ganon battle again. Once the cutscenes have finished, Calamity Ganon will vanish. This results in the battle being softlocked, forcing you to load a different save, close the game, or die.
Notes: Only Calamity Ganon will disappear. You can still do any actions possible with Link.
Method Two[]
How To: Clip out of bounds using one of the above strategies, then return to the Sanctum where the Calamity Ganon fight was initiated. After playing or skipping the cutscenes, there will be a black loading screen that never goes away, requiring the game to be restarted.
Notes: Returning to the Sanctum itself does not result in the softlock, only upon entering the bounds in which a fight would occur causes it to softlock. This was tested after defeating all Divine Beasts, results may vary.
Zelda Mute[]
Effect: Mutes Zelda during the Dark Beast Ganon battle
How To: After escaping Dark Beast Ganon, talk to a traveling NPC near the fight. The NPC should pause for a bit, then time will resume without Link exiting the dialogue box. When time resumes, get on a horse and start pressing A. Eventually, the screen should show a blank dialogue box and Zelda should stop talking.
Notes: Doing anything that opens a dialogue box resets the glitch.
Fight the Wrong Boss[]
Effect: Causes invisible Divine Beasts and maps, crashes the game.
Prerequisites: Requires Champion's Ballad DLC, the Divine Beast that Link travels to must have been beaten for the second time.
How To: Use any method to escape the Dark Beast Ganon fight, then go to the Divine Beast of choice. Upon entering its area, there will be a prompt to enter the Illusory Realm again and enter the Blight battle. Select yes, and the fight will load in but with most of the Beast and map missing. If Link dies during the fight and chooses to continue, the game will crash. Winning the fight seems to take Link back outside the Beast as normal.
Notes: The fights are significantly more difficult as most of the assets are not visible. Some assets, like the sliding doors on the roof of Vah Rudania, are completely removed. This makes fighting the Blight much more difficult, especially in Master Mode in which not hitting the Blight for long enough causes it to heal.
Effect: Causes a Guardian's beam to freeze on Link.
How To: Randomly when deflecting a small Guardian, such as a Guardian Scout's, beam, the beam will get stuck on Link.
Notes: The beam will continuously deal damage as long as it is in contact with Link. Jumping and having the beam deal damage while Link is in the air will cause the beam to fly off, ending the glitch.
Bullet-Time Bounce[]
Link about to bounce off a frozen Bokoblin while in 'Bullet time'
Effect: Launches Link extremely fast in any direction.
Prerequisites: A Shield, a Bow, an enemy, and an item to freeze said enemy (if the enemy is not a red variation).
How To: To perform this glitch, you will need an enemy. Go to a ledge or vantage point overlooking the enemy; if they are not a red variation, they must be frozen before attempting this glitch. Use Shield Surfing to jump off the ledge (i.e. Shield Jump) and pull out the Bow to slow time mid-descent. If your shield lands on the enemy during the slow-down, immediately stop slow-down by pressing Y, unequipping the bow, or pressing B twice. If performed correctly, Link will fly at a vastly accelerated speed; this can be combined with the Paraglider to cross impressive distances.
Notes:
This glitch is caused by an oversight in the physics of slow-down. Link's interactions with ragdolling enemies are not properly converted to be slowed down; however, the game will still attempt to reconvert these physics when returning to normal speed, causing said interaction to be up to 20 times more potent intended.
The direction of the bounce is dependent on the location of the enemy's body Link's shield lands on.
Putting away the shield after successfully performing the bounce will kill Link's forward speed; conversely, because Link is on his shield, the player can bring out and put away the Paraglider to preserve stamina without losing speed (they will, however, slightly lose height).
The sooner the player cancels the slow-down upon contact with the enemy, the more potent the bounce will be. For the most ideal results, cancel on the first frame of contact (this can be easily done by buffering with the Bow Selection menu).
Voice Acting Switch[]
Effect: After switching languages, the cutscene's subtitles will be in the right language, but the voice acting will be in the language in which the cutscene was first seen by the player.
How To: Play the game in one language until you find a re-watchable cutscene, then save. Go into the console menu and switch the language. Go back into the game and rewatch the cutscene.
Notes: Only been tested on Switch. Not sure whether new cutscenes will play in the correct language.
Daruk's Perfect Parry[]
Daruk's Perfect Parry
Effect:Daruk's Protection will be activated without consuming an use of the ability.
How To: As soon as you get hit, release ZL.
Notes: Can even prevent you from taking fall damage.
Bow Spinning[]
Bow Spinning
Effect: Lets you perform a spin attack with the bow // Lets you use the effects from elemental weapons indefinitely.
How To: Equip a heavy weapon and hold Y, then press ZR and B at the same time.
Notes: The blade will still get damaged and you'll have lower reach.
Mini Guardian Combo[]
Effect: Lets you hit the Mini Guardian 2+ times very fast.
How To: Hit the guardian and immediately press X and Y.
Notes: It has to be a shrine with shallow water. Only blades work.
Flying Ganon[]
Effect: Makes Calamity Ganon fly.
How To: Hit its legs while Ganon is on the wall.
Fall Damage Cancel[]
Effect: Resets Link's ground position, allowing him to fall from great heights without taking fall damage.
How To: Hold R to ready weapon throw when in the air or walking off ledge. As you release R, equip another one or unequip using right on the D-Pad. If done correctly, Link will keep both weapons but the fall timer will be reset and damage will not be taken if done close enough to the ground.
Scope Clipping and Clip Out of Shrine of Resurrection[]
Effect: Clip through walls with your scope/camera rune.
How To: Position yourself next to a wall or a corner. Walk towards it while the camera faces the opposite direction. Now use your rune.
Notes: This does not work everywhere. This can be used to clip outside of the Shrine of Resurrection, allowing you to skip the opening cutscene.
Hold Weapon in Second Cutscene[]
Effect: Link holds a weapon during the cutscene in which the Shrine of Resurrection opens to the outside world.
How To: (Requires more testing, this is the method that worked for me.) Use the above Scope Clipping glitch to leave the Shrine, then clip back into bounds using the standard speedrun method in the snowy area. Activate the cutscene on the cliff (either inside the wall or in the normal world), then grab a weapon. This was tested after activating the Tower and getting the greatsword from the Ja Baij (bomb) Shrine. Teleport or clip back into the SoR then activate the pedestal that leads outside. Link will equip the weapon in his hand after taking out the Sheikah Slate and hold it until the animation ends.
Explore Under the Map[]
Effect: Allows Link to clip underneath the map by combining two glitches.
Prerequisites: Clip out of the Shrine of Resurrection using the above method, then save and set up Moon Jump. After warping away, load the save outside of the SoR. Moon Jump will be active.
How To: Set up the two glitches, then go to one of the large holes on the left side of the water underneath the Shrine. Fall into the largest hole on the left and start moving around until Link clips through the ground. There is no specific method for clipping quickly and bombs are inconsistent, so keep moving and trying things until the clip is achieved. If a wind-like falling sound starts to play, stop moving as this often means Link is close to clipping. Once Link is under the ground, use the Moon Jump and Cryonis blocks to explore under Hyrule.
Notes: Various land areas like the one to the west near the Digdogg Bridge will allow Link to summon the Master Cycle, if obtained, to cancel the Moon Jump. The Travel Medallion cannot be placed, and horses with the Ancient Saddle cannot be called. Currently there does not seem to be a way to clip back into bounds without warping. Attempting to save and reload while under the map will place Link back under the Shrine but above the ground. It is usually possible to jump out of the water if Link falls in, but going into one of the super tall waterfalls will trap Link until warping. Remember that while in the Moon Jump state, due to the uneven terrain Link will often be put into the slow walk state and may not be able to recover stamina.
Horse Scope Clipping[]
This glitch was patched.
Effect: Clip through walls using your horse.
How To: Position your horse next to a wall, then use your scope to rotate it by 90°, so that the back of the horse is in the wall. If needed, you can shield jump off from it.
Notes: If there is not enough room for the horse, it's easier.
Stasis Clipping[]
Effect: Clip through walls using objects.
How To: Position an object (Boxes are perfect for this) next to a wall, with a little gap between. Stasis it and hit it a few times so that it'll launch towards the wall. Now stand between it and push towards the object.
Ollie Clipping[]
Effect: Clip through the ground.
How To: Shield jump and enter Bullet Time. 1 frame before you hit the ground: Start mashing X. Then, if you stay in Bullet Time, repeat a pattern of three or two X presses.
Notes: If you run out of stamina during the process, it can lead to Infinite Shield Surfing.
Notes: As the pillar is completely solid, you can get pushed out.
Blood Moon Clipping[]
Effect: Clip through the ground using the Blood Moon cutscene.
How To: Position yourself on a spot where you killed a Guardian Stalker or Turret. Wait until a Blood Moon triggers. After the cutscene, you'll get pushed through the ground by the Guardian.
Notes: This can be used to clip inside Hyrule Castle.
Locked State[]
Effect: You won't be able to move or rotate, it can lead to other weird stuff.
How To: Jump from a hill with your bike - If it despawns as you touch the ground, it should've worked.
Spinning Head[]
Effect: Link will rotate his head until you crouch.
How To: Get a wooden shield with an arrow on it and open the map for the first time.
Notes: It must be the first arrow you have collected in this file.
Skew Storage[]
Effect: Stores Link's orientation from when he last shield surfed.
How To: Cancel shield surfing as soon as Link hits the ground. This can be done automatically by shield jumping against a slope.
Notes: To use the skew, unequip the shield during Link's boarding animation. The stored skew persists through loading screens. You will lose your skew if Link touches the ground while surfing or completes his boarding animation.
Shield Clipping[]
Shield Clipping Tutorial
Effect: Clip through walls using a shield.
How To: Store a skew facing the same direction as the wall you want to clip into, shield jump, then unequip your shield as Link boards his shield.
Extended Shield Clipping (ESC)[]
Effect: Clip through walls using a shield (More wall options).
How To: The same as Shield Clipping, but in the frame you snap back from your skew, pull out your shield by pressing ZL and A. Then unequip the shield immediately.
Notes: This even works on most solid walls.
Instant Shield Clipping[]
Effect: Clip through walls using a shield.
How To: ESC, but instead of storing a skew, shield jump off from a slanted surface, then unequip the shield. Then immediately shield surf and unequip the shield.
Notes: Is less consistent than ESC.
Skew Bounce[]
Effect: Bounce really high by shield jumping.
How To: Set a skew while in Bullet Time.
Notes: Make sure you face against the wall so shield surfing is canceled on the same frame you hit the ground.
Fosbury Flop[]
Effect: Launches Link upwards.
How To: Shield Surf, perform a trick with Y, jump and unequip your shield a frame after.
Stasis Launch[]
Stasis Launch
Effect: Launches Link by using Stasis on an object.
How To: Stasis a box or rock and hit it repeatedly. Either hold on or stand ontop of the object as it launches away.
Notes: This leads to Super Launching. This method is commonly used in speedruns on the rock outside of the shrine where Stasis is unlocked.
Super Launching[]
Effect: Launches Link by using Stasis on an object. Maintain the speed by using the Paraglider.
How To: Stasis Launch, but jump into the trajectory of the object as it gets launched.
Bullet Time Launch[]
Effect: Launches an object upward at extreme speed.
How To: Place an object over water and stand on a ledge you can activate Bullet Time from. Create a Cryonis Pillar underneath the object and activate Bullet Time as the pillar is raising.
Notes: Does not work with some objects, such as horses. The timing will determine how far off the object will be launched. The ideal timing is when the Cryonis Pillar is raising the fastest. If performed with the Master Cycle or another big object such as rafts and crates, Link can launch himself with the object by jumping over them before activating Bullet Time.
Bullet Time Storage[]
Effect: Lets you walk in Bullet Time.
How To: Create to Cryo Pillars with a little gap between. Stand on the gap and jump. As you touch the ground, enter Bullet Time. Then repeatedly press R and B.
Flying Machine[]
Flying Machine
Effect: Fly using two metal objects and magnesis.
How To: Place two objects ontop each other. The lower object must contain metallic parts. Then, climb up to the upper object and use magnesis on the lower one to raise the machine.
Notes: This is most stable when done with two minecarts ontop each other, or a crate ontop a minecart. Pressing up on the D-Pad will accelerate the machine, whereas pressing down will de-accelerate it. Link can balance the machine using his own weight.
Horse Sliding[]
Horse Sliding
Effect: Get momentum by dismounting your horse/bike.
How To: Get to a steep slope and place your vehicle parallel to it. Mount it by holding ZL and pressing X.
Notes: The distance and speed depends on the distance you've ridden, the direction depends on the direction the slope was facing.
Bomb Smuggling[]
Effect: Makes Link stuck in the Bomb Holding animation // Invisible Bomb.
How To: Stand next to a seal, press R and A very quickly.
Seal Sliding[]
Effect: Make Link rotate insanely fast.
How To: Use Bomb Smuggling and pull out your bow. Then dismount the seal and mount another one.
Stuck with a Seal[]
Effect: Get stuck until the seal wakes up.
Prerequisites: Must have a shield equipped.
How To: Stand next to a seal, hold ZL, press A and immediately use your bow.
Shield Sliding[]
Effect: Removes the turn radius of Shield Surfing.
How To: Stand next to a seal and press A and B very quickly.
Notes: This stays once you restart the game // Trying to mount a seal can crash the game.
Shield Hovering[]
Effect: Makes you shield surf in the air.
How To: Make Link rotate (By using a Horse or ESC). Position the horse on a slope next to a wall and hold ZL, press A and X. If Link touches the wall while he is tilted, he'll start surfing in the air.
Notes: Shield Slide required.
Horse Stamina Refresh[]
Effect: Remounts a horse very quickly, restoring their stamina faster than usual.
How To: Have a shield and a bow equipped. While on the horse: Hold ZL, A and ZR and press X.
Notes: This works better over flat terrain.
Arrow Duplication[]
Effect: Farm arrows very quickly.
How To: Use a multishot bow (preferably x5 but any bow that has a multiplier works) to shoot into a lit torch in the Lost Woods or Kara Kara Bazaar. The arrows shot will not despawn.
Notes: A very consistent method is to stand to the side of the cooking pot in Kara Kara Bazaar. Aiming at the tent slightly to the right of the soup ladle will allow quick collection of arrows while the bow reignites after firing, since it angles down into the fire under the pot.
Sword Smuggling[]
Effect: Hold a weapon until you use it. You can perform any action while holding it.
How To: Spawn a bomb, pull out your weapon, press B to unequip it, pause as Link is still in his unequipping animation, unequip your shield. Unpause, then pick up the bomb.
Notes: The glitch will end if you draw your smuggled weapon.
Bow Smuggling[]
Effect: Hold a bow until you use it. You can perform any action while holding it.
How To: Either use the Sword Smuggling setup or stand in front of a bomb or a rock, then hold ZL and press ZR and A.
Hold Smuggling[]
Hold Smuggling + Dead Link Inventory
Effect: Lets you hold an item everywhere.
How To: There are multiple ways to do this.
Method One[]
Drop a Fire Jelly and hit it with a sword. As you get damage, hold an item and teleport.
Method Two[]
Stand shoulders deep into water. Hold an item, jump and spawn a bomb. Detonate the bomb, and n the third frame of the explosion animation, pause the game and teleport away.
Dye Clothes With Any Ingredient[]
Effect: Allows Link to dye his clothes any color with any ingredient.
How To: Perform Hold Smuggling with five items of any kind, then talk to Sayge. The smuggled ingredients will be used for the dye.
Stand on a Horse/Bike[]
Effect: Stand on a Horse/Bike.
How To: After you performed Hold Smuggling: Get a wooden shield with an arrow on it and mount the Horse/Bike.
Notes: It has to be the first arrow in this file.
Horse in Teba Cutscene[]
Effect: Stay at the Flight Range // Become very long // Instant Death // Softlock
How To: Talk to Teba while sitting on a horse.
Reset Runes[]
Effect: Lets you reset the Runes' recharge timer.
How To: Watch a memory.
Free Compendium Pictures[]
Free Compendium Pictures
Effect: Lets you complete up to 1 page of the Hyrule Compendium for free.
Prerequisites: Must not have obtained Symin's free picture yet.
How To: Go to a merchant in Hateno, select an item you have the most of, select sell all and cancel, then talk to Symin.
Weapon Durability Glitch[]
Effect: Lets you use weapons without damaging it.
How To: Press Y and switch the weapon 1 frame before the enemy gets hit.
Shield Durability Glitch[]
Effect: Use a shield without damaging it.
How To: Swap out your shield during a flip mid-air.
Burn Timer Reset[]
Effect: Lets you survive in the Death Mountain area.
Prerequisites: Have a two handed equipped.
How To: Once you start burning, hold Y, then let go of it.
Notes: Link will take a small amount of damage when the burn timer starts. Counter this by healing when low.
Blood Moon Timer Reset[]
Blood Moon Timer Reset (skip to 0:53)
Effect: Skips the Blood Moon refreshing the game world, but still resets the timer as if the Blood Moon had happened.
How To: Use a Travel Gate (or a placed Travel Medallion) to warp away just before the clock strikes midnight. You will know you did it correctly if, upon arrival at the destination, no cutscene plays, the clock shows midnight, and only Malice particles are about, no red sky effect.
Guardian Stalker Stasis+ Clip[]
Guardian Stalker Stasis+ Clip
Effect: Makes a sleeping Guardian Stalker clip through the ground. Will reset if Link leaves the area.
How To: Use Stasis+ on a Guardian Stalker while it is still sleeping.
WARNING: Does not work on all sleeping Guardian Stalkers, and the ones that don't clip will wake up normally instead. For example, the one on Lomei Labyrinth Island will NOT clip through the ground with this glitch; they need to be attacked while under the effects of Stasis+ in order to clip properly. However, this is not feasible with the Lomei Island Guardian, as it is already awake if Link teleports to the shrine and wakes up too quickly if the island is approached from the south.
Notes: Guardians that do not clip through the ground after Stasis+ wears off cannot be targeted by pressing ZL. Guardians that do clip through the ground may still be able to aim at Link for a short time.
Bomb during Revali's Gale[]
Effect: Hold a bomb while you rise up.
How To: Hold X, let go of X and immediately use your bomb.
Horse Factory[]
Horse Factory
Effect: Spawn horses yourself.
How To: Make a boko dismount the horse (Don't kill it!) and go away. The boko will despawn, the horse will stay.
Notes: If there are ≈200 or 250 horses on the screen, it can cause a panic blood moon which results in a crash.
Healing on a Horse[]
Effect: Transfers the Hot Spring Water effects to your horse until you dismount.
How To: Place your horse on a warp point, then go into spring water -> Teleport to the horse.
Get Damage on a Horse[]
This glitch was patched.
Effect: Makes you die very quickly.
How To: Place your horse on a warp point, then go into icy water -> Teleport to the horse.
Notes: The cooldown won't exist anymore, so you pretty much die instantly.
Infinite Guardian Parts[]
Infinite Guardian Parts
Effect: The guardian will spawn an unlimited amount of guardian parts. // Lags the game very hard.
How To: Move one of those four guardians two quadrants away from their spawn point.[1]
Infinite Treasure Chests[]
Effect: Lets you open your chest repeatedly.
How To: Move an iron chest two quadrants away from its spawn point, open it, and reload. The chest will be still there.
B-Lock[]
Effect: Causes five glitches: Stuck in place, Stuck in running animation, Moonwalk, Slide, Hover
How To: Pull out your bow and press B -> Immediately unequip your shield during the unequipping animation.
B-Lock: Stuck in Place[]
Effect: Makes you be stuck in place, but you can still rotate in the standing animation.
How To: After performing B-Lock: Jump while holding B and don't let go of B.
B-Lock: Stuck in Running Animation[]
Effect: Makes you be stuck in the running animation // You can't move at all
How To: After performing B-Lock: Jump while holding B and moving and don't let go of B.
B-Lock: Moonwalk[]
Effect: Lets you moonwalk.
How To: After performing B-Lock: Walk into any direction while holding ZL, hold B (Don't let go of it), let go of ZL.
B-Lock: Slide[]
Effect: Replaces the running animation with the standing animation.
How To: After performing B-Lock: Hold ZL, jump and start holding B mid-air. Then don't stop moving or holding B.
B-Lock: Hover[]
Effect: Makes you stuck mid-air.
How To: After performing B-Lock: Climb a small step while holding B. Letting go of B fixes it.
Ragdolling Bokoblin[]
Effect: Makes a bokoblin stuck in the ragdolling animation.
How To: Let a moblin throw a bokoblin, then freeze/electrocute it once it touches the ground.
Glitched Shop Items[]
Effect: Lets the shop display glitched items.
How To: Stand in front of the item, place a bomb. Pick it up and pause buffer. If you pause, there'll be one frame that displays the incorrect number of rupees, melee damage etc.
Flying Rope[]
Effect: Places a seal rope mid-air.
How To: Stand next to a seal -> Press A and B a few frames later.
Notes: The next time you're trying to mount a seal, it won't work.
Invisible Link[]
Effect: Make Link hold an invisible rock which turns him invisible.
How To: Pick up an item as it falls from a ledge. Then turn the camera away from the point where you dropped it.
Notes: Walking away will fix the glitch.
Goddess Glitch[]
Effect: Spawns particles indefinitely, which lags the game.
How To: If you have full hearts and stamina (To do this: [Apparatus Glitch: Heart Duping], talk to the goddess in the Temple of Time repeatedly.
Hyrule Overloading[]
Hyrule Overloading
Effect: Overloads the game which leads to weapon duping and other weird stuff.
How To: Escape the Dark Beast Ganon fight by using Stasis Clipping or Shield Clipping, then enter Hyrule Castle and leave it repeatedly. Do this 180 times and Ganon should despawn, and the inventory should show a glitched Link.
Lizalfos Curse[]
Lizalfos Curse (11:11)
This glitch was patched.
Effect: Makes NPCs, enemies and Link rotate forever and crashes the game sometimes.
How To: Push the three Lizalfos from the rock.
Notes: This is a Switch exclusive glitch.
Flying Guardian Boat[]
Flying Guardian Boat (11:00)
Effect: Makes a flying raft.
How To: Place a guardian ontop of the raft. Then, if needed, place a cryonis block underneath.
Sanctum Zip[]
Effect: Warps you back to the Ganon fight, but immediately pushes you out again.
How To: Escape the Calamity Ganon fight and fall down to the ground while holding a bomb or an item.
Delete Koroks[]
Effect: Avoids spawning Rock Koroks until you reload the game or warp.
How To: Explode a bomb at the same time you lift the rock. Then stasis launch it away. It won't spawn the Korok anymore.
Floating Campfire[]
Effect: Makes the campfire float until you exit the dialogue box.
How To: Place a campfire next to a tower's pedestal and use it.
90s Loading Screen[]
Effect: Makes reloading take much longer.
How To: Reload while you have 1 bomb on screen and are in Bullet Time.
Mess with Dye Cutscene[]
Effect: Makes Link T-Pose and other funny stuff.
How To: Place a box where Link gets dyed // Use your ancient saddle inside the building and dye your clothes while you sit on a horse.
Malice Glitch[]
Effect: Damages the horse once you look at it or walk near it.
How To: Jump off the horse once it touches the malice.
Kilton Overload[]
Effect: Drastically lags the game.
How To: Place objects where Kilton spawns and wait at a campfire. If done with a horse, this will push Kilton outside his shop.
Korok Softlock[]
Effect: Softlocks the game.
How To: Watch a memory in the exact frame a Korok Puzzle is solved.
Camera Glitch[]
Effect: Walk around freely while in the camera state.
Prerequisites: Any Shield, Camera Rune
How To: Hold your shield with ZL, then ready a weapon throw by holding R. Release ZL but keep holding R, then open your camera with L and push in the left stick to crouch at the same time, then release R. You'll know if you did this right, because Link will be moving much slower then usual in the camera state, and Link's shadow will show him crouching.
Notes: This glitch had a misconception that changing to Self-Portrait mode will not allow Link to move around. This is not true, as the X button causes Link to jump and ends the glitch instead of giving him free-roam.
Apparatus Glitch[]
Apparatus Glitch + Every side effect
Effects: Gives control of both the Apparatus and Link, makes Link invincible and gives infinite stamina (it still appears to drain, but will not stop him from running/gliding). Leads to Heart Duping, Early Master Sword, Void out everywhere, Climate Immunity, Death Mountain Effect everywhere, transferring potion effects, free rupees, broken paraglider, and ragdolling/regaining control underneath the shrine boundaries.
How To: Perform the Camera Glitch in a shrine with an apparatus. When in the camera menu, press A on the Apparatus to both Examine and Capture Image at the same time. Select Delete and immediately pause, hold an item, unpause, then pause again and watch a memory. Unpausing allows control of both Link and the Apparatus and lead to the glitches below.
Notes: This glitch stops once you open a menu. Watching a memory again will cause a softlock after closing the menu; the apparatus can still be controlled but no other buttons/movements will respond.
Apparatus Glitch: Heart Duping[]
Effect: Lets you duplicate hearts and stamina using the cursed statue in Hateno Village (At least four hearts are required).
How To: Sell any number of Link's essences to the statue. Note that this value will be doubled by the glitch, regardless of whether hearts or stamina is sold. Save the game, then buy back the essences. The game will autosave a few times during this process. Perform the apparatus glitch, then pause and load the save that YOU made after selling to the statue (NOT the autosave!) then talk to the statue again. The statue will still have the essences sold to it, and Link will still have the amount of hearts and stamina received from buying them back the first time. Buying the glitched essences will result in the duplication.
Apparatus Glitch: Early Master Sword[]
Effect: Lets you duplicate hearts and stamina (At least four hearts are required).
How To: Save on a horse next to the Master Sword, perform the Apparatus Glitch, then reload and warp to another place. Now collect the Master Sword.
Notes: As long as you don't have collected it normally, you won't get an extra slot. You can still pull it, though. Once you pull the invisible Master Sword, everything is fixed.
Apparatus Glitch: Void Out Everywhere[]
Effect: Makes you void out as soon as you load a save file and places you underneath the location of your save.
How To: Perform the apparatus glitch, void out and reload. Link will go into the void out animation upon reloading and will be underneath the ground.
Notes: Can be used to skip the opening cutscene or obtaining the Sheikah Slate. Must have more than one heart (or a fairy/Mipha's Grace) at the time of voiding out.
Apparatus Glitch: Climate Immunity[]
Effect: Makes you immune to fire, ice, hot and cold temperature (+ Broken Paraglider).
How To: Perform the Apparatus Glitch twice in a row very quickly (Reload before the camera fully zooms out).
Notes: This ends after restarting the game.
Apparatus Glitch: Death Mountain Everywhere[]
Effect: Sets your equipment on fire. Bomb Arrows are not a good idea.
How To: Perform Climate Immunity and walk into lava.
Notes: Walking into water fixes the glitch, leaving you with Climate Immunity.
Apparatus Glitch: Transfer Potion Effects[]
Effect: Lets you transfer potion effects from one save file to another.
How To: Perform the Apparatus Glitch. After watching the memory, reopen the menu and take the potion/food of choice then load a save file.
Notes: Upon reloading, the effect will be active but the potion/food will remain in the inventory. Can be useful for prolonging the effects of Fireproof Elixir when travelling in Death Mountain or armor/attack up effects for bosses.
Apparatus Glitch: Free Rupees[]
Effect: Get free rupees from the Demon Statue in Hateno.
How To: Do the Heart Duping glitch but don't buy your hearts back. Upon reloading the save, Link will have the hearts back but still keep the rupees for selling them.
Apparatus Glitch: Broken Paraglider[]
Effect: Makes Link glide as if he had not equipped the paraglider
How to: Do the Heart Duping Glitch but with stamina wheels. Once at three wheels, the paraglider will not work correctly and Link will fall a little faster than normal fall speed but will not take fall damage.
Notes: To fix just save and reload that save. Link will still take no fall damage when gliding. This needs to be tested at under three stamina wheels.
Apparatus Glitch: Ragdoll Out of Bounds/Softlock the Game[]
How To: Make sure Link has one heart or less. Do the Apparatus Glitch in the Ze Kasho Shrine (by the South Akkala Stable). After watching a memory, position the spikes to where Link can jump into them and bounce into the wall. Two things can happen from here.
Effect 1: If Link takes damage, heal to about 3 hearts then press B. Link will be in a ragdoll-like state on the ground but still have some control. Placing and blowing up a bomb will make Link ragdoll (again) and make him get up.
Effect 2: If Link does not take damage, opening the inventory will cause a void out after closing it. To avoid death, heal to about 3 hearts.
Apparatus Glitch: Visit Space[]
How To: Set up the Death Mountain anywhere glitch, then make sure you have a few hundred bomb arrows. Climb to the top of a tall area, equip bomb arrows, then wait about a few hours or so. Link will continuously be pushed higher and higher into the air, and will eventually get past the world ceiling/height limit in the process. Keep going, and he'll eventually reach the edge of Hyrule'st atmosphere.
Notes: Given how many bomb arrows are needed, it's advised to use Inventory Corruption to get 80,000 or so before doing this glitch. It's also advisable to use moon jump alongside it too, since the Apparatus Glitch breaks your paraglider and makes it more difficult to stay out of bounds.
Moon Jump[]
Effect: Lets you continuously jump in midair.
How To: Start the Mounted Archery minigame near the Lake Tower and Highland Stable, then be riding on a bucking wild horse as the timer runs out. Once it does, you'll still be on the horse as it keeps jumping into the air, so teleport to any warp spot on the map. Link will be able to jump in mid air, however you cannot paraglide or enter bullet time, as the game seems to consider Link in somewhat of a grounded state. This glitch is reset if you either reset the game or ride a horse, Lynel or the Mastercycle Zero.
Notes: If you are jumping just after you finish loading in you freeze in the air, you either have to rewarp or use a bomb to blow Link up to reset his positioning. A consistent method is to ride to the hill east of the horses that are south of the camp, then jump off at around 10-12 seconds remaining. This window increases with the amount of stamina Link has, but the minimum time required is about 9 seconds. Sometimes when walking up a small step, Link will begin to walk very slowly or stop altogether, and running will deplete the stamina bar but not allow Link to move faster. Warping to any location seems to fix this.
Flying Chest[]
Effect: Lets Link fly on a chest
How to: Get the Moon Jump Glitch and pull out a metal chest. Position Link so that one of his legs is on the ground and the other on the chest. Then, Magnesis the chest to fly.
Go Under the Mud[]
Effect: Lets Link go under the mud
How to: Get the Moon Jump Glitch, then walk into a mud pit.
Notes: Putting a Cryonis block directly above Link will let him see under the mud. Link can also walk inside of certain objects, namely rock formations, while under the mud. This is likely because these objects are seen as part of the same landscape, and walking inside of the mud acts similar to clipping inside of it despite it not being a solid object, meaning that Link can jump into the mud but not out of it.
Wrong Warp (V1)[]
Effect: Respawns you at your Travel Medallion whenever you void out
How To: Set up the moon jump glitch, but teleport to the Travel Medallion as your warp point. Now whenever you void out, you'll be placed where your Travel Medallion is on the map (or its equivalent co ordinates if in a shrine or dungeon)
Wrong Warp (V2)[]
Wrong Warp Tutorial
Effect: Lets you teleport to any saved location by saving and reloading
How To: Set up the moon jump glitch, then load a save in the location you want to wrong warp to. Teleport to the Travel Medallion once you've done this, and now you'll be placed in said save location whenever you save/reload (until the game is reset). This effect can also be carried over to Master Mode/normal mode by heading to the title screen and switching modes.
Rune Skip[]
Effect: Leave the Plateau without all of the runes
How To: Set up a wrong warp to a non Plateau shrine as the warp location, then start a new game. Save and reload to wrong warp into said shrine, and finish it. You'll get the Spirit Orb as normal before voiding out and appearing on the Plateau. You can use this in place of any particular Great Plateau shrine to avoid collecting the rune there, or in place of all four of them to skip getting any runes at all.
Mini Game Storage[]
Effect: Escape a mini game, and roam the world while said game is still ongoing
How To: Use glitches to escape a mini game, with said glitch varying based on the mini game. For instance, you can use the first form of wrong warping with the Blue Flame or Gut Check Rock mini games to escape them, and keep things like the timer going elsewhere in Hyrule.
Mini Game Storage: Birdman Contest[]
Effect: Lets you walk anywhere while the Birdman Contest minigame is still active.
Notes: You will not be able to talk to any NPC while in this state.
Mini Game Storage: Eventide Paraglider Course[]
Effect: Lets you walk anywhere while the Eventide minigame is still active.
How To: Activate the Eventide minigame, then go near a place that triggers a cutscene, such as Gerudo Town or a freed Divine Beast.
Notes: Going near Eventide Island will deactivate the glitch.
Mini Game Storage: Test of Wood Escape[]
A Basic Guide to Mini Game Storage
Effect: Setup mini game storage by escaping the Test of Wood
How To: Start the Test of Wood mini game, and then land somewhere outside the main area that's near/before the mini game's exit trigger. If done correctly, the Korok running the mini game will ask if you want to quit, but the Lost Woods fog will cover up the conversation. Agree to continue, and you'll be voided out, and placed at the entrance to Korok Forest. Now, head back towards the trigger for the mini game (but not close enough that it'll count as you having left), and the mini game will start again with you outside the intended area. From here, you can go anywhere in Hyrule with the mini game active, and it'll only end if you unequip the Forest Dweller's gear in your inventory.
Mini Game Storage: Keep the One Hit Obliterator[]
Effect: Lets you keep the One Hit Obliterator outside the quest it's meant to be used in
How To: Activate mini game storage with the Test of Wood escape glitch mentioned above, then start the Obliterator trial. You'll immediately fail the mini game due to having unequipped the Forest Dweller's Sword in favour of the One Hit Obliterator. Now, choose to restart the mini game. Monk Maz Koshia will say you've left the Great Plateau and that the trial has ended, but he won't take the Obliterator away. Instead, he'll take your current weapon, which is now the Forest Dweller's Sword. You'll then fail the Test of Wood again, and still have the One Hit Obliterator in your inventory, letting you use it whenever you want or hang it up in your house.
Notes: The One Hit Obliterator only does one damage outside of the Great Plateau, but will reduce Link to a quarter of a heart when used regardless. Dying with it equipped will not cause an instant game over either, and both Fairies and Mipha's Grace will now act as expected when using it.
Eventide Storage[]
Effect: Keeps the Eventide Island quest going while outside of Eventide Island, which resets your inventory upon saving and reloading
How To: Escape the Test of Wood to activate Mini Game Storage, then go to Eventide Island. You'll fail the mini game when the quest begins, and warp back to Korok Forest. Choose to continue, then fail/exit the mini game. By doing this, you'll now have the empty inventory from Eventide Island, while not being limited to the island itself.
Notes: Any changes in your inventory will reset when you save/reload. Hence Spirit Orbs spent at Goddess Statues will come back, key items given away to NPCs will be returned to your inventory, and any clothing purchased/obtained with Eventide Storage active will be lost forever when you reload. However, upgrades to Link himself (like extra inventory slots or heart/stamina upgrades) and event triggers will not be reset.
Ride Prince Sidon Anywhere[]
Effect: Lets you ride Sidon outside the Vah Ruta boss battle
How To: Set up moon jump, then go to a shrine near the East Reservoir Lake. From there, moon jump towards the lake without touching the ground, and speak to Prince Sidon while in mid air above the water. Start the battle, then drown to respawn by the shrine. Now, head to the bottom of the dam near the Reservoir, and Sidon should appear soon after.
Defeat Bosses in One Hit[]
One Shot Ganon Glitch
Effect: Defeats any boss (including Calamity Ganon) in one hit
How To: Go to the boss battle trigger (like the Sanctum), and stop just outside of said trigger. Now, shoot an arrow/bunch of arrows at the location the boss spawns during the cutscene, and quickly activate the battle while they're in mid air. If done correctly, the boss should take tons of damage during the pre fight cutscene, and collapse dead the minute the cutscene ends.
Dupe Items Anywhere[]
How to Dupe Items in Breath of the Wild
Effect: Lets you clone weapons, shields and bows anywhere in the game
Pre-Requisites: At least 7 multishot bows and at least one shock arrow.
How To: Equip one of the multishot bows and the shock arrow(s). Tap ZR so Link pulls out his bow, drop the bow on the floor, equip another multishot bow, then repeat six times. Link should start to disappear on the menu screen. From here, just equip the item you want to clone via the quick change menu, and swap it out for the one you want to replace in the inventory itself. If done correctly, the item that Link's shown to be holding should not have changed. Now, drop the currently equipped item, and it'll become a clone of the one you want to dupe instead.
Item Duplication at Link's House[]
Effect: Allows Link to clone weapons or shields.
Prerequisites At least one Shock Arrow, and multiple multishot Bows. Link will also need to have purchased at least one display case for the Item he is trying to duplicate, as well as a spare item of the same kind as the one he is trying to clone. For example, if he is trying to clone a Wooden Bow, he needs another Bow, although it does not have to be the exact same Weapon as the one being cloned.
How to:Link must empty a display case in his house, and equip the Item he is trying to duplicate. Then, he must equip a Shock Arrow and drop multiple multishot Bows and equip another one in his Inventory. When Link has done this enough, most of his body will stop appearing when in his inventory. For this to work, he cannot put away his Bow as well. Then, Link must equip his spare weapon, although the Item he is attempting to duplicate will stay on his back. Afterwards, he must put that Item in its appropriate display case and retrieve it again. If he goes back to his Inventory, he will find that he has duplicated the Item.
Elemental Trap[]
Effect: Makes elemental weapons retain their elemental properties after being dropped.
How To: Equip an elemental weapon, press Y, then immediately pause and drop the weapon mid swing.
Notes: Does not work with ice weapons. Electric weapons need some sort of conducive object to transfer electricity to.
Shield Block Reset[]
Effect: Allows Link to double jump.
How to: Jump, block an attack with your shield, then immediately jump again.
Notes: Can be used to access Bullet Time from ground level.
Flurry Lock[]
Effect: Makes Link initiate an unprovoked Flurry Rush.
How To: Press Y the moment you enter Bullet Time.
Horse Wrong Warp[]
horse wrong warping
Effect: Lets you bring your horse anywhere (or almost anywhere)
How To: Set up moon jump, then take your horse to the entrance of the Lost Woods. Now, head to the right of the entrance and there should be a cliff with a small rock at the bottom in the lake that surrounds the forest. Take your horse down there. Bring it near to the entrance, and the Lost Woods fog should quickly roll in. If done correctly, you'll then respawn in the location your Travel Medallion was set at.
Disable Water Physics[]
Effect: Enables you to use weapons, Champion abilities and runes in water, as well as not drown when your stamina runs out
How To: Activate moon jump, then start the Birdman Contest mini game in mid air while above the water alongside the tower. You'll now be able to swim forever/walk in water normally, as well as walk on land while the mini game is still going.
Notes: This activates Minigame Storage with the Birdman minigame
For one of them, get moon jump, and enter the Final Trial. Now, jump up the elevator shaft the Shrine of Resurrection moves down in, and head towards the back wall. This area has no collision above a certain point, so you can head on through to escape the dungeon. From here, keep jumping until you escape the bounds of the dungeon itself (you'll know when this happens since your Champion Abilities will come back), and then keep moon jumping away from the dungeon. Do this long enough, and you'll end up above the boss arena where you fight Maz Koshia, and can drop down to start the battle.
Alternatively, you can also use wrong warp to instantly warp there. Head to the Riverside Stable, then go away from the river. You'll get to another path with some trees nearby. Place the Travel Medallion here, then set up a wrong warp via it. From there, you just need to head the Final Trial and jump into the lava to respawn in the Maz Koshia boss arena.
Guardian Hypnosis[]
Effect: Hypnotizes a guardian.
How To: Crouch underneath a guardian stalker and spam the whistle button.
How To: Setup wrong warp or moon jump, then fall into a pit while in the Sharo Lun Shrine. The game will crash either immediately after Link voids out, or immediately after he respawns. This is because the shrine itself is very unstable, and going more than about 20 feet from the edge of the shrine via glitches will cause the game to crash for unknown reasons.
Daqa Koh Clip[]
Effect: Makes Link clip through the moving blocks in the Daqa Koh Shrine.
How To: Shield surf and land on the ground the moment the blocks start rising.
Hyrule Escape[]
A video tutoria on how to escape Hyrule with this glitch
Effect: Lets Link get past the world borders with moon jump
How To: Set up a Travel Medallion out of bounds, then get moon jump. Go to the Travel Medallion, then travel to the border (where it says you can't go any further) with moon jump while staying out of bounds. Now drop down quickly into the water, then swim forward. If done correctly, you shoud go under the barrier and eventually start falling through the air. Moon jump back up to escape Hyrule.
Magnesis Overload[]
Overloading the game with Magnesis Overload
Effect: Lets you overload (and eventually crash) the game with dropped items and Magnesis
How To: Use Magnesis, then pause when Link is holding the magnet. Hold some items, and you'll drop them after leaving the menu. Either pick them up or leave them, and repeat to overload the game. This is because it generates invisible items whenever you do this, and those don't get erased. Hence doing this enough will cause you pick up invisible jars by pressing A in random spots, or eventually crash the game altogether.
Hinox Curse[]
Breaking physics with the Hinox Curse
Effect: Lets you break multiple parts of the physics engine (including Link's model, enemy and object interaction, etc) by pushing a Hinox into a waterfall
How To: Use Magnesis and a weapon or box to push or carry a Hinox into a waterfall. If done correctly, it'll despawn/turn invisible, and the game's physics engine will just completely shatter. Link will get stuck rotating in place or walking upside down, enemies will float in the air or walk while tilted diagonally, the camera will randomly zoom out, entire shrines will sometimes start spinning in place and the game will lag like hell.
Rune Lock[]
Using the Rune Lock glitch
Effect: Lets you walk around with a glowing Sheikah Slate hand, as well as walk automatically.
How To: Activate any rune, then hold ZL. Now remove your shield to activate the glitch. In this state, you can't interact with objects in your environment (like NPCs or signs), and if you equip and unequip a shield, you'll either spin around (if standing still) or walk automatically (if moving).
Memory Storage[]
Using the Memory Storage glitch
Effect: Lets you start a new game with all of your weapons, equipment, armor sets and everything else from your previous save including the Master Sword, keeping the Bow of Light outside of the Dark Beast Ganon fight, and the Paraglider as part of a new game+ save file
How To: You will need the following things: The Travel Medallion, the upgraded Sheikah Sensor, at least 1 Hyrule Compendium entry, at least one recovered Captured Memory, plus a sidequest to mark on the map. Once you have all of that, go to the Inventory, and place the cursor on The Travel Medallion. Go into Hyrule Compendium, select the picture, and press the Y button to begin searching, and then press the + button to open the Inventory immediately afterwards. Before the 'Searching' text disappears, place down the Travel Medallion, before going back to the map. Selecting a sidequest, pressing Y to change to Shrines, then as it's searching, open up the Adventure Log. Press Right and A quickly, and you should have the Memory prompt in normal gameplay. Afterwards, go to a cooking pot, then by pausing the game, and by going to the option screen, selecting load, then when you select a file, immediately view the Captured Memory from the glitched menu. Now, you must kill Link without pausing the game. You then need to return to the title screen from the game over screen. Once here, start a new game. If the glitch has been done correctly, you will notice something a bit weird. Namely, the game would never save, which means you have to do a "No Death Run" of the game. Continue through the game until you get your first Captured Memory. Free all of the Divine Beasts. And once you are ready, fight Dark Beast Ganon. During the battle, watch a Memory cutscene. Now, whittle down its health as usual. When you are about to do the final blow, switch to another bow in the Inventory. Watch or skip the ending, then load the save file. For whatever reason, it'll put you back at the Shrine of Resurrection as if you started a new game. Then wait for it to save, then reload the autosave. The game also acts as if you have gotten every type of weapon for the first time, and all of your Inventory items, including the Bow of Light, is transferred into the new save. You can use them all right from the start of the game.
What's more is that the player has access to the Paraglider and can skip talking to the old man, skip the Runes, and leave the Great Plateau early. This glitch does have limitations, as you can only bring your entire Inventory.
Early Master Sword[]
Getting the Master Sword early
Effect: Lets you get the Master Sword with less than 13 hearts
How To: Go to the Master Sword pedestal in Korok Forest, and put some wood on the corner of the pedestal. Light it to start a campfire, then sit at the campfire, and look up at the trees above. Mash A as the time skips ahead, and you should get the sword early.
Save in Yiga Clan Hideout[]
Saving in the Yiga Clan Hideout with this glitch
Effect: Lets you save and place the Travel Medallion in the Yiga Clan Hideout stealth mission.
How To: In the mission, set up a campfire, then sit at it while facing the ceiling. After time moves ahead, press pause. You should be able to save the game, even though you're normally not allowed to. You can also place the Travel Medallion in the same state.
This lasts until you move the camera down again, which disables saving and the Travel Medallion once more.
Take the Yiga Clan Anywhere[]
Taking the Yiga Blademasters to Gerudo Town
Effect: Allows you to bring the Yiga Blademasters from the hideout (the ones that kill Link in one hit) anywhere in the game.
How To: Go out of bounds in the hideout, then shoot an arrow at one of the Blademasters to get them to attack Link. Now get back in bounds, and the Blademasters will follow you back, including into the snowy mountains, Gerudo Desert, etc.
If Link goes near a town with one of them, they'll go into a permanent 'stealth mode' setup, where they'll patrol the area aimlessly instead of attacking.
Collision Overload[]
How to setup Collision Overload
Effect: Allows you to become immune to enemy attacks, walk underwater, etc.
How To: Overload the game by dropping multishot bows with shock arrows, then start cloning weapons. Throw these cloned weapons into a body of water, and eventually they'll start skimming across it or falling through. At this point, Link will be able to walk underwater, as well as walk through enemy attacks like a ghost.
Infinite Rupees[]
Effect: Get multiple Sapphires, Topazes, and Rubies, which you can then sell for infinite rupees.
Prerequisites: Piece of Royal Guard Equipment, (Anything other than clothing) 4 or 5 Multishot bows ( 5 is recommended, you can find them around the Yiga Hideout) and 1 shock arrow.
How To: Go over to the Riverside Stable in the Afternoon- ( Going in the early morning or at night it won't work because the character we need for this would be sleeping.)- And find the girl there named Parcy. Remove All gear, clothing, and weapons equipped on Link. ( Just disequip them, but keep them in your inventory) Equip one of your Multishot bows along with a shock arrow. Exit your menu, and push the ZR button so that link is holding the bow in front of him. Go back to your menu and drop the bow you are currently holding, then while still in the menu equip another multishot bow. Exit your menu, then repeat and drop the one you are currently holding. Repeat until the only thing that you see when you open the menu is Links shaved head ( If his belt is still visible that is OK) Now that this has happened, you can equip ONE of your Royal Gaurd Weapons, Shields, OR, bows, if you do not hear the sound of you equipping something, then you are doing it right. Now speak to Parcy, and say Yes when she asks for your weapon. If done correctly, your weapon should not leave your inventory, and you can keep giving her your weapons. The glitch will cancel once you collect one of your multishot bows.
Fireproof Wooden Weapons[]
How to Make Wooden Weapons Fireproof in the Legend of Zelda Breath of the Wild
Effect: Makes wooden weapons fireproof
How To: Set the weapon you want to make fireproof on fire, then hit Link with a bomb explosion on the same frame you put it away with B. Now the weapon will be fireproof, and won't set alight if used on fiery enemies, near campfires, etc.
BLS Sliding[]
A guide to BLS Sliding in the Legend of Zelda Breath of the Wild
Effect: Lets you slide across the sky at high speed, unaffected by gravity.
How To: Place down a bomb, then take out your bow. Press B and + at the same time, and unequip your shield. From there, equip your shield again, then pick up the weapon you want to hold. Jump, and press B and + at the same time. Unequip your shield, then aim your bow to get the item stuck to Link's hand. Now, to slide through the air, just hold B and try to climb onto a ledge. You can alternate directions to speed up, and stopping will drop Link to the ground again.
Missing Old Man[]
Effect: Makes the old man invisible in the cutscene when you go down the Great Plateau Tower.
How to: Perform the Moon Jump glitch and start a new game. DO NOT go to the ground below the tower after it rises. Moon Jump to the shrines and do them out of order (not magnesis for first). An example of an order is Stasis, Bomb, Magnesis, and Cryonis. After going to all 4 shrines get your heart container or stamina vessel at the goddess statue. If you talk to the old man before the tower ground cutscene, he will say you have (a number between 1 and 4) left if you did it correct. After all 4 shrines and the Goddess statue, you can then go down below the tower and he will be invisible and his paraglider will be visible for a few moments. Dialogue will not show and the interaction passes way faster, as the game seems to be skipping the dialogue triggers.
Notes: There is an invisible barrier surrounding the tower that normally makes players have to go down and talk to him, but it is low enough to jump over.
Immortal Stal Enemies[]
Stalkoblins Can Survive During the Day in Zelda Breath of the Wild?
Effect: Keeps Stalkoblins alive during the day
How To: Take a Stalkoblin skull from the Typhlo Ruins out of the area. It'll be immune to sunlight, since ones from that area are.
Auto Register Horse[]
Effect: Registers a horse without going to a stable.
How To: Escape the final battle with Dark Beast Ganon, and save on a horse. It'll have a saddle and be 'registered' when you reload your save file.
Make Save File Unusable[]
I Permanently Destroyed My Save File in Zelda Breath of the Wild?
Effect: Makes the game crash the second you load it.
How To: Save the game while riding a Stalhorse or the Lord of the Mountain in the last battle. Loading that save will crash the game, and if all your files were saved in this state, the file is unusable.
Make Materials Float[]
Make Items FLOAT in Mid Air in Zelda Breath of the Wild (Glitch)!
Effect: Makes materials float in mid air, as well as let you pick them up and throw them around.
How To: Open the camera rune, then hold an item. Unpause, press A and immediately pause again. Then hold another item, and the previous one should float in mid air.
Notes: The item should float in mid air, and be mostly immune to environment effects and hazards. If Link picks up the item, he can carry it around like a bomb or barrel, and if he throws it again, it'll fly through the air at high speed. Interestingly, dragon parts will shoot off and fall from the sky when thrown in this state.
Spaghetti Link[]
Effect: Makes Link's limbs grow/stretch really far, launches Link along the ground.
Prerequisites: To cause this glitch, Link needs to die. Before starting, make sure to save then disable Mipha's Grace and release any fairies. They will be returned upon pressing continue or reloading the save. Make sure Link has a half heart or less. (Choosing to continue after dying will load the save but give Link 3 hearts. This can be solved by using more Chuchu jelly or lighting the grass on fire.)
How To: Go to one of the holes that the boulders roll into to reveal Korok seeds. A consistent spot is the hole on the opposite side of the mountain directly south of the Highland Stable and Ka'o Makagh Shrine, just left of the Horse God Bridge. After following the above notes, drop 5 of any elemental Chuchu jellies into the hole. Normal Chuchu jellies will not work. Position Link in the hole somewhere on or between the jellies and do a jump slash (X then Y). Upon dying, Link's limbs will stretch and he will sometimes be launched out of the hole. Different elements seem to have different effects, including different combinations and placements.
Rolling Chest Launch (RCL)[]
Effect: Launches Link Upwards, Allows You to go into Bullet Time.
How To: Shield Surf on a Chest that is rolling down a Hill.
Notes: You can't do this on a steep cliff, it can only be on a hill.
Swim in Lava[]
Effect: Lets Link swim in lava without voiding out.
How To: Equip the One-Hit Obliterator outside the trial, then jump into lava. You'll constantly take damage, but you'll be able to swim there without voiding out. Similar things occur with mud, bottomless pits and water, since voiding out in general is disabled with the Obliterator active.
Dupe Materials/Spirit Orbs/Korok Seeds[]
How to CLONE Materials in Zelda Breath of the Wild (Glitch)!
Effect: Lets Link get up to 6 of any item at once
How To: Overload the game by aiming shock arrows with multishot bows. Then, hold 5 of any material, and sell the remaining items of that kind at a shop. Now, pick up a new item you don't already have any of in your inventory, and press X in your inventory to stop holding the old items. They'll have transformed into copies of the item you just picked up.
Notes: If you complete a shrine with 0 Spirit Orbs, or get a Korok seed with 0 remaining in your inventory while smuggling materials with this glitch, you'll be able to dupe those the same way.
Hestu Softlock[]
Upgrading Your Inventory SOFTLOCKS Zelda Breath of the Wild?(Glitch)!
Effect: Softlocks the game when you speak to Hestu
How To: Use the above glitch to dupe Korok seeds, then try to spend more on upgrading your inventory than the game previously thought you had available (so for instance, spend 6 seeds while the counter shows 1).
Notes: By entering a shrine or Divine Beast, reloading your save or collecting another Korok seed, the counter will be updated to count the glitched ones, and this glitch won't occur.
Floating Armour[]
You Can Break Metal Treasure Chests in Zelda Breath of the Wild?? (Glitch)!
Effect: Lets you suspend armour in mid air
How To: Destroy a metal treasure chest containing an armour piece with one of the cannons at the Abandoned North Mine. The contents of the chest will float in mid air.
Notes: This also works with key items like horse armour too. However, these will despawn if you go too far away from them, while armour seems to stick around for longer.
See Underwater[]
How to SEE UNDERWATER ANYWHERE in Zelda Breath of the Wild!
Effect: Lets you see underwater in any part of Hyrule.
How To: Setup Moon Jump via the Horseback Archery mini game, then go to the Ridgeland Tower. Play the Bird Man Research mini game, go to Lurelin Village and open a chest in the gambling game. Play the mini game, then end it to enable saving and warping. Now warp to wherever you want to go underwater, and swim to the shore to permanently stop Link's stamina refilling. Run out of stamina, then jump over the water. Fall in, and use Cryonis as Link goes beneath the surface. Now use Revali's Gale and shield surf to get to the bottom of the water, letting you look around down there at your leisure.
Inventory Slot Transfer[]
How to EASILY Get the Bow of Light/Transfer Items (No Memory Storage)!
Effect: Lets you transfer items between save files, allowing you to do things like keep the Bow of Light and start a new game with your items
How To: Overload the game with Shock Arrows, then hold 4 separate items. Sell the rest of these items at a shop, then hold another type of item. Drop it, and pick it up to created glitched inventory slots. The more times you do this process, the more glitched inventory slots you'll create. This will let you transfer the last X number of items to the last save you loaded, with X being equal to the number of glitched slots created.
Notes: If you setup more glitched slots than you actually have items, the menu will break, often leaving you with nothing in your inventory at all.
New Game + Via Inventory Slot Transfer[]
Effect: Lets you start a new game with your existing items
How To: Setup Inventory Slot Transfer, then go to the title screen. Start a new game, then pick up the Sheikah Slate. Save, exit the game and reload to have the items in the last X number of inventory slots present on your new save file.
Keep Trial of the Sword/Boss Rematch Items[]
Effect: Lets you keep items from the Trial of the Sword, or the Champion's Ballad boss rematches.
How To: Setup Inventory Slot Transfer, then enter the Trial of the Sword or a boss rematch. Now, load a save file, and you'll have the last X number of items from your Trial of the Sword/boss rematch inventory on the other save. This can let you clone Champion weapons, or get rare items from these areas.
Weapon Modifier Corruption[]
Create Superweapons With Weapon Modifier Corruption in Zelda Breath of the Wild!
Effect: Lets you create weapons with crazy modifiers, letting you boost their attack power by 100, shoot 10 arrows at once, etc.
How To: Make sure you have no armour or item slots between the meals tab and the relevant weapon. Then, get the meal whose stats you want used on this file, and transfer 60 meals from another file with Inventory Slot Transfer. The recipe for the meal you used will be applied to the weapon's modifiers instead, with insane results.
Notes: This doesn't work with durability. The bonus will be displayed, but the weapon's durability won't change.
999 of Any Material[]
How to Easily Get 999 of ANY Material in Zelda Breath of the Wild!
Effect: Get 999 of any material in the game.
How To: First, make sure your new file has no armour. Then, put the material you want to clone in the first item slot, and equip a shield. Save the game, and load the alternate file. Setup enough IST slots to transfer a shield + any necessary key items. Return to the other file, and don't open the menu. Get an auto save, then get rid of the rest of that first item type. Reload the auto save, and you should now have 999 of that item.
Notes:
999 Korok Seeds[]
Get 999 Korok Seeds in Under 10 Minutes in Zelda Breath of the Wild!
Effect: Get 999 Korok seeds on a new file.
How To: Start a new game, and exit the Shrine of Resurrection without collecting any clothing. Pick up a woodcutter's axe, and save the game. This will be save 1. Then, jump into the ring of water lilies nearby for a Korok seed, which will be referred to as save 2. Load the alternate save file, and get two IST slots.
Now, load save 1, and unequip the axe. Repeat this process twice.
Before loading save 2. Don't open the inventory or reload the game, instead get an auto save. This will be called save 3.
Then load save 1 three more times, before reloading save 3. You should have now 999 Korok Seeds in your inventory.
Notes:
Easily Get Up to 12,000 Arrows[]
How to EASILY Get THOUSANDS of Arrows in Zelda Breath of the Wild!
Effect: Lets you get up to 12,000 arrows of any kind
How To: Make sure you have enough empty weapon slots to correlate to the arrow type you want to corrupt (1 for normal arrows, 2 for fire arrows, etc). Then, equip the last bow in your inventory, and save. Setup IST so you have enough slots for your key items + affected empty weapon slots. Now, go to either Eventide Island or the Trial of the Sword, and pick up enough weapons to fill those slots. Once you've done that, reload the previous save, get a auto save without opening the menu, and reload the auto save. Your bow's durability value should have corrupted the affected arrow slot.
Notes: If you open a chest with the relevant type of arrow, you'll have 999 of them instead.
Broken Runes and Horse Armour[]
Why Doesn't My Master Cycle Zero/Ancient Horse Armour Work?
Effect: You aren't able to use the Ancient Saddle, Master Cycle Zero or Amiibo rune anymore.
How To: Escape the Calamity Ganon battle by any means. Once you do, these things will just stop working.
Notes: This happens because the game restricts said items from working during the battle, and Nintendo's failsafe for landing in the Sanctum doesn't remove the flags that do this. As a result, the game still thinks you're in the final battle where amiibo and the Master Cycle are concerned, despite otherwise thinking you're not.
Disarm Enemies[]
Disarm the Yiga Clan in Zelda Breath of the Wild!
Effect: Enemies will lose their weapons, leaving some defenceless.
How To: Take an enemy with a weapon to Gerudo Town, and get caught by the guards. They'll remove the enemy's weapons too.
Notes: While this works with all enemy types, it's more interesting with Yiga Clan members and Lynels, since they can't pick up new weapons, and are left entirely unable to attack as a result.
Easily Get 999 of Any Material[]
How to EASILY Get 999 of Any Material in Zelda Breath of the Wild!
Effect: You can get 999 of any material in the game
How To: First, set up enough glitched slots with IST to cover your key items, plus the material slot you want to corrupt. Then, make sure you have enough empy weapon slots to hold as many new weapons as there are slots from the top left of the materials tab to the affected one (so if say, you want to corrupt the second material, you'll need two empty weapon slots) and equip the last shield in your inventory. Save, get rid of any armour you have, and get an auto save.
Once that's done, you'll need to go to Eventide Island or the Trial of the Sword, and pick up as many weapons as you had empty slots for beforehand. Reload the auto save, and get another auto save without ever opening the menu. Reload that auto save to get 999 of the affected item, and resync the menu.
If you did this on an auto save after losing your armour, exit and re enter the game, and get enough IST slots to cover key items + a couple of materials. Make sure your 999 material slot is in one of those affected slots, and reload the manual save to transfer the 999 items slot to that.
Notes: You need to makes sure you haven't equipped the final bow while doing this, otherwise you'll (most likely) corrupt your arrow count instead. See the Easily Get Up to 12,000 Arrows glitch entry for info on how that works.
Not Quite Fireproof[]
Visiting the Divine Beasts Early (effect is in Rudania section)
Effect: Link gets set on fire despite wearing upgraded Flamebreaker armour with the fireproof effect.
How To: Use a glitch like wrong warping to try and visit Vah Rudania early. When you do, Link will get set on fire despite having the fireproof effect and otherwise being unaffected by flames or fire based attacks.
Notes: Apparatus Storage still stops Link being set on fire, making it a safe way to visit Rudania early.
Lose/Destroy the Bow of Light[]
How to Drop/Lose the Bow of Light in Zelda Breath of the Wild!
Effect: The Bow of Light is dropped/destroyed.
How To: Overload the game, then switch to a wooden bow in the quick select menu. Go to the pause menu, and equip the Bow of Light (Link's model should not update in game when you do this). Now, set the bow on fire, and either enter a shrine or teleport when it disintegrates.
Notes: This also works with the Master Sword, though it'll reappear in Korok Forest afterwards.
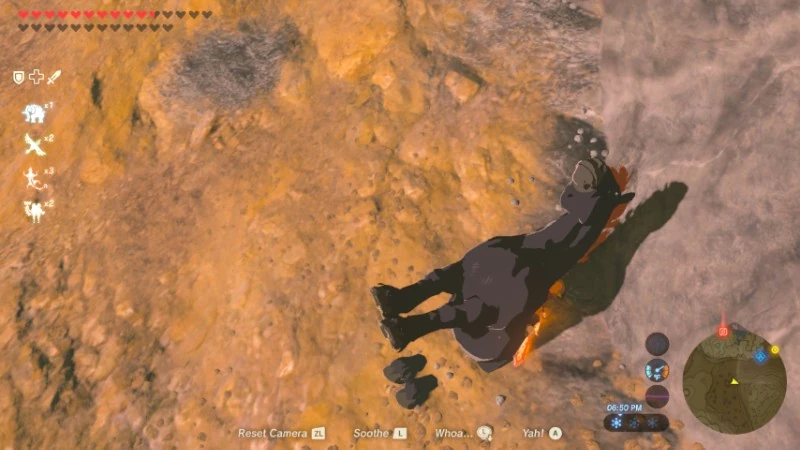
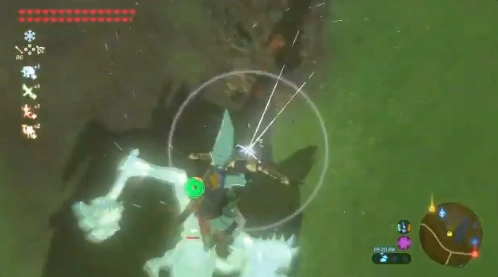