m (→Hall D: Forsaken Fortress Figurines: + Darknuts) |
SecminourTheThird@legacy41962858 (talk | contribs) |
||
| Line 1: | Line 1: | ||
| + | These are the glitches which are possible to perform in ''[[The Legend of Zelda: Majora's Mask|Majora's Mask]]''. Please read the [[Glitch Disclaimer Notes]] before attempting any of the glitches on this page. |
||
| − | <!-- |
||
| − | To Do: |
||
| − | *Add and replace images of poor quality |
||
| − | *Add info on how to obtain special figurines? |
||
| − | *Add layouts for all rooms |
||
| − | --> |
||
| − | :''You may also wish to see [[Figurines in The Legend of Zelda: The Minish Cap]].'' |
||
| − | '''Figurines''' are small sculptures of people and enemies in ''[[The Legend of Zelda: The Wind Waker|The Wind Waker]]''. They can be obtained and accessed in the [[Nintendo Gallery]] after [[Link]] shows [[Carlov]] a suitable [[pictograph|Pictography]] of the subject to be sculpted. |
||
| + | ==Fierce Deity Link Glitches== |
||
| − | There are 134 figurines to collect in total. 17 of these are collected under special circumstances. |
||
| + | ===Be the Fierce Deity Outside of Boss Rooms 1=== |
||
| + | {{Youtube|vWvry4QkGSQ|250|right}} |
||
| + | This is the easiest and best way to transform and it works with all versions of ''[[The Legend of Zelda: Majora's Mask|Majora's Mask]]'', including the GameCube and Wii Virtual Console. It can be done in several locations but the easiest is in [[Termina Field]], just outside the entrance to [[Great Bay]]. There's a small pool of water off to the side, (to the right if facing Clock Town, or left if facing [[Great Bay]]) which Link must jump into. Once in the water, he needs to be positioned in a spot where he is floating, but if the Zora Mask were donned, he would stand. Once that had been achieved press A to dive and shortly after doing so press the C-Button with the [[Zora Mask]] equipped, which will cause a regular transformation. Rapidly press B and, if positioned correctly, [[Zora Link]] will appear to "hop". While he's "hopping", try to take off the Zora Mask, and if done correctly the B button will go blank. Hold A and swim in the direction of land, and Link will roll and then stand up normally. If he continues to swim, the positioning is off and the glitch needs to be restarted. Once this had been achieved, the 'B' and 'A' buttons will go blank, and anything can be equipped to the C-Button to which the Zora Mask was assigned. Equip the [[Fierce Deity Mask]] instead of the Zora Mask and put it on to become [[Fierce Deity Link]]. After you transform, you will notice that you cannot use any item but bottles. |
||
| + | ===Be the Fierce Deity Outside of Boss Rooms 2=== |
||
| − | == Hall A: [[Forest Haven]] Figurines == |
||
| + | [[File:LinkDonsFD_Gorman.jpg|left|thumb|180px|Link dons the Fierce Deity Mask at the race track]] |
||
| − | [[File:Gallery1.jpg|250px|right]] |
||
| + | By riding [[Epona]] to [[Milk Road]] or [[Southern Swamp]], it was possible through a saving glitch to get all the C-Buttons on the horse. There was a chance that when the game was reloaded, you would start on her, and have access to the C-Buttons and whatever was assigned to them, although the icons weren't visible. Unfortunately, if the Fierce Deity Mask was equipped straight after loading, you would have to wait until the Dawn of The Second or Third day to get off Epona, due to conflict between Fierce Deity Link's function of keeping his sword out, and the bow being assigned to [[B-Button|B]] on Epona. By riding to the [[Gorman Brothers|Gorman Brothers']] race course and challenging them, you could avoid this little problem. Once the race started, you could safely put the mask on, and after it had ended, the bug would be canceled out, and you would be standing, as Fierce Deity Link with no problems. |
||
| + | This glitch has also been removed from later versions such as the European [[Nintendo 64]] version and the [[GameCube]] ''[[The Legend of Zelda: Collector's Edition|Collector's Edition]]''. |
||
| + | ===Be the Fierce Deity Outside of Boss Rooms 3=== |
||
| − | {| class="wikitable" style="text-align:center;" |
||
| + | [[File:OniLink_Clocktown.jpg|right|thumb|250px|Fierce Deity Link in Clock Town]] |
||
| − | |- |
||
| + | This glitch involves part of the [[Reuniting Kafei and Anju|Kafei and Anju quest]], specifically, [[Sakon|Sakon's Hideout]]; however, it isn't necessary to actually do the entire quest thanks to a glitch in the map design. On the Third Day enter Sakon's Hideout, either by waiting for Sakon to appear or by using the "[[#Sakon.27s_Hideout_Before_Day_3|Sakon's Hideout before day 3]]" glitch. Before complying with [[Kafei|Kafei's]] request to step on the switch, Link should put on the Bunny Hood if he's not already wearing it. Once the player is in control of [[Kafei]], it is possible to open the Start Menu, go to the mask screen and place the Fierce Deity Mask over the Bunny Hood on the C-Buttons. Once control is returned to Link, he will immediately put the mask on and transform into Fierce Deity Link. Once this is accomplished, all the player has to do is complete the hideout puzzle normally and then Link will be returned outside to [[Ikana Canyon]]. |
||
| − | !width=75 | Name |
||
| − | !width=150| Figurine |
||
| − | !width=300| Description |
||
| − | |- |
||
| − | | [[Korok#Notable Koroks|Aldo]] |
||
| − | | [[File:Aldo_Figurine.png|125px]] |
||
| − | | Birthplace: The [[Forest Haven]]<BR>One of the [[Korok]] forest spirits<BR><BR>After the annual ceremony in the Forest Haven, Aldo flies off to a distant part of the world to sow tree seeds and raise new patches of forest.<BR>He's responsible for the forest on [[Cliff_Plateau_Isles|an island one square east of the Forest Haven]]. |
||
| − | |- |
||
| − | | [[Carlov|Carlov the Sculptor]] |
||
| − | | [[File:Carlov_Figurine.png|110px]] |
||
| − | | Birthplace: Unknown<BR>Occupation: [[Nintendo Gallery]] Master<BR><BR>With unmatched talent, he is the world's greatest sculptor. It's said the reason he won't let anyone watch him sculpt is because he does so in his underwear.<BR>Lately, his club has been losing membership because he hasn't done anything "cool" with it, but as long as [[Link]] hangs around, everything will be all right! |
||
| − | |- |
||
| − | | [[Great Deku Tree|Deku Tree]] |
||
| − | | [[File:GDT_Figurine.png|150px]] |
||
| − | | Birthplace: The [[Forest Haven]]<BR><BR>The Deku Tree is both an earth spirit and the guardian of the forest. He has lived for many long years, so his wisdom is vast.<BR><BR>However, since his roots run deep into the earth, he cannot move. As a result, he is often afflicted by parasitic enemies... |
||
| − | |- |
||
| − | | [[Korok#Notable Koroks|Drona]] |
||
| − | | [[File:Drona_Figurine.png|150px]] |
||
| − | | Birthplace: The [[Forest Haven]]<BR>One of the [[Korok]] forest spirits<BR><BR>After the annual ceremony in the Forest Haven, Drona flies off to a distant part of the world to sow tree seeds and raise new patches of forest.<BR>He is responsible for the forest on [[Private_Oasis|an island one square west and one square north of the Forest Haven]]. |
||
| − | |- |
||
| − | | [[Korok#Notable Koroks|Elma]] |
||
| − | | [[File:Elma_Figurine.png|150px]] |
||
| − | | Birthplace: Birthplace: The [[Forest Haven]]<BR>One of the [[Korok]] forest spirits<BR><BR>After the annual ceremony in the Forest Haven, Elma flies off to a distant part of the world to sow tree seeds and raise new patches of forest.<BR>He is responsible for the forest on [[Needle_Rock_Isle|an island five squares west and one square north of the Forest Haven]]. |
||
| − | |- |
||
| − | | [[Fado (The Wind Waker)|Fado]] |
||
| − | | [[File:Fado_Figurine.png|170px]] |
||
| − | | Birthplace: Birthplace: [[Kokiri Forest]]<BR>Personality: Somewhat saucy<BR><BR>Long, long ago the [[Kokiri]] [[sage]], Fado, offered up his prayers in the [[Wind Temple]] so that the [[Master Sword]] would continue to house the [[Power to Repel Evil|power to repel evil]]. |
||
| − | |- |
||
| − | | [[Korok#Notable Koroks|Hollo]] |
||
| − | | [[File:Hollo_Figurine.png|170px]] |
||
| − | | Birthplace: The [[Forest Haven]]<BR>One of the [[Korok]] forest spirits<BR><BR>Even after the Korok ceremony, Hollo remains in the Forest Haven researching potion-making.<BR><BR>He'll make a [[potion]] that replenishes both [[Heart Container|life energy]] and [[Magic Meter|magic power]] for you if you bring him [[Boko Baba Seed|Boko Baba seeds]].<BR>Onjalla! Manjalla! CHO-WAY! |
||
| − | |- |
||
| − | | [[Korok#Notable Koroks|Irch]] |
||
| − | | [[File:Irch_Figurine.png|120px]] |
||
| − | | Birthplace: The [[Forest Haven]]<BR>One of the [[Korok]] forest spirits<BR><BR>After the annual ceremony in the Forest Haven, Irch flies off to a distant part of the world to sow tree seeds and raise new patches of forest.<BR>He is responsible for the forest on [[Shark Island|an island three squares west of the Forest Haven]]. |
||
| − | |- |
||
| − | | [[Korok#Notable Koroks|Linder]] |
||
| − | | [[File:Linder_Figurine.png|150px]] |
||
| − | | Birthplace: The [[Forest Haven]]<BR>One of the [[Korok]] forest spirits<BR><BR>After the annual ceremony in the Forest Haven, Linder flies off to a distant part of the world to sow tree seeds and raise new patches of forest.<BR>He is responsible for the forest on [[Greatfish Isle|an island four squares west and two squares north of the Forest Haven]]. |
||
| − | |- |
||
| − | | [[Makar]] |
||
| − | | [[File:Makar Figurine.png|105px]] |
||
| − | | Birthplace: The [[Forest Haven]]<BR>Personality: Frivolous<BR><BR>Makar is in charge of the musical performance at the ceremony held each year by the [[Korok]]s in the Forest Haven.<BR><BR>The instrument he uses appears to be a cello, but it is actually a violin... |
||
| − | |- |
||
| − | | [[Manny]] |
||
| − | | [[File:Manny_Figurine.png|120px]] |
||
| − | | Birthplace: [[Windfall Island]]<BR>Favorite Thing: Figurines<BR><BR>He used to always sit at home and rarely go outside, but his passion for the [[Nintendo Gallery]] kept him moving and he finally earned membership in it. |
||
| − | |- |
||
| − | | [[Korok#Notable Koroks|Oakin]] |
||
| − | | [[File:Oakin_Figurine.png|85px]] |
||
| − | | Birthplace: The [[Forest Haven]]<BR>One of the [[Korok]] forest spirits<BR><BR>After the annual ceremony in the Forest Haven, Oakin flies off to a distant part of the world to sow tree seeds and raise new patches of forest.<BR>He is responsible for the forest on [[Star Island|an island four squares west and five squares north of the Forest Haven]]. |
||
| − | |- |
||
| − | | [[Korok#Notable Koroks|Olivio]] |
||
| − | | [[File:Olivio_Figurine.png|150px]] |
||
| − | | Birthplace: The [[Forest Haven]]<BR>One of the [[Korok]] forest spirits<BR><BR>After the annual ceremony in the Forest Haven, Olivio flies off to a distant part of the world to sow tree seeds and raise new patches of forest.<BR>He's responsible for the forest on [[Fairy Islands#Eastern Fairy Island|an island one square west and three squares north of the Forest Haven]]. |
||
| − | |- |
||
| − | | [[Korok#Notable Koroks|Rown]] |
||
| − | | [[File:Rown_Figurine.png|150px]] |
||
| − | | Birthplace: The [[Forest Haven]]<BR>One of the [[Korok]] forest spirits<BR><BR>After the annual ceremony in the Forest Haven, Rown flies off to a distant part of the world to sow tree seeds and raise new patches of forest.<BR>He is responsible for the forest on [[Mother & Child Isles|an island four squares west and four squares north of the Forest Haven]]. |
||
| − | |- |
||
| − | |} |
||
| + | This glitch has been exterminated and can only be used in the original Nintendo 64 American and Japanese versions since pausing as Kafei is no longer allowed. The glitch was fixed in the Nintendo 64 European release and was also fixed in the Collector's Edition for the GameCube. However, this glitch can be performed on the American Virtual Console game since you can pause as Kafei again, leading to the belief that the Nintendo 64 version was ported for Americans rather than the Collector's Edition version. |
||
| − | == Hall B: [[Dragon Roost Island]] Figurines == |
||
| − | [[File:Gallery2.jpg|250px|right]] |
||
| + | ===Dos and Don'ts as Fierce Deity Link=== |
||
| − | {| class="wikitable" style="text-align:center;" |
||
| + | *Fierce Deity Link's in-game model is so large (much taller than most characters), that when he enters some buildings, he can not exit, and becomes trapped. A prime example of this is the Stock Pot Inn. |
||
| − | |- |
||
| + | *The guards in Clock Town will not let Link leave in this form; however, there are multiple ways to escape. |
||
| − | !width=75 | Name |
||
| + | **The first technique is to enter the body of water beneath Clock Tower and put on the Zora Mask. This technique will return Link to his regular Zora form and reverse the Fierce Deity glitch. |
||
| − | !width=150| Figurine |
||
| + | **The second technique is to stand atop the Milk Bar (or the other buildings surrounding East Clock Town's exit) and jump towards the exit of East Clock Town. If aimed correctly, Link will jump clear over the guard's head and escape to Termina Field. |
||
| − | !width=300| Description |
||
| + | **The third technique requires you to activate your target system and walk backwards past the wall to the entrance to Termina, then talk to the guard. Fierce Deity Link's model should touch the entrance to Termina, warping him to the field. Make sure to walk straight backwards and not on a diagonal, or else this glitch will not work. Also be sure to have Fierce Deity's sprite inside the guards before you talk. That way, Fierce Deity's sword will hit the exit and you will be in Termina field. |
||
| − | |- |
||
| + | **The fourth technique is in East Clock Town, You should walk near Honey and Darling's and notice the obvious two targets and ledge the glitch is on the ledge, jump there from either over milk bar or from shooting gallery once on you will want to run into the left target so position yourself a little back on the ledge while still being on the lower part of the ledge look at the target with view and view a little to the right of the target, run and if done right you should jump out of bounds headed right to the termina field exit path. |
||
| − | | [[Baito]] |
||
| + | **Alternatively, before activating the glitch, you can plot an escape route through the Astral Observatory by gaining access to the bombers hideout, popping the balloon blocking the ladder, and planting a Magic Bean in the soil outside the observatory. |
||
| − | | [[File:Baito_Figurine.png|95px]] |
||
| + | *Speaking to the Bombers will cause the game to freeze, with the exception being the youngest guarding the entrance to their hideout (it will freeze if he has moved from his spot to let you pass, though). |
||
| − | | Birthplace: Unknown<BR>Personality: Earnest<BR><BR>Baito is very earnest when it comes to mastering a job. He often misses his mother and gets homesick, which can be quite hard on him.<BR><BR>He wants to be like [[Link]]. |
||
| + | ===Fierce Deity Link Uses a Bottle=== |
||
| − | |- |
||
| + | To activate this glitch, do any of the 3 glitches to become Fierce Deity Link outside of boss battles. Second, equip a bottle. Normally, when the bottle button is pressed, Fierce Deity Link takes out the bottle and puts it away immediately, replacing it with his sword. However, if you press the bottle button a second time with the right timing (that is, when he has the bottle all the way out), he will fully swing the bottle. When he does, he will capture anything! For example, if he captures water, he will bottle a fish instead; if he swings the bottle in the air, he will catch a fairy. |
||
| − | | [[Bisht and Basht|Basht & Bisht]] |
||
| + | Another way to use a bottle it to go into an area where you cannot use a sword, e.g. a house or building. However, [[Fierce Deity]] can get stuck. |
||
| − | | [[File:Basht_and_Bisht_Figurine.jpg|150px]] |
||
| − | | Birthplace: [[Dragon Roost Island]]<BR>Occupation: Island police<BR><BR>Being extremely honest and sincere [[Rito]]s, they were chosen to be the island's police force. When you talk to them, they speak frankly about the events on the island. |
||
| − | |- |
||
| − | | [[Hoskit]] |
||
| − | | [[File:Hoskit.jpg|135px]] |
||
| − | | Birthplace: [[Dragon Roost Island]]<BR><BR>His biggest worry is getting a present for his girlfriend. He looks quite easy-going, but he's always thinking of his girlfriend. He values his friends tremendously. |
||
| − | |- |
||
| − | | [[Ilari]] |
||
| − | | [[File:Ilari Figurine.png|85px]] |
||
| − | | Birthplace: [[Dragon Roost Island]]<BR>Occupation: Windfall Island [[Postman]]<BR><BR>Ilari is quite kind as long as he's composed, but when things don't go well, he quickly grows impatient and can get wrought with his speech.<BR><BR>He apparently has a hard time remembering people's faces... |
||
| − | |- |
||
| − | | [[Koboli]] |
||
| − | | [[File:Koboli Figurine.png|130px]] |
||
| − | | Birthplace: [[Windfall Island]]<BR>Occupation: Mail sorter<BR><BR>Koboli is the third generation in a family of [[Postman|postmen]], but rumor has it that an ancestor of his in an age gone by was also a postman... |
||
| − | |- |
||
| − | | [[Kogoli]] |
||
| − | | [[File:Kogoli Figurine.png|85px]] |
||
| − | | Birthplace: [[Dragon Roost Island]]<BR><BR>He always seems to be worrying about the state of the island, but no one has ever seen him working to improve it... |
||
| − | |- |
||
| − | | [[Prince Komali|Komali]] |
||
| − | | [[File:Komali Figurine.png|150px]] |
||
| − | | Birthplace: [[Dragon Roost Island]]<BR>Personality: Mama's boy<BR><BR>Komali has very little confidence in himself and thus closed himself off from the world outside [[Rito|his tribe's]] aerie.<BR><BR>With just little help from [[Link]], though, he has regained his confidence and has at least begun to show signs of being a confident and mature [[Rito]] adult. |
||
| − | |- |
||
| − | | [[Laruto]] |
||
| − | | [[File:Laruto Figurine.png|150px]] |
||
| − | | Birthplace: [[Zora's Domain]]<BR><BR>Long, long ago the [[Zora]] [[sage]], Laruto, offered up her prayers in the [[Earth Temple]] so that the [[Master Sword]] would continue to house the [[Power to Repel Evil|power to repel evil]]. |
||
| − | |- |
||
| − | | [[Medli]] |
||
| − | | [[File:Medli Figurine.png]] |
||
| − | | Birthplace: [[Dragon Roost Island]]<BR>Personality: Serious and sincere<BR><BR>Medli is [[Valoo|Valoo's]] attendant, and as such puts incredible effort into everything she does. Even so, there are times when she seems to be spinning her wheels.<BR><BR>Her greatest treasure is [[Medli's Harp|her harp]] that she carries on her back. |
||
| − | |- |
||
| − | | [[Namali]] |
||
| − | | [[File:Namali Figurine.png]] |
||
| − | | Birthplace: [[Dragon Roost Island]]<BR>Personality: Worrisome<BR><BR>Namali doesn't really have any distinct characteristics per se... |
||
| − | |- |
||
| − | | [[Obli]] |
||
| − | | [[File:Obli Figurine.png]] |
||
| − | | Birthplace: [[Windfall Island]]<BR>Hobby: Dressing up<BR><BR>Obli has such an unhealthy obsession with the [[Rito]]s that he's begun dressing as a Rito and running the famed [[Flight_Control_Platform#The_Bird-Man_Contest|Bird-Man Contest]].<BR><BR>He's the older of the laudable brothers who host the contest. |
||
| − | |- |
||
| − | | [[Pashli]] |
||
| − | | [[File:Pashli Figurine.png]] |
||
| − | | Birthplace: [[Dragon Roost Island]]<BR>Personality: Gentle<BR><BR>For reasons unknown, Pashli's always busy. |
||
| − | |- |
||
| − | | [[Quill|Quill the Postman]] |
||
| − | | [[File:Quill Figurine.png]] |
||
| − | | Birthplace: [[Dragon Roost Island]]<BR>Personality: Dutiful, passionate<BR><BR>Quill has courage, if nothing else. He is admired by his fellow [[Rito]] and [[Rito Chieftain|the chieftain]] places great trust in him. |
||
| − | |- |
||
| − | | [[Rito Chieftain|The Rito Chieftain]] |
||
| − | | [[File:RitoChieftan Figurine.png]] |
||
| − | | Birthplace: [[Dragon Roost Island]]<BR>Head of the [[Rito]] tribe<BR><BR>The chieftain is a very gifted leader who is adored by his people. Due to his position, he must be strict with his relations, but as with any father, he worries about [[Prince Komali|his son]]. |
||
| − | |- |
||
| − | | [[Skett and Akoot|Skett & Akoot]] |
||
| − | | [[File:Skettandakoot_Figurine.jpg|150px]] |
||
| − | | Birthplace: [[Dragon Roost Island]]<BR>Occupation: [[Rito Chieftain|The Chieftain’s]] Guards<BR><BR>Skett and Akoot are said to be number-one and number-two [[Rito]]s when it comes to talent and strength, which is why they are the chieftain’s guards.<BR><BR>The main reason they get along so well is because they are childhood friends. Their style of speech can be considered somewhat antiquated. |
||
| − | |- |
||
| − | | [[Valoo]] |
||
| − | | [[File:Valoo Figurine.png|150px]] |
||
| − | | Birthplace: [[Dragon Roost Island]]<BR>Sky Spirit<BR><BR>Valoo has lived on Dragon Roost Island and protected the [[Rito]]s since long, long ago. He has a habit of speaking only [[Hylian Language|Hylian]], which only his attendant, [[Medli]], grasps. |
||
| − | |- |
||
| − | | [[Willi]] |
||
| − | | [[File:Willi_Figurine.png|95px]] |
||
| − | | Birthplace: [[Windfall Island]]<BR>Hobby: Dressing up<BR><BR>Willi used to be a very average carpenter on Windfall. He so longed to soar the skies that he began dressing as a [[Rito]]. He's the younger of a laudable pair of siblings. |
||
| − | |- |
||
| − | | [[Zephos]] & [[Cyclos]] |
||
| − | | [[File:CyclosZephos Figurine.png|150px]] |
||
| − | | Birthplace: [[Dragon Roost Island]]<BR>Sibling [[Deity|deities]] who control the wind<BR><BR>Zephos and Cyclos are two light-hearted deities who teach Link the [[Wind's Requiem]] and the [[Ballad of the Gales]]. |
||
| − | |- |
||
| − | |} |
||
| + | This glitches was executed on "The Legend of Zelda: Collector's Edition" for the [[Nintendo GameCube|GameCube]]. |
||
| − | == Hall C: [[Cave|Cavern]] Figurines == |
||
| − | [[File:Gallery3.jpg|250px|right]] |
||
| + | ===Fierce Deity Link Falls Through Steps=== |
||
| − | {| class="wikitable" style="text-align:center;" |
||
| + | First, complete the 'Fierce Deity Link Escapes To Termina’ glitch, then make your way to Clock Town. Enter Eastern Clock Town, and jump onto the ledge near the shooting game building. Turn your camera so you can see the Treasure Chest game building, then jump towards it. Fierce Deity Link should fall through the steps which lead to Southern Clock Town. He can also do this in Southern Clock Town, on one of the grass-roofed shacks. He will appear to fall through the ground, but will appear in East Clock Town instead. This is also possible as normal Link, by rolling off the edge near the Shooting Gallery, which makes your jump long enough to land on the steps and fall through. You will then appear in Southern Clock Town. |
||
| − | |- |
||
| − | !width=75 | Name |
||
| − | !width=150| Figurine |
||
| − | !width=300| Description |
||
| − | |- |
||
| − | | [[Armos]] |
||
| − | | [[File:Armos Figurine.png|125px]] |
||
| − | | Habitat: [[Tower of the Gods]]<br>Vulnerability: [[Arrow]]s<br><br>These small statues shift into autopilot and attack prey. Shoot them in the eyes with an arrow to silence them, then destroy them by hacking their crystal backs. |
||
| − | |- |
||
| − | | [[Armos Knight]] |
||
| − | | [[File:Armos Knight Figurine.png|125px]] |
||
| − | | Habitat: [[Tower of the Gods]]<br>Vulnerability: [[Bombs]]<br><br>These auto-homing statues were created to deter intruders. To destroy them, you must toss bombs into their gaping mouths. |
||
| − | |- |
||
| − | | [[Boko Baba]] |
||
| − | | [[File:Boko Baba Figurine.png|125px]] |
||
| − | | Habitat: [[Forbidden Woods]]<br>Spoils: [[Boko Baba Seed]]s<br><br>These creatures that mimic [[Baba Bud]]s attempt to swallow anything that comes near. Defeat them by stunning them with a [[Jump Attack|jump attack]] and then cutting their stems. |
||
| − | |- |
||
| − | | [[Bokoblin]] |
||
| − | | [[File:No Image.png|100px]] |
||
| − | | Habitat: [[Forsaken Fortress]]<br> |
||
| − | Spoils: [[Joy Pendant]]s<br>These little imps wield sharp [[machete]]s and [[Boko Stick|Boko sticks]] when attacking. If they have no weapon, they'll attempt to fight hand-to-hand. |
||
| − | |- |
||
| − | | [[Bubble#Red Bubble|Red Bubble]] & [[Bubble#Blue Bubble|Blue Bubble]] |
||
| − | | [[File:Bubble Figurine.png|125px]] |
||
| − | | Habitat: [[Tower of the Gods]]<br>Stronger Form: Blue Bubble<br><br>The cursed blue flames of the Blue Bubble [[Jinx|steal the power away from all of your attacks]]. Bubbles can be easily blown away by the [[Deku Leaf]]. |
||
| − | |- |
||
| − | | [[ChuChu]] |
||
| − | | [[File:No Image.png|100px]] |
||
| − | | Habitat: Varied<br>Spoils: [[Chu Jelly]]<br><br>There are ChuChus of many different colors, all with their own distinct characteristics. In general, they are most susceptible to projectile weapons. |
||
| − | |- |
||
| − | | [[Floormaster]] |
||
| − | | [[File:Floor Master Figurine.png|125px]] |
||
| − | | Habitat: [[Forsaken Fortress]]<br>Personality: Surprisingly lonely<br><br>These creatures use their long hands to grab their victims, which they then yank into another room. They occasionally grab nearby [[Jar|vases]] and throw them. |
||
| − | |- |
||
| − | | [[Gyorg]] |
||
| − | | [[File:Gyorg Figurine.png|125px]] |
||
| − | | Habitat: The [[Great Sea]]<br>Weakness: Projectiles<br><br>These so-called ocean killing machines are plentiful in the Great Sea. You should attack them with [[arrow]]s or [[bomb]]s before they're able to knock you into the sea. |
||
| − | |- |
||
| − | | [[Kargarok|Kargaroc]] |
||
| − | | [[File:Kargaroc Figurine TWW.png|125px]] |
||
| − | | Habitat: [[Dragon Roost Island|Dragon Roost]]<br>Spoils: [[Golden Feather]]s<br><br>These fierce and dangerous opponents often carry [[Bokoblin]]s and [[Moblin]]s into battle. You can use your [[Grappling Hook]] to steal their Golden Feathers. |
||
| − | |- |
||
| − | | [[Keese]] and [[Keese#Fire Keese|Fire Keese]] |
||
| − | | [[File:Keese_Figurine_TWW.png|150px]] |
||
| − | | Habitat: [[Dragon Roost Cavern]]<br>Least Favorite Thing: Projectiles<br><br>These bats fly around dark places and attack anything that moves. Great care should be taken around Fire Keeses that appear during times of volcanic activity. |
||
| − | |- |
||
| − | | [[Magtail]] |
||
| − | | [[File:Magtail Figurine.png|125px]] |
||
| − | | Habitat: [[Dragon Roost Cavern]]<br>Weakness: Water<br><br>These creatures are covered in a hard exoskeleton that not even the searing heat of [[Zelda Definitions#Lava|lava]] can penetrate. Their eyes are their only weakness.Magtails can be picked up and carried around when they've rolled into a defensive position. |
||
| − | |- |
||
| − | | [[Miniblin]] |
||
| − | | [[File:miniblin.png|200px]] |
||
| − | | Habitat: [[Forsaken Fortress]]<br>Talent: Herd movements<br><br>These little beasts are quick and agile. They scurry along walls and gather in great numbers. You should deal with them individually so they don't surround you. |
||
| − | |- |
||
| − | | [[Morth]] |
||
| − | | [[File:Morth Figurine.png|125px]] |
||
| − | | Habitat: [[Forbidden Woods]]<br>Least Favorite Thing: [[Deku Leaf|Deku Leaves]]<br><br>These creatures attack in groups and cling to the bodies of their prey. A [[Spin Attack|spin attack]] is the best way to shake them off. They're light and vulnerable to Deku Leaf blasts. |
||
| − | |- |
||
| − | | [[Octorok]] |
||
| − | | [[File:Octorok Figurine.png|200px]] |
||
| − | | Habitat: The [[Forest Haven]], [[Great Sea]]<br>Winner of the Perfect Attendance Award<br><br>When approached, these creatures tend to hide in the [[Water_(Terrain)|water]]. They can easily be defeated by reflecting the rocks they shoot with a [[sword]] or [[shield]]. |
||
| − | |- |
||
| − | | [[Peahat]] |
||
| − | | [[File:Peahat Figurine TWW.png|125px]] |
||
| − | | Habitat: [[Forbidden Woods]]<br>Talent: Rotating<br><br>These strange creatures use their propeller-like wings to float in midair. They can be easily knocked out of the sky with either projectiles or a [[Deku Leaf]]. |
||
| − | |- |
||
| − | | [[Poe]] |
||
| − | | [[File:Poe Figurine TWW.png|175px]] |
||
| − | | Habitat: [[Earth Temple]]<br>Best Attack: Possession<br><br>These ghostly creatures have no physical form, so physical attacks pass right |
||
| − | through them. Shining light on them with the [[Mirror Shield]] makes them take form. |
||
| − | |- |
||
| − | | [[Rat]] |
||
| − | | [[File:Rat Figurine.png|125px]] |
||
| − | | Habitat: [[Forsaken Fortress]]<br>Favorite Food: [[All-Purpose Bait]]<br><br>These creatures attack spontaneously and attempt to steal [[Rupee]]s. The ones that carry [[bomb]]s around are apparently known as [[Bombchu]]s. |
||
| − | |- |
||
| − | | [[ReDead]] |
||
| − | | [[File:Redead Figurine.png|125px]] |
||
| − | | Habitat: [[Earth Temple]]<br>Least Favorite Thing: [[Mirror Shield]]<br><br>These undead creatures live only in the darkest depths of the earth. Their icy cold gazes paralyze their victims with fear. Try to attack them from behind. |
||
| − | |- |
||
| − | | [[Sea Hat|Seahat]] |
||
| − | | [[File:GallerySeahat.jpg|150px]] |
||
| − | | Habitat: The [[Great Sea]]<br>Weakness: Projectiles<br><br>These tremendous flying fish can be found only on the Great Sea. They tend to ram ships to knock their prey into the sea, so it is best to attack them from a distance. |
||
| − | |- |
||
| − | |} |
||
| + | ===Fierce Deity Link Falls Through Ground Into Void=== |
||
| − | == Hall D: [[Forsaken Fortress]] Figurines== |
||
| + | As Fierce Deity Link outside of a boss battle, find any ledge that is approximately the same height as you. A good area would be the cliff leading to the Clock Town Great Fairy. Climb it, then slowly tiptoe to the edge. You will attempt to jump, then fall through the ground. You will continue falling until you reach the void, and be transported back to the entrance of the area. |
||
| − | [[File:Gallery4.jpg|250px|right]] |
||
| + | ==[[Epona]] Glitches== |
||
| + | ====Epona In Clock Town First==== |
||
| + | Make sure that both files are reset to the beginning of day one. Then, in one file, ride Epona to the [[Owl Statue]] in [[Milk Road]]. Don't get off, save the game, and quit. On the second file, start the game, and you should be on Epona in Clock Town. |
||
| + | ====Ride Epona As [[Deku]]/[[Goron]]/[[Zora]] Link==== |
||
| − | {| class="wikitable" style="text-align:center;" |
||
| + | {{Youtube|jbGJhsP9PIQ|200|right}} |
||
| − | |- |
||
| + | This is similar to the "Ride Epona In Clock Town Glitch", but a few things change. First, make sure both files are reset to the beginning of day one. Afterwards, on one file, turn into Deku/Goron/Zora Link, and save at any owl statue.On the second file, ride Epona to the Milk Road owl statue; don't get off, and save the game. Go back to the first file, and play it. You should be on Epona, at the owl statue in which you saved your game at. |
||
| − | !width=75 | Name |
||
| − | !width=150| Figurine |
||
| − | !width=300| Description |
||
| − | |- |
||
| − | | [[Big Octo#The Wind Waker|Big Octo]] |
||
| − | | [[File:Big_Octo_Figurine_TWW.png|150px]] |
||
| − | | Habitat: [[Great Sea]]<BR>Effective Weapons: Projectiles<BR><BR>There are said to be six of these legendary giant squid in different reaches of the Great Sea. When ships pass by, they create tremendous currents to try to sink them.<BR>The only way to escape is to shoot all of their weak spots - their eyes - with projectiles before being sucked in. |
||
| − | |- |
||
| − | | [[Darknut]] |
||
| − | | [[File:Darknut Figurine TWW.png|200px]] |
||
| − | | Habitat: [[Tower of the Gods]]<BR>Spoils: [[Knight's Crest]]<BR><BR>These mighty knights are protected by heavy-duty armor. Rather than attacking from the front, it might be best to slip around behind them and cut their armor off. |
||
| − | |- |
||
| − | | [[Darknut]] |
||
| − | | [[File:Darknut Figurine 2 TWW.png|200px]] |
||
| − | | Habitat: [[Earth Temple]]<BR>Spoil: [[Knight's Crest]]<BR><BR>These knights are well protected by their round bucklers and mighty armor. If you use a [[Parry|parry attack]] to jump up and knock off their helmets, it'll spell their doom. |
||
| − | |- |
||
| − | | [[Ganon]]dorf |
||
| − | | [[File:No Image.png|100px]] |
||
| − | | Base of Operations: [[Ganon's Castle]]<BR>Effective Weapons:<BR>[[Light Arrow]]s, [[Master Sword]]<BR>The possessor of the [[Triforce#Triforce_of_Power|Triforce of Power]], Ganondorf controls many fell beasts.<BR><BR>It is useless for [[Link]] to try to face him alone. He must look for an ally who can aid him in battle. |
||
| − | |- |
||
| − | | [[Gohdan|Gohdan, The Great Arbiter]] |
||
| − | | [[File:No Image.png|100px]] |
||
| − | | Habitat: [[Tower of the Gods]]<BR>Effective Weapon: [[Arrow]]s<BR><BR>This monstrous machine was created by [[Deity|the gods]] as a trial for the great hero. You can drop it to the ground only by piercing its hands and face with arrows.<BR>Once it has fallen, you can defeat it by immediately tossing a [[bomb]] inside it.<BR>Oddly enough, arrows occasionally drop from its nostrils. |
||
| − | |- |
||
| − | | [[Gohma]] |
||
| − | | [[File:No Image.png|100px]] |
||
| − | | Habitat: [[Dragon Roost Island]]<BR>Effective Weapon: [[Grappling Hook]]<BR><BR>This gigantic shelled insect inhabits areas of [[Zelda Definitions#Lava|lava]] and magma. The only way to penetrate its hard bio-armor would be to drop an entire sheet of bedrock on it. |
||
| − | |- |
||
| − | | [[Helmaroc King|The Monstrous Helmaroc King]] |
||
| − | | [[File:Helmaroc King Figurine TWW.png|200px]] |
||
| − | | Habitat: [[Forsaken Fortress]]<BR>Master: [[Ganon]]dorf<BR><BR>The Helmaroc King is a monstrous bird that has been fitted with a mighty steel mask. Once the mask has been split with a [[Hammer#Skull_Hammer|hammer]], its tender beak will be revealed. |
||
| − | |- |
||
| − | | [[Jalhalla|Jalhalla, Protector of the Seal]] |
||
| − | | [[File:Jalhalla.jpg|150px]] |
||
| − | | Habitat: [[Earth Temple]]<BR>Underlings: [[Poe]]s<BR><BR>This gigantic ghost rules over all Poes. After reflecting light onto it with the [[Mirror Shield]], you can lift it and throw it around. |
||
| − | |- |
||
| − | | [[Kalle Demos]] |
||
| − | | [[File:Kalle_Demos_Figurine_TWW.png|200px]] |
||
| − | | Habitat: [[Forbidden Woods]]<BR>Favorite Thing: [[Makar]]<BR><BR>This plant-monster is a gigantic parasite that lives in the depths of the Forbidden Woods.<BR><BR>Only by cutting loose all of its disgusting tentacles with the [[Boomerang]] will its tender core be revealed. |
||
| − | |- |
||
| − | | [[Mighty Darknut]] |
||
| − | | [[File:Mighty Darknut Figurine.png|200px]] |
||
| − | | Habitat: [[Hyrule Castle]]<BR>Spoil: [[Knight's Crest]]<BR><BR>These are [[Darknut]] captains. Some wear capes that must be burned or cut off before their armor straps can be cut. |
||
| − | |- |
||
| − | | [[Moblin]] |
||
| − | | [[File:No Image.png|100px]] |
||
| − | | Habitat: [[Forsaken Fortress]]<BR>Spoils: [[Skull Necklace]]s<BR><BR>These mighty enemies swing their long [[Moblin Spear|spears]] with the greatest of ease. They've knocked [[Link]] around with that attack countless times. |
||
| − | |- |
||
| − | | [[Molgera|Molgera, Protector of the Seal]] |
||
| − | | [[File:Molgera.jpg|150px]] |
||
| − | | Habitat: [[Wind Temple]]<BR>Effective Weapon: [[Hookshot]]<BR><BR>This evil guardian burrows deep into sand. Use the Hookshot to draw out its tender tongue, then slash at it with your [[sword|blade]]. |
||
| − | |- |
||
| − | | [[Mothula]] |
||
| − | | [[File:No Image.png|100px]] |
||
| − | | Habitat: [[Forbidden Woods]]<BR>Effective Weapons: [[Deku Leaf]], projectiles<BR><BR>This gigantic moth scatters its scales through the air. Even using projectiles to clip its wings won't assure safety - it can still run around swiftly and release larvae. |
||
| − | |- |
||
| − | | [[Phantom Ganon]] |
||
| − | | [[File:No Image.png|100px]] |
||
| − | | Habitat: [[Forsaken Fortress]]<BR>Effective Weapons: [[Light Arrow]]s, [[Master Sword]]<BR><BR>This is a phantom that [[Ganon]]dorf created in his own likeness. Use your [[sword]] to [[Dead Man's Volley|knock back the balls of magic]] that he hurls, then attack him when he's stunned.<BR><BR>Actually, you can also use [[Bottle|empty bottles]] to deflect his magic attacks. |
||
| − | |- |
||
| − | | [[Puppet Ganon]] |
||
| − | | [[File:No Image.png|100px]] |
||
| − | | Habitat: [[Ganon's Castle]]<BR>Effective Weapon: [[Light Arrow]]s<BR><BR>This is a gigantic marionette created by [[Ganon]] himself. It transforms into three different shapes, but all are vulnerable to rays of light.<BR><BR>Rather than shooting randomly at it, try to deduce when it can be easily targeted and then take advantage of your chance. |
||
| − | |- |
||
| − | | [[Stalfos]] |
||
| − | | [[File:No Image.png|100px]] |
||
| − | | Habitat: [[Earth Temple]]<BR>Weakness: Its head<BR><BR>These skeleton warriors attack by violently swinging their gigantic maces around. Even if they're shattered to pieces, they'll reform unless their heads are destroyed. |
||
| − | |- |
||
| − | | [[Wizzrobe]] |
||
| − | | [[File:Wizzrobe_Figurine2_TWW.png|150px]] |
||
| − | | Habitat: [[Wind Temple]]<BR>Magic: Summons<BR><BR>These high-level mages use the magic of summoning to aid them in battle. They are the only Wizzrobes that can summon other Wizzrobes, which makes them formidable. |
||
| − | |- |
||
| − | | [[Wizzrobe]] |
||
| − | | [[File:Wizzrobe_Figurine_TWW.png|200px]] |
||
| − | | Habitat: [[Tower of the Gods]]<BR>Magic: Fire, Summons<BR><BR>These mighty mages are adept at wielding flame and summoning other creatures to their aid.<BR><BR>The only way to defeat them is to try to predict their movements and attack them during the brief moments that they assume physical form. |
||
| − | |- |
||
| − | |} |
||
| + | ====Be Epona==== |
||
| − | == Hall E: [[Outset Island]] Figurines == |
||
| + | There are two ways to do this, both involving the "Use Items on Epona Glitch". |
||
| − | [[File:Gallery5.jpg|right|250px]] |
||
| − | {| class="wikitable" style="border:1px solid white;text-align:center;margin: 0;" |
||
| − | |- |
||
| − | !width=75 | Name |
||
| − | !width=150| Figurine |
||
| − | !width=266| Description |
||
| − | |- |
||
| − | | [[Abe]] |
||
| − | | [[File:Figurine_Abe.png|85px]] |
||
| − | | Birthplace: [[Outset Island]]<BR>Greatest Treasure: His family<BR><BR>Abe is a family man who takes good care of [[Rose|his wife]] and two kids. In his younger days, his dashing good looks and baritone voice made him quite the ladies’ man.<BR><BR>Then one day, he was instantly smitten by a woman named [[Rose]]. Even though he was consistently rebuffed, he persisted and finally convinced Rose to marry him. |
||
| − | |- |
||
| − | | [[Aryll]] |
||
| − | | [[File:Aryll_Figurine.png|105px]] |
||
| − | | Birthplace: [[Outset Island]]<BR>Personality: Kind and true to her family<BR><BR>[[Link]]'s energetic younger sister is adored by all who meet her. Her current goal is to learn how to fetch water so she can help out her [[grandmother]].<BR><BR>Her most treasured belonging is a [[telescope]] bearing a drawing of a [[seagull]]. |
||
| − | |- |
||
| − | | [[Crab]] |
||
| − | | [[File:Crab Figurine.png|100px]] |
||
| − | | Birthplace: Unknown<BR>Talent: Crab-walking<BR><BR>These creatures are crabs, plain and simple. |
||
| − | |- |
||
| − | | [[Grandmother|Link's Grandma]] |
||
| − | | [[File:Grandma_Figurine.png|110px]] |
||
| − | | Birthplace: [[Outset Island]]<BR>Personality: Worrywart<BR><BR>This kind old woman works hard to raise her two grandchildren. She's a very |
||
| − | talented cook - her special [[Elixir Soup]] is sure to raise anyone's spirit.<BR><BR>She can be somewhat mischievous and enjoys playing the occasional prank on [[Link]]. |
||
| − | |- |
||
| − | | [[Jabun]] |
||
| − | | [[File:Jabun_Figurine.png|150px]] |
||
| − | | Birthplace: [[Greatfish Isle]]<BR>Water Spirit<BR><BR>Jabun can only speak [[Hylian Language|Hylian]], so hardly anyone understands a word he says. |
||
| − | |- |
||
| − | | [[Joel]] |
||
| − | | [[File:Joel_Figurine.png|130px]] |
||
| − | | Birthplace: [[Outset Island]]<BR>Main Interest: Sticks<BR><BR>Joel's dream is to grow up as soon as he can so he can jump across boulders just like [[Link]].<BR><BR>Both he and his younger brother, [[Zill]], distinctly resemble their [[Abe|father]]. |
||
| − | |- |
||
| − | | [[Mesa]] |
||
| − | | [[File:Mesa_Figurine.png|120px]] |
||
| − | | Birthplace: [[Outset Island]]<BR>Personality: Slacker<BR><BR>Mesa performs his chores at very much his own pace. His vegetable patch is always full of weeds and he spends most of the year trying to clear it out.<BR><BR>He's surprisingly timid and often can't fall asleep at night. He's currently looking for a wife. |
||
| − | |- |
||
| − | | [[Orca]] |
||
| − | | [[File:Orca_Figurine.png|200px]] |
||
| − | | Birthplace: [[Outset Island]]<BR>Talent: Swordplay<BR><BR>In his younger days, Orca had hoped to be a swordsman, but after he suffered a serious injury that ended that dream. He soon returned to Outset and became a fisherman.<BR><BR>On a ledge on one one wall of his house is a memento from his days of training with a blade. Orca is a lifelong bachelor. |
||
| − | |- |
||
| − | | [[Rose]] |
||
| − | | [[File:Rose_Figurine.png|140px]] |
||
| − | | Birthplace: [[Outset Island]]<BR>Favorite thing: Animals<BR><BR>The mother of [[Joel]] and [[Zill]], Rose a woman of refreshingly simple tastes...but she's a demanding mother. She has the bad habit of trying to laugh her way out of lies. |
||
| − | |- |
||
| − | | [[Seagull]] |
||
| − | | [[File:Seagulls.png|150px]] |
||
| − | | Birthplace: Unknown<BR>Talent: Flying<BR><BR>Seagulls soar freely over the [[Great Sea]]. They love [[Hyoi Pear|Hyoi Pears]] above all other foods, and eating them simply steals their hearts. |
||
| − | |- |
||
| − | | [[Sturgeon]] |
||
| − | | [[File:Figurine Sturgeon.png|120px]] |
||
| − | | Birthplace: [[Outset Island]]<BR>Peronality: Extremely serious<BR><BR>Known as Outset's living encyclopedia, Sturgeon is quite wise, boasting an abnormally high IQ.<BR><BR>He has extremely sensitive nerves - quite the opposite of his younger brother, [[Orca]], who lives downstairs. Surprisingly, Sturgeon was an accomplished swordsman in his youth. |
||
| − | |- |
||
| − | | [[Sue-Belle]] |
||
| − | | [[File:SueBelle_Figurine.png|80px]] |
||
| − | | Place of birth: [[Windfall Island]]<BR>Personality: Serious<BR><BR>Sue-Belle was born and raised on Windfall, but she became concerned for the health of her grandfather, [[Sturgeon]], so she decided to move to live with him on [[Outset Island]].<BR><BR>Morning, noon and night, she fills [[Jar|vases]] with water and carries them on her head from the well to their house. Strangely enough, she actually enjoys the task. |
||
| − | |- |
||
| − | | [[Pig|Wild Pig]] |
||
| − | | [[File:Wild_Pig_Figurine_TWW.png|150px]] |
||
| − | | Birthplace: Unknown<BR>Talent: Digging holes<BR><BR>Wild Pigs are found primarily in the fields of [[Outset Island]]. They love [[All-Purpose Bait]] above all other foods, and when they eat it they can't help but tear into the earth. |
||
| − | |- |
||
| − | | [[Zill]] |
||
| − | | [[File:Zill_Figurine.png|100px]] |
||
| − | | Birthplace: [[Outset Island]]<BR>Talent: Sniffling<BR><BR>Zill is a hyper-inquisitive young boy who speaks his thoughts as soon as they come to mind. He can often strike a nerve without realizing it.<BR><BR>He likes to imitate his older brother, [[Joel]]. And strangely enough, it seems that he actually lets his nose run on purpose... |
||
| − | |} |
||
| + | Method 1: This method is by far the easiest. First, perform the "Use Items on Epona Glitch", and wear the [[Deku Mask]], [[Goron Mask]] or the [[Zora Mask]]. You will drop off Epona, but you will still be able to control her. |
||
| − | == Hall F: [[Windfall Island]] Figurines == |
||
| − | [[File:Gallery6.jpg|right|250px]] |
||
| + | Method 2: Perform the "Use Items on Epona Glitch". Then go to the [[Gorman Brothers]] Race Track, and challenge them. When the race starts, wear the [[Giant's Mask]]. You will be frozen in mid-air, but still able to control Epona. |
||
| − | {| class="wikitable" style="text-align:center;" |
||
| − | |- |
||
| − | !width=75 | Name |
||
| − | !width=150| Figurine |
||
| − | !width=300| Description |
||
| − | |- |
||
| − | | [[Anton]] |
||
| − | | [[File:Anton Large.png|150px]] |
||
| − | | Birthplace: [[Windfall Island]]<BR>Favoirte Activity: Kickboxing<BR><BR>The reason his second-favorite hobby is taking walks is because it keeps his legs in shape. He's had his eye on a [[Linda|certain young lady]] lately. |
||
| − | |- |
||
| − | | [[Candy|Candy the Sailor]] |
||
| − | | [[File:Candy Figurine TWW.png|150px]] |
||
| − | | Birthplace: [[Windfall Island]]<BR>Good at Cooking: Grapes<BR><BR>At first glance, Candy looks a little intimidating, but he's actually extremely kind and quite knowledgeable. He's always happy to share his knowledge, too.<BR><BR>He is energetic and sort of a scamp for a seventeen year old. |
||
| − | |- |
||
| − | | [[Bomb-Master Cannon]] |
||
| − | | [[File:Cannon Figurine TWW.png|150px]] |
||
| − | | Birthplace: [[Windfall Island]]<BR>Mood: Shifts violently<BR><BR>Cannon is the world's only maker of [[Bomb|bombs]]. He considers himself a magician with gunpowder and other explosives. His hairstyle is as unique as his talent. |
||
| − | |- |
||
| − | | [[Dampa|Dampa the Sailor]] |
||
| − | | [[File:Dampa_Figurine.png|150px]] |
||
| − | | Birthplace: [[Windfall Island]]<BR>Favorite Animal: [[Pig|Pigs]]<BR><BR>Dampa recently got some pet pigs, and now they're all he can think about. He really confirms the old adage about pets and their owners. |
||
| − | |- |
||
| − | | [[Doc Bandam|The Potion Master, Doc Bandam]] |
||
| − | | [[File:DocBandam_Figurine.png|120px]] |
||
| − | | Birthplace: [[Windfall Island]]<BR>Favorite Food: [[Chu Jelly]]<BR><BR>Doc Bandam spends his days researching [[ChuChu|ChuChus]] in his [[Chu Jelly Juice Shop|potion shop]]. He visits [[Pawprint Isle|Pawprint Island]] now and then to collect the Chu Jelly he uses to make his [[Potion|potions]].<BR><BR>He considers himself a potion artist, and like an artist, he's quite whimsical. |
||
| − | |- |
||
| − | | [[Garrickson]] |
||
| − | | [[File:Garrickson Figurine.png|150px]] |
||
| − | | Birthplace: [[Windfall Island]]<BR>Personality: Passionate<BR><BR>He is constantly thinking of someone on a faraway island. He's apparently a very passionate man, and he has a very hip sense of fashion. |
||
| − | |- |
||
| − | | [[Gillian]] |
||
| − | | [[File:Gillian.png|80px]] |
||
| − | | Birthplace: [[Windfall Island]]<BR>Workplace: The [[Cafe Bar]]<BR><BR>Gillian manages the cafe in place of her now-ill father. It seems she once had a boyfriend, but that info is TOP-SECRET! |
||
| − | |- |
||
| − | | [[Gossack]] |
||
| − | | [[File:Gossack_Figurine.jpg|150px]] |
||
| − | | Birthplace: [[Windfall Island]]<BR>Personality: Not brave<BR><BR>There isn't much to say about Gossack. |
||
| − | |- |
||
| − | | [[Gummy|Gummy the Sailor]] |
||
| − | | [[File:Gummy.jpg|150px]] |
||
| − | | Birthplace: [[Windfall Island]]<BR>Favorite Spice: Pepper<BR><BR>No one knows where he gets his spending money from, but this nifty sailor spends night after night unwinding at the [[auction]]. |
||
| − | |- |
||
| − | | [[Kamo]] |
||
| − | | [[File:Kamo_Figurine.jpg|110px]] |
||
| − | | Birthplace: [[Windfall Island]]<BR>Years With No Girlfriend: 18<BR><BR>Ever the romantic, Kamo loves to gaze at the night sky. He and his dear friend [[Linda]] were once classmates at [[School of Joy|Mrs. Marie's School]]. |
||
| − | |- |
||
| − | | [[Kane|Kane the Sailor]] |
||
| − | | [[File:Kane_Figurine.jpg|130px]] |
||
| − | | Birthplace: [[Windfall Island]]<BR>Favorite Occupation: Artist<BR><BR>Long ago, Kane longed to be an artist or a sculptor, but circumstances in his home life forced him to become a sailor. He's still critical of all artistic expression, though. |
||
| − | |- |
||
| − | | [[Killer Bees|Windfall's Gang of Boys, The Killer Bees]] |
||
| − | | [[File:KillerBees_Figurine.png|200px]] |
||
| − | | Birthplace: [[Windfall Island]]<BR>Main Objective: Raising trouble<BR><BR>This small group of four calls itself the Killer Bees. Starting from left, the members are:<BR><BR>The leader, Ivan:<BR>A very talented and reliable leader. Leave all tree climbing to him.<BR><BR>Jin, the fox:<BR>Ivan's quick-witted adviser. His wry insults can be hard to take.<BR><BR>Jan, the blue-hair:<BR>Uses his innocent looks to avert trouble. He's the Killer Bee's Thug.<BR><BR>The pig-nosed, Jun-Roberto:<BR>Secretly aims to be the next gang leader. He was raised in a bourgeois family and has developed into a terrible little tyrant.<BR><BR>When these four are together, they fear absolutely nothing! |
||
| − | |- |
||
| − | | [[Kreeb]] |
||
| − | | [[File:Kreeb.jpg|95px]] |
||
| − | | Birthplace: [[Windfall Island]]<BR>Least Favorite Proberb: "Only smoke and fools love high places."<BR><BR>This young guy's trademark is his yellow hat. He seems to have an unusual interest in the town's ferris wheel and lighthouse. |
||
| − | |- |
||
| − | | [[Lenzo|The Pictographer, Lenzo]] |
||
| − | | [[File:Lenzo_Figurine.png]] |
||
| − | | Birthplace: Unknown<BR>Personality: Hard to grasp<BR><BR>Lenzo is a famed pictographer known to all. His mysterious personality is quite popular with the ladies in town. |
||
| − | |- |
||
| − | | [[Linda]] |
||
| − | | [[File:Linda_Figurine.png]] |
||
| − | | Birthplace: [[Windfall Island]]<BR>Best Friend: Sue-Belle<BR><BR>Lately, her childhood friend, the delicate [[Kamo]], has become smitten with her, but she's apparently completely oblivious to his feelings. |
||
| − | |- |
||
| − | | [[Maggie]] |
||
| − | | [[File:Maggie_Figurine.png|150px]] |
||
| − | | Birthplace: [[Windfall Island]]<BR>Favorite Thing: Love and Romance<BR><BR>Maggie was dirt-poor before being kidnapped and held captive in the [[Forsaken Fortress]]. She's quite popular with all boys... but she prefers "wild" boys over all others.<BR><BR>Lately she has taken to writing poems and will soon be publishing one entitled "A Woman's Heart is Blue." |
||
| − | |- |
||
| − | | [[Maggie's Father]] |
||
| − | | [[File:MaggieFather_Figurine.png|150px]] |
||
| − | | Birthplace: [[Windfall Island]]<BR>Personality: Not particularly good<BR><BR>Surprisingly, Maggie's father is quite confident that he is the epitome of fashion. It would probably be more accurate to say that the clothes he wears are "distinct."<BR><BR>He seems to especially like vintage clothes and jewelry. |
||
| − | |- |
||
| − | | [[Mila]] |
||
| − | | [[File:Mila_Figurine.png|150px]] |
||
| − | | Birthplace: [[Windfall Island]]<BR>Personality: Harsh<BR><BR>This poor girl was filthy rich until she got rescued from her prison in the [[Forsaken Fortress]].<BR><BR>Now that her family has fallen on hard times, she works for the [[Zunari's Shop|shop on Windfall Island]] to help ease their hardship. |
||
| − | |- |
||
| − | | [[Mila's Father]] |
||
| − | | [[File:MilaFather_Figurine.png|150px]] |
||
| − | | Birthplace: [[Windfall Island]]<BR>Favorite Thing: Money<BR><BR>His hobby was once collecting [[Jar#Expensive_Jar|expensive vases]], but unfortunately, they were the kind of vase one wants to break as soon as one catches sight of them.<BR><BR>Those who did and were forced to compensate him for his loss were said to regret it afterward. |
||
| − | |- |
||
| − | | [[Minenco]] |
||
| − | | [[File:Minenco.jpg|85px]] |
||
| − | | Birthplace: [[Windfall Island]]<BR>Favorite Thing: [[Pictography|Pictographs]]<BR><BR>This former beauty became famous after being dubbed Miss Windfall Island...about forty years ago. There isn't a younger woman who could take that title away. |
||
| − | |- |
||
| − | | [[Miss Marie|The Joyful Teacher, Mrs. Marie]] |
||
| − | | [[File:MrsMarie_Figurine.png]] |
||
| − | | Birthplace: [[Windfall Island]]<BR>This Year's Lucky Number: 20<BR><BR>This year marks the twentieth year this splendid individual has worked as Windfall's school teacher. Her hobby is collecting [[Joy Pendant|Joy Pendants]].<BR><BR>Her goal in life is to raise unique and creative students. The most unique thing she's ever created is her own hairstyle. |
||
| − | |- |
||
| − | | [[Missy]] |
||
| − | | [[File:Missy.jpg|95px]] |
||
| − | | Birthplace: [[Windfall Island]]<BR>Her son: [[Dampa|Dampa the Sailor]]<BR><BR>She's just an ordinary elderly woman. |
||
| − | |- |
||
| − | | [[Pompie and Vera|Pompie & Vera]] |
||
| − | | [[File:Pompieandvera.jpg|150px]] |
||
| − | | Birthplace: [[Windfall Island]]<BR>Hobby: Gossiping<BR><BR>Pompie and Vera are the town's most talkative pair of ladies, and they are always spreading idle gossip. Lately they've been obsessed with [[Lenzo]]. |
||
| − | |- |
||
| − | | [[Joanna and Potova|Potova & Joanna]] |
||
| − | | [[File:Joanna_and_Potova.jpg|150px]] |
||
| − | | Birthplace: [[Windfall Island]]<BR>Nickname: The Little Tipsters<BR><BR>These two girls are talented at hitting on islands rumors, seemingly without any tips or advise from others. Children can be really frightening sometimes. |
||
| − | |- |
||
| − | | [[Sam]] |
||
| − | | [[File:Sam.jpg|105px]] |
||
| − | | Birthplace: [[Windfall Island]]<BR>Favorite Spot: The sea view bench<BR><BR>He thinks that a little composure is of the utmost importance in life. Sam's a card-carrying member of the [[Joyous Volunteer Association]]. |
||
| − | |- |
||
| − | | [[Tott]] |
||
| − | | [[File:Tott_Figurine.png]] |
||
| − | | Birthplace: [[Windfall Island]]<BR>Talent: Dancing<BR><BR>This young fellow dreams of becoming a professional dancer. He dances before a |
||
| − | strange stone monument day and night.<BR><BR>This smooth dancer may still be practicing, but he's also recruiting for a partner! ♪ |
||
| − | |- |
||
| − | | [[Zunari|The Shop Guru, Zunari]] |
||
| − | | [[File:Zunari_Figurine.png|150px]] |
||
| − | | Birthplace: A C-C-Cold Island<BR>Pet Phrase: "Dear me!"<BR><BR>Even on the hottest day of summer, Zunari can be found in his [[Zunari's Shop|shop]], wearing the beloved hood that his mother made for him. He keeps a [[Magic Armor|great treasure]] in his safe there.<BR><BR>On a side note, he turns 40 this year and is now recruiting for a wife. |
||
| − | |- |
||
| − | |} |
||
| + | This only works on the Golden N64 cartridge. |
||
| − | == Hall G: [[Great Sea]] Figurines== |
||
| − | [[File:Gallery7.jpg|right|250px]] |
||
| + | ====Use Any Item On Epona==== |
||
| − | {| class="wikitable" style="text-align:center;" |
||
| + | Call Epona, and ride to [[Milk Road]], go to the Owl Statue and save (Don't get off of Epona). Go back in, and you will have the C buttons active on Epona, although they aren't visible. |
||
| − | |- |
||
| − | !width=75 | Name |
||
| − | !width=150| Figurine |
||
| − | !width=300| Description |
||
| − | |- |
||
| − | | [[Tingle Brothers#Ankle|Ankle]] |
||
| − | | [[File:Ankle_Figurine_TWW.png|100px]] |
||
| − | | Birthplace: Unknown<BR>Favorite Proverb: "One may as well hang for a stolen sheep as for a stolen lamb."<BR><BR>Since being taught how to decipher [[charts|maps]] by his older brother [[Tingle]], Ankle has been supporting his good-for-nothing twin brother [[Knuckle]].<BR><BR>The only time he feels he can truly be himself is when he's tending to the [[Tingle Island]] flower garden. |
||
| − | |- |
||
| − | | [[Beedle]] |
||
| − | | [[File:Beedle_Figurine.png|150px]] |
||
| − | | Birthplace: Unknown<BR>Favorite Thing: Bugs (especially beetles)<BR><BR>A businessman by nature, Beedle's sales pitch is unmatched. He hopes to open a chain of trading posts where people can buy, sell, or trade anything. |
||
| − | |- |
||
| − | | [[Tingle Brothers#David Jr.|David Jr.]] |
||
| − | | [[File:David_Jr_Figurine_TWW.png|100px]] |
||
| − | | Birthplace: [[Windfall Island]]<BR>Occupation: Treasure hunter<BR><BR>Seventeen-year-old David Jr. set out ot sea with dreams of finding the treasure of the [[Ghost Ship]] that his now-deceased father once saw.<BR><BR>He gets seasick quite easily and was in just such a state when he awoke in a daze on [[Tingle Island]].<BR><BR>Ankle told him that "self comes before wealth" and he's been working in the tower ever since. He really hates the uniform. |
||
| − | |- |
||
| − | | [[Fairy]] |
||
| − | | [[File:Fairy_Figurine_TWW.png|150px]] |
||
| − | | Birthplace: Unknown<BR>First Impression: Good<BR><BR>Fairies are the most reliable of creatures. When their master's life energy has been depleted, they immediately come to his or her aid. They can be carried in [[Bottle|bottles]]. |
||
| − | |- |
||
| − | | [[Fishman]] |
||
| − | | [[File:Fishman_Figurine.png|150px]] |
||
| − | | Birthplace: [[Great Sea|The Great Sea]]<BR>Personality: Honorable, dutiful, and surly<BR><BR>Apparently, these fish were aided long ago by the [[Daphnes Nohansen Hyrule|King of Red Lions]], which is why they're now willing to offer [[Link]] valuable information.<BR><BR>Unfortunately, much of their information is off the mark. For many long years they have suffered from stiff necks, but none of them know how to cure it. |
||
| − | |- |
||
| − | | [[Gonzo]] |
||
| − | | [[File:Gonzo_Figurine.png|135px]] |
||
| − | | Personality: Short-tempered<BR>Favorite Thing: [[Miss Tetra|Tetra]]<BR><BR>Leader of [[Tetra's Pirate Crew|Tetra's family of pirates]], Gonzo seems to be quite strong...but he cries at the drop of a hat. |
||
| − | |- |
||
| − | | [[Great Fairy]] |
||
| − | | [[File:GreatFairies_Figurine.png|150px]] |
||
| − | | Birthplace: [[Angular Isles]]<BR>Talent: Powering-up<BR><BR>The seven Great Fairies who are destined to aid the Great Hero by increasing his powers are hiding in seven different reaches of the [[Great Sea]]. |
||
| − | |- |
||
| − | | [[Daphnes Nohansen Hyrule|King of Hyrule]] |
||
| − | | [[File:Daphnes_Figurine.png|150px]] |
||
| − | | The King of Hyrule was unable to protect his kingdom from evil and left its fate up to the gods. The [[King of Red Lions]] is merely his disguise.<BR><BR>His full name is one that is truly fit for royalty: Daphnes Nohansen Hyrule. |
||
| − | |- |
||
| − | | [[Tingle Brothers#Knuckle|Knuckle]] |
||
| − | | [[File:Knuckle_Figurine_TWW.png|150px]] |
||
| − | | Birthplace: Unknown<BR>Occupation: Carver<BR><BR>[[Knuckle]] is another of [[Tingle]]'s younger brothers-he happens to be [[Ankle]]'s twin. He finished carving Tingle Tower when he was ten years old. The head is his studio.<BR><BR>Supposedly, he felt unsatisfied completing his collection without this figure. He loves his special vertically aligned [[Tingle Tuner]]. |
||
| − | |- |
||
| − | | [[Link]] & the [[King of Red Lions]] |
||
| − | | [[File:Link_and_the_King_of_Red_Lions_Figurine_TWW.png|150px]] |
||
| − | | Birthplace: [[Outset Island]]<BR>Favored Hand: Left<BR><BR>The Hero of Wind, Link uses the Wind Waker to control the wind and sail the seas on his mysterious boat (which is actually the King of Hyrule).<BR><BR>Surprisingly, he seems to have an unnatural interest in figurines and has at last completed his collection! He is now the master of the Nintendo Gallery. |
||
| − | |- |
||
| − | | [[Loot|Loot the Sailor]] |
||
| − | | [[File:Loot.jpg|150px]] |
||
| − | | Birthplace: [[Windfall Island]]<BR>His Only Fear: [[Fishman|The Merman]]<BR><BR>Loot spends his days working far from home at the [[Boating Course]]. He takes his earnings straight to the [[Cafe Bar]] on Windfall to enjoy a relaxing beverage. |
||
| − | |- |
||
| − | | [[Mako]] |
||
| − | | [[File:Mako_Figurine.jpg|150px]] |
||
| − | | Personality: At first glance, quiet<BR>Least Favorite Thing: Having his glasses touched by strangers.<BR><BR>Mako is called the brains of [[Tetra's Ship|the ship]] and the king of invention. He may look like a weakling, but his glasses give him keen eyesight, and he's unstoppable when mad.<BR><BR>Not many know this, but he keeps a knife hidden in that thick book of his. |
||
| − | |- |
||
| − | | [[Niko]] |
||
| − | | [[File:Niko.jpg|125px]] |
||
| − | | Personality: Merry<BR>Least Favorite Thing: [[Gonzo]]'s underwear<BR><BR>Niko is the bottom rang on the pirate ladder, so he's responsible for all the odd jobs on the ship.<BR><BR>He's quite childish and rarely thinks of the consequences of his actions. Even so, he shows signs of having what it takes to move up the pirate ladder. |
||
| − | |- |
||
| − | | [[Nudge]] |
||
| − | | [[File:Nudge_Figurine.jpg|105px]] |
||
| − | | Personality: Who knows?<BR>Talent: Sewing<BR><BR>Nudge seems to understand [[Tetra]] best of all the pirates and often counsels her in her decision making. He's actually stronger than [[Gonzo]]. |
||
| − | |- |
||
| − | | [[Old Man Ho Ho]] |
||
| − | | [[File:Old_Man_Ho_Ho.jpg|100px]] |
||
| − | | Birthplace: Unknown<BR>Favorite Thing: [[Telescope|Telescopes]]<BR><BR>Old man Ho Ho found his first telescope after retiring from his job and has been traveling in search of new sights ever since.<BR><BR>A new discovery always awaits at the far end of his telescope. |
||
| − | |- |
||
| − | | [[Princess Zelda]] |
||
| − | | [[File:Princess_Zelda_Figurine_TWW.png|100px]] |
||
| − | | Princess Zelda is the legitimate heir to the [[Royal Family of Hyrule|Hyrulean royal family]]. She is actually the pirate [[Tetra]]. |
||
| − | |- |
||
| − | | [[Fairy Queen|Queen of Fairies]] |
||
| − | | [[File:QueenofFairies_Figurine.png|100px]] |
||
| − | | Birthplace: Fairy Island<BR>Talent: Empowering arrows with fire and ice<BR><BR>She appears to be but a child, but she is much greater and more powerful than the [[Great Fairy|Great Fairies]]. She will grant [[Link]] the power to add [[Fire Arrow|fire]] and [[Ice Arrow|ice]] to his [[Arrow|arrows]]. |
||
| − | |- |
||
| − | | [[Salvage Corp]] |
||
| − | | [[File:Salvage_Corp.jpg|150px]] |
||
| − | | Birthplace: [[Angular Isles]]<BR>Talent: Searching for sunken treasure<BR><BR>These young men found friendship through their common interest in searching for sunken treasure. Soon afterward, they formed the Salvage Corp.<BR><BR>With thier first haul of treasure, all they could afford to buy was their diving suits. Now they dream of finding that one huge haul that makes them all rich.<BR><BR>They are currently searching for [[Triforce#The Wind Waker|the legendary treasure sunken beneath the sea]]. |
||
| − | |- |
||
| − | | [[Salvatore]] |
||
| − | | [[File:Salvatore_Figurine.jpg|150px]] |
||
| − | | Birthplace: [[Windfall Island]]<BR>Talent: Drawing pictures<BR><BR>Long ago, Salvatore hoped to be a famous painter, but that dream didn't last long. He eventually returned to his hometown and came up with [[Sinking Ships|his current business plan]].<BR><BR>It's been a huge success, allowing him to purchase [[Spectacle Island|his own island]], where he has opened up the [[Barrel Shoot|second store]] in what he hopes will become a huge chain.<BR><BR>He's now busy trying to think up that one idea that will spark his next big endeavor. |
||
| − | |- |
||
| − | | [[Senza]] |
||
| − | | [[File:Senza_Figurine.jpg|150px]] |
||
| − | | Personality: Mild-mannered<BR>Talent: Ummm...talking, maybe?<BR><BR>Senza is in charge of keeping the [[Tetra's Ship|pirate ship]] in order. He's a mild-mannered speaker, but his persuasive skills are said to be unmatched. |
||
| − | |- |
||
| − | | [[Tetra]] |
||
| − | | [[File:Tetra_Figurine.png|100px]] |
||
| − | | Personality: Elusive<BR>Tetra seems bossy and strong willed, but she's actually quite kind.<BR><BR>Orphaned at a young age, Tetra followed in her mother's footsteps, becoming a pirate and watching after her mother's gang of lovable swabbies.<BR><BR>Tetra and her crew are in search of a [[Triforce#The Wind Waker|legendary treasure]] hidden beneath the waves of the [[Great Sea]]. |
||
| − | |- |
||
| − | | [[Tingle]] |
||
| − | | [[File:Tingle_Figurine.png]] |
||
| − | | Birthplace: Unknown<BR>Favorite Things: [[Fairy|Fairies]], deciphering [[Charts|maps]]<BR><BR>It's been several years since Tingle first became enchanted with deciphering maps in the hopes it would help him find fairies, and he's lost many things during that time.<BR><BR>He's raising funds to begin his search for fairies, hoping to embark sometime in his thirties, while the lust of life is still upon him. At the age of 35, the pressure's on! |
||
| − | |- |
||
| − | | [[Goron#The Wind Waker|Traveling Merchants]] |
||
| − | | [[File:GoronMerchants_Figurine.png|150px]] |
||
| − | | Birthplace: Unknown<BR>Favorite Food: Rocks<BR><BR>These businessmen are traveling the world in search of curios and oddities, each with the hope of someday opening his own shop.<BR><BR>Nobody knows where these wandering merchants have come from or where they're headed. |
||
| − | |- |
||
| − | | [[Zuko]] |
||
| − | | [[File:Zuko_Figurine.jpg|150px]] |
||
| − | | Peronality: Taciturn<BR>Talent: Spying<BR><BR>Zuko is in charge of keeping watch. His sharp eyes can read signs a mile off, but no one really understands what he says, so they rarely know what he's seen. |
||
| − | |- |
||
| − | |} |
||
| + | This can only be performed on the Golden N64 Cartridge. |
||
| − | [[Category:Items]] |
||
| + | |||
| − | [[Category:Listings]] |
||
| + | ====Teleport Epona==== |
||
| + | This glitch is similar to the “Epona in Clock Town Glitch”, but a few things change. First, make sure two files are reset to the beginning of the first day. Then, on one file, use the [[Song of Soaring]] to warp to Zora Cape. Check the owl statue, then save and quit the game. On the second file, exit Clock Town, and call Epona with “Epona’s Song.” Ride her to Milk Road, and don’t get off. Check the owl statue, then save and quit the game. Go back to the first file, and play it. You should be on Epona at [[Zora Cape]]. Get off her, and then play “Epona’s Song.” She should vanish, and be no where in sight. Exit Zora Cape, and then go back. You can do this a number of ways; but it does not matter as long as you leave the location, then come back. When you come back, Epona should be there, and act as though nothing has happened. |
||
| + | |||
| + | ====Get Epona Past Steep Hills==== |
||
| + | First, do all of the necessary preparations for the “Teleport Epona Glitch.” But, don’t do the last step. Instead of getting off, ride Epona into Zora Hall. In [[Zora Hall]], there should be a big hill which leads to the tallest area in Zora Hall, and to the Zora who wants pictures of the princess. Normally, Epona couldn’t get in Zora Hall, and the game won’t let Link ride her up all the way. But, this glitch changes all of that. Ride Epona up the hill until the game won’t let you go any further. Get off Epona, and play [[Epona's Song]] in front of Epona, and a little higher up the hill. Make sure when your ocarina is out, that you can see at least part of Epona. (It does not matter which part you see, as long as it is in view.) Once the song is played, run/roll up the hill, and then Epona should run towards the side of the hill, then up it. Epona should stop when she is almost to the top. Get on Epona, and ride her to the rest of the way up the hill. |
||
| + | *Extra Fun. |
||
| + | The game has no borders near the cliff for Epona in this area. This lets Link ride Epona off the cliff, and onto the floor below. This does not hurt Link, and can be done as much as you want for endless "Almost kill Epona and Link fun." |
||
| + | |||
| + | ==Sequence Breaking == |
||
| + | ===Bombchu Jumping=== |
||
| + | *'''Effect:''' Jump over barricades and enter areas early |
||
| + | *'''Prerequisites:''' Bombchu and Infinite Sword Glitch |
||
| + | *'''How to:''' To perform this glitch, activate the infinite sword glitch. Next, equip bombchu and begin Z targeting. Be sure to perform this quickly! Jump backwards, press the button you have the bombchu on, and then hold down R. Link will backflip, pull out a bombchu, and then drop it by pulling out his shield. When the bombchu explodes, it will hit Link's shield and cause him to float. This can be repeated to enter areas early |
||
| + | *'''Notes:''' If you do this from ground level, you must do two of these in quick succession or else Link will return to the ground after the first. This is because the game attempts to "link" him with the ground at all times, and being that close results in the game pushing him down where it believes he should be. Also note that if you take damage, you must reactivate the Infinite Sword Glitch.''' |
||
| + | |||
| + | ===Enter [[Mountain Village]] without [[Hero's Bow]]=== |
||
| + | Activate the Infinite Sword glitch. Stand with your back to the big block of ice, hold Z & R, and backflip. The ice won't freeze you, and you will be standing on it. Keep backflipping until you get over the ice. |
||
| + | |||
| + | ===Enter [[Great Bay]] before getting [[Epona]]=== |
||
| + | First, activate the infinite sword glitch. Go to [[Termina Field]] and stand on the lower fence in front of the big fence. Face away from the big fence, backflip, drop a [[Bombchu]] and hold up your [[Shield]](All in mid-air). You will be left floating in mid-air. Repeat, until you get over the fence. |
||
| + | An easier way is to have the [[Goron Mask]] and the Bomb Bag. As Link,. set a bomb behind you. Then, transform into Goron Link, wait until the bomb starts blinking fast (a little after), then do a ground-pound but uncurl in mid-air (let go of A). If the timing is done correctly, the bomb should explode while Goron Link is in midair, and he will be sent over the fence. Once there, you can hit the Owl statue and get the [[Zora Mask]]. |
||
| + | |||
| + | ==Bypass Invisible Blockades== |
||
| + | ====Bypass Zora Hall-Shell Speakers/Amplifiers "Out of reach blockade"==== |
||
| + | In Zora Hall, on the giant shell in the middle of the room, there are two shell speakers/amplifiers. Link can get into one; by simply back flipping a few times in front of them. The speaker/amplifier which is being tuned by a Zora cannot be reached. To get out, jump out of the front of the speaker/amplifier. |
||
| + | |||
| + | ====Bypass The Soldier-Clock Town==== |
||
| + | As Deku Link, face your back to any soldier guarding a gate out of Clock Town. Get out your shield, pull your control stick back, and walk backwards towards the soldier at an angle. If done correctly, Deku Link will go pass the soldier, and into Termina field. If this is done before Link gets the Deku mask, there will be no sound, or enemies in the field. |
||
| + | |||
| + | ====Bypass The Guard Bomber==== |
||
| + | In Eastern Clock Town, there is a Bomber guarding the entrance of the sewers which led to the [[Observatory]]. You do not have to complete the Bomber “Hide and go seek game” to get the pass code, and go through. Instead, get far enough away from the Bomber, so that the “A” button does not say “Talk”, and do a few back flips in the space between the [[Bomber]], and the wall. If done correctly, you should get pass the Bomber, and be able to go to the observatory. |
||
| + | |||
| + | ==Go Through Walls== |
||
| + | ====Zora Hall- The Giant Shell==== |
||
| + | In Zora Hall, there is a giant shell which the Zora band plays in. Go behind the shell, and take out Link’s sword. Do a jump strike a few times until you go through it. To get out, simply go forwards, towards the water surrounding the little island. |
||
| + | |||
| + | ==Game Freeze== |
||
| + | '''All of the following glitches can be undone by resetting the game.''' |
||
| + | |||
| + | ====Oni Link-Communication Freeze==== |
||
| + | This is one of the simplest glitches in Majora's Mask. First, execute the be Fierce Deity outside of boss battes glitch. Afterwards, go to Clock Town, and talk to one of the bomber kids or the man who runs the shooting building. |
||
| + | |||
| + | ====Transformation Freeze-Giant’s Mask==== |
||
| + | This glitch freezes the game when Link is trying to transform by using the [[Giant Mask]]. First, you must be in day three. You can wait for the time to pass, or play The Song of Double Time four times to get to the dawn of the final day. Next, execute the "Enter Sakon's Hideout Before Day 3/Anytime Glitch." This freeze can only be done in Day three because [[Kafei]] will not be there. Once inside, step on the switch, which will activate Sakon's security system. Put on any mask (that is not a transformation one), and continue through it. Once you are Kafei, go to the start menu, and put the Fierce Deity's Mask on the C button which has the mask you are wearing. Continue through it until you are Link again. Link should put on the Giant’s Mask, and scream. Then, the game should freeze, with a blue and white haze surrounding Link's face. |
||
| + | |||
| + | ====[[A New Day|Fourth Day]] Freeze==== |
||
| + | This glitch can only be done after you do the "Fourth Day Glitch." First, execute the "Fourth Day Glitch." This will make the clock vanish, and allow Link to play past the Three Day period. Talk to the scarecrow in the observatory, and say "yes" when it asks you if you want to dance until night. Afterwards, talk to anyone who helps move the plot around during a certain time period. For ex: the mayor's assistant. You should then go to a screen with the scarecrow dancing. The game should freeze up, but you should be able to hear the room's background music. You can see the scarecrow's animation, but it is stuck-slightly leaning to the right. |
||
| + | |||
| + | ===Freeze In The [[Secret Shrine]]=== |
||
| + | Every so often, a glitch will occur in the Secret Shrine where after Link has overcome the four battles, the [[Poe Collector]] will not reappear. Once this has happened, the only way to reverse the glitch is to reverse time. There is no real way to execute the glitch. The glitch itself is done because the game is lacking the coding to make the Poe Salesman reappear. |
||
| + | |||
| + | ===[[Zora]] Freeze=== |
||
| + | First, do the Be the [[Fierce Deity]] outside of Boss Rooms 1, but with a slight change. In stead of equiping the [[Fierce Deity's Mask]], equip the [[Hookshot]] or [[Hero's Bow]]. Now just shoot with either of them. [[Zora]] [[Link]] will fire his [[Boomerang]]s, but when they're a foot away from him, [[Link]]'s controls will freeze except for the B button and the button the [[Hookshot]] or [[Hero's Bow]] was assigned to. |
||
| + | |||
| + | ==Other Glitches== |
||
| + | ===Hop to the Great Bay Temple=== |
||
| + | {{Youtube|bu-XaDXVAkA|200|left}} |
||
| + | Usually, the only way to get to The Great Bay Temple is to ride the giant [[Turtle]], but this glitch allows access without the Turtle. The game recognizes if you are out too far in the water, and warps you back to where you were. But, it does not recognize you if you are above the water (which is the base of this glitch). You need: |
||
| + | [[Romani's Mask]], at least 200 [[Rupee]]s, [[Ice Arrow]]s, the [[Deku Mask]] (recommended), and a bottle of [[Chateau Romani]]. First, get 200 rupees, and then some arrows. When it's 10:00 Pm, put on Romani's Mask, and enter the Milkbar. Buy the Chateau for 200 rupees, and head to Zora's Cape. (Hopefully, you got a lot of arrows.) Drink the Chateau, this will give you infinite [[Magic]]. Shoot an ice arrow in the water, put on the Deku Mask, and hop to the new platform. (You can hop to it as Link, but it will be harder not to slide off. Take off the Deku Mask, and repeat. Once you are there, you will see that you can walk right through The Great Bay Temple. |
||
| + | {{Clear}} |
||
| + | |||
| + | ===Glide Through Walls=== |
||
| + | '''Clock Town:'''<br> |
||
| + | On any given day, talk to the head Bomber in Northern Clock Town. You will than enter the hide, and go seek minigame. Go to Eastern Clock Town, and go up the stairs which lead to the [[Mayor's Residence]]. Turn right, and scare the Bomber near the edge, with the cucco in his hands. Jump off the edge, and grab the [[Cucco]]. Go back to where you were, and throw the cucco on top of the fence. Get on the fence, and grab it before it runs off of it. Jump off the fence, and towards the wall. You will go through it, and into the void. You will continue to float until you let go of the cucco. |
||
| + | |||
| + | ===Invisible [[Swords of Majora's Mask#Great Fairy's Sword|Great Fairy's Sword]]=== |
||
| + | This glitch allows [[Link]] to be holding what would appear like an invisible Great Fairy's sword. To do this, first you must have the Great Fairy's Sword itself. Once you have the item, go to [[East Clock Town]] or any other place which has a [[mailbox]] Equip the Great Fairy's Sword, and press the A button the check the mailbox. When the mailbox asks you to deposit mail, click the C button which the Great Fairy's Sword is equipped to. The mailbox will not accept it, because the item is not mail. When the dialog box is gone, Link should be holding an Invisible Great Fairy's Sword. This glitch can be undone by exiting the area in which the glitch was performed or put the item away. This glitch also works with the [[Hookshot]] and [[Hero's Bow]]. |
||
| + | |||
| + | ===Infinite Sword=== |
||
| + | {{Youtube|etT6aYmqKBw|200|right}} |
||
| + | Through this glitch, whenever [[Link|Link's]] sword is drawn, it will be automatically swung causing damage to enemies without you having to press B, yet also without Link actually swinging his sword. Link will hold his sword normally, however your surroundings, whether an enemy or object, will react as if you hit them with your sword. This glitch is also needed to perform other such glitches as [[Bombchu]] hovering. We did this on the [[Nintendo 64]] golden cartridge version and the [[Nintendo Gamecube]] [[The Legend of Zelda: Collector's Edition|Collector's Edition]] version using [[Swords of Majora's Mask|any sword]]. |
||
| + | |||
| + | To perform this glitch find an item that Link can interact with. A [[Mail Box|mail box]] is recommended, but other such things as [[sign]]s, [[Terminan]]s, [[dog]]s or even [[Bomb]]s if nothing else is around will work. Go up to your selected item, and crouch down with your [[Shield|shield]]. Rapidly tap B (or if using the [[Swords of Majora's Mask#Great Fairy's Sword|Great Fairy's Sword]], tap the C direction it is assigned to) so that Link jabs with his sword, but make sure he doesn't actually hit anything but air. Whilst rapidly pressing B, push A once so that Link reacts with the item, whether by reading it, picking it up, or talking to the character. If using bombs, you'll need to be extremely quick to avoid it exploding. Only use bombs when nothing else is around. Having done that successfully the glitch should have worked, however it can often take a few tries. With some items, such as mail boxes and signs, Link's sword will already be drawn, and you'll see a white trail behind his sword when moving, showing that the glitch has been activated. Other items, such as bombs, dogs or characters will leave Link with his sword sheathed. To draw Link's sword and not effect the glitch, you must draw it in mid air, whilst doing a backflip, by targeting the camera behind Link, pulling back on the control stick and pressing A, then quickly pressing B whilst in the air. To undo this glitch either enter a new area, or put Link's sword away with A, and draw it normally again with B. |
||
| + | {{Clear}} |
||
| + | |||
| + | ===Sakon's Hideout Before Day 3=== |
||
| + | {{Youtube|lu_o9ifr62M|200|left}} |
||
| + | In this glitch you can enter [[Sakon|Sakon's]] [[Sakon's Hideout|hideout]] in [[Ikana Canyon]] before day 3 and without doing the [[Reuniting Kafei and Anju|Anju and Kafei sidequest]]. Once inside it is possible to progress to the final room using only Link, however no way has yet been found to obtain the [[Sun Mask]], therefore rendering this glitch pretty much useless. The only way out of the hideout is to [[Warping|warp]] using the [[Song of Soaring|song of soaring]] or to play the [[Song of Time]]. We used the [[Nintendo 64]] golden cartridge version. |
||
| + | |||
| + | This glitch is really quite simple. Head to the entrance of Sakon's hideout. Face the rock blocking the entrance, and look to the bottom right where there is a crack between the rock and the wall. Equip the [[Bunny Hood|bunny hood]], and run at that small crack, rolling just before contacting the wall. This usually will take a few tries, but soon enough [[Link]] will roll through the crack, jump, and enter the hideout. This is possible to do without the bunny hood, however wearing the hood does improve your chances of making it through the crack. |
||
| + | {{Clear}} |
||
| + | |||
| + | ==="[[New Day|Fourth Day]]" Glitch=== |
||
| + | {{Youtube|N20NZb7Lacc|200|right}} |
||
| + | This glitch allows you to play past the three day time limit, and explore [[Termina]] without the limitation of a clock. During this time most of the [[Terminan]]s are gone, and the [[moon]] has vanished. Because of the nature of the glitch, there is no way to complete the storyline with this glitch activated, so don't use this glitch just to give you unlimited time to complete the game. Once this glitch has been executed there are some actions that cannot be done, and some other glitches which can be activated. This glitch can be executed on the [[Nintendo 64]] golden cartridge version of the game, "The Legend of Zelda Collector's Edition" for Gamecube, and the Virtual Console version for Wii. |
||
| + | |||
| + | To do this glitch, go to the [[Astral Observatory|astral observatory]] near the end of the 3rd day, and look through the telescope by talking to [[Professor Shikashi]]. As you are looking through the telescope, carefully watch the clock. You need to press B to exit the telescope view as close to the clock reaching 00:00:00 as possible, but if you let it reach zero, it will be game over. If you are successful, once you have exited the telescope view, and spoken to the Professor, the clock will have vanished from the bottom of your screen, and time will flow uninterrupted past the three day limit. To use your items again you will have to talk with the scarecrow and go forward to the next night. Playing the [[Song of Double Time]] will cause the game to freeze. You'll need to reset your console to deactivate this glitch. |
||
| + | {{Clear}} |
||
| + | |||
| + | ===Zora Link Can Fly=== |
||
| + | {{Youtube|4qmoGkn0zO4|200|left}} |
||
| + | Through using this glitch, [[Zora Link]] will be able to fly in the air above the water. It will appear as if he was swimming normally, however he will be floating in mid air. This glitch will only last as long as you can keep it going, and eventually you will decline back into the water. We executed this glitch on the [[Nintendo 64]] golden cartridge version of the game, and also on the [[Nintendo Gamecube]] [[The Legend of Zelda: Collector's Edition|Collector's Edition]]. |
||
| + | |||
| + | To begin, go to the area of [[Great Bay Coast]] where [[Zora Hall]] is located. Just offshore, near the cave entrance to the area, you will see a [[Like Like]]. Equip the [[Zora Mask]], and defeat the Like Like however you prefer. Float stationary above where the Like Like was and face directly towards the shore. Now quickly swim towards the shore using A to go faster and just before reaching the shore pull the control stick backwards. Again tap A and steer Zora Link back over the water. Most of the time this will succeed, but if not give it another shot. Once in the air you'll need to keep tapping A to stay in the air. |
||
| + | |||
| + | There are other areas of [[Termina]] where the it is possible to do this glitch, however it is a lot harder to do. One such place is the [[Spring Water Cave]] in [[Ikana Canyon]]. |
||
| + | |||
| + | ===Mess Up Sakon's Hideout=== |
||
| + | This glitch does not truly "mess up" Sakon's Hideout; but it does interfere with what is happening inside. On the first day play the Song of Double Time three times. This will make your time of waiting shorter. Next, execute the "Enter Sakon's Hideout before Day 3/Anytime" glitch. Step on the switch, and turn into a Goron. Roll past the door, and push a block into the blue switch. If you are not fast enough, you will either not make to the door, or the door will close on top of you and you will teleport back outside of Sakon's Hideout. Afterwards, a short scene should play, and Tatl should tell you to enter the other room. Since it is not day three, your views will vary from Link's to Kafei's. But, you will play as Link throughout the Glitch because Kafei is not there. Exit the first room, pass the main room, and enter the room with the Deku Baba. Kill it, and go back to the first room. Go back to the lower room, through the door, and into the next room. Wait there until the third day. It is possible to go further, but it is next to impossible to kill the second Deku Baba. Once it is day three, Link should be in the main room, and on the switch. Kafei is behind him, and will go up towards the Sun's Mask. Kafei will go through Link, then stand in front of him. Sakon's security system should start, and the Sun's Mask should begin to go down the beltway. Kafei should run towards the door, but stop because the door shuts before he can get through, despite the two doors in the main room being opened. Kafei should say "Step on the switch." Link, already on the switch is yours to control. Since both doors are opened, walk off the switch, and then back on. This should re-activate the lower door’s mechanism to open/close. The door leading to where the Deku Baba will stay open, but the other door will open/close depending on the switch. You cannot get to the Sun's Mask because the system is messed up, and Kafei stays in front of the lower door. Exit, and then come back for everything to be back to normal again. |
||
| + | |||
| + | ===Stuck Block=== |
||
| + | This glitch is useless, and was found while trying to prove the “Get The Sun’s Mask Before Day 3” glitch true. On day one or two, go to Sakon’s Hideout and execute the “Get Into Sakon’s Hideout Before Day 3/Anytime Glitch.” Once inside, go into the main room, and step on the switch. Turn into Goron Link, and roll past the door before it closes on you. Push a block on the switch, then you should be back in the main room. Go to the new room, and kill the Deku Baba. Go back to the main room, and did what you did before to get into the bottom room. Stand be hide the block closest to the door to the next room, and pull in two/three times towards the door. You will have to pull it three times if that is the block you used to weigh down the blue switch. The block should be right under the door now. Step on the blue switch, and the door should slam down on the block. The block is now stuck in between the doorway, and is half-way through the door. This cannot be undone unless you exit the hideout, or restart the game. |
||
| + | |||
| + | ===Jump Past The Giant [[Octorok]]=== |
||
| + | Normally Link needs an arrow, or ride the boat cruise to get passes the giant Octorok guarding the tunnel to the [[Deku Palace]]. This glitch allows the player to get passed the giant octorok without either of them. First, execute one of the Fierce Deity Link early glitches to be able to play as Fierce Deity in [[Southern Swamp]]. Afterwards, climb up the latter which allows Link to enter the Photo Contest Hut, and talk to the [[Deku]]. As Fierce Deity Link, run to the top rightmost corner of the platform, and jump off. Once about 1/2-1/4 of the way to the giant Octorok, do a Downwards Slash in mid air by holding the Z button, and pressing the B button. Once passed the first Octorok, it will switch places, and be in front of you. Go closer to it until it sucks you closer to its mouth, then flings you out towards the palace |
||
| + | |||
| + | ===Super Fast Link=== |
||
| + | To execute this glitch, you will need to have the following: the [[Romani Mask]], [[Kamaro's Mask]], [[Bunny Hood]], [[Deku Mask]], [[Goron Mask]] and [[Zora Mask]]. First, enter the [[Milk Bar]] using the [[Romani Mask]] and agree to perform. Complete all of the acts except the [[Hyrulean]] act. Now, equip the [[Bunny Hood]] and dash at [[Toto]]. When your next to him, equip the [[Kamaro's Mask]] (while still running) and press A. Perform and get the [[Circus Leader's Mask]]. [[Link]] will run as fast as he would with the [[Bunny Hood]], despite not wearing it. If Link actually wears the mask, he will run even faster. The glitch is canceled when Link leaves the Milk Bar, or if he transforms. |
||
| + | |||
| + | ===Super Link=== |
||
| + | Enter a room in the [[Pirates' Fortress]] where you will battle a [[Gerudo|Pirate]]. When Link is in range of a lantern, equip the [[Hookshot]] and fire at a lantern without triggering the fight. Link will latch onto the lantern, and will fly towards it. While in mid-flight, Link will trigger the fight while the Gerudo pirate appears from the ceiling. |
||
| + | |||
| + | ===Ocarina of Time on B=== |
||
| + | Play the [[Honey and Darling]] game on any day. As the minigame ends, dangle from the edge of the platform. When the game ends, your B button will be blank. Play again and jump off the platform. The [[Ocarina of Time (Item)|Ocarina of Time]] will appear on your B button. |
||
| + | '''Note''': This glitch can be put to full use during the [[Twinmold]] fight. While wearing the [[Giant's Mask]], you can use anything that is on B. If you play the [[Elegy of Emptiness]], you will make a giant statue of [[Link]], and if you play the [[Song of Storms]], you will have unlimited magic. Because you don't have your [[Sword]] equipped, you can't actually fight them, making the fight pointless unless you have obtained the Great Fairy's Sword. |
||
| + | |||
| + | ===Floating Hole=== |
||
| + | [[File:Floating hole.png|right|thumb|This strange hole floats above the lake.]] |
||
| + | In the Northern Mountains, there is a secret grotto entrance which floats above the frozen lake. To reach it, use bombchu jumping or the levitation cheat. Inside the grotto are four gossip stones, with the second one from the right being larger than the rest. It will change color like those found in Termina Field, as well. Upon exiting the grotto, Link will return to the frozen pond. |
||
| + | |||
| + | ===Extra Heart Container=== |
||
| + | This is a glitch that allows one to get an extra [[Heart Container]]. It is tricky to perform and requires patience and general knowledge of the game, and can only be performed in the [[Southern Swamp]]. Due to that fact that this glitch is achieved by causing the objects in the swamp to "multiply", the N64 cannot hold all the memory loaded at once and therefore, can only be done on the Gamecube. It is believed that this is also achievable on the Wii, but it has yet to be tested. [http://www.youtube.com/watch?v=b9SB6acPMgM Video of this glitch] |
||
| + | |||
| + | Below is a list of things that '''must be done before this glitch is attempted.''' |
||
| + | *Give your Gamecube a nice, long rest. It may help in allowing the system to handle the large number of things that will be loaded at once. |
||
| + | *Beat [[Odolwa]]. This will get rid of many many things that will duplicate otherwise (Octoroks, flower things, miscellaneous objects), thus making it impossible to do this glitch without it freezing. It will also stop you from getting hurt by the poison water. |
||
| + | *Give the Moon Tear to the Deku Scrub in Clock Town and trade the title deed to the one in the swamp to get rid of another duplicating object. |
||
| + | *Get rid of more duplicating objects by killing the Deku Baba by the owl statue, as well as cutting down any signs or grass. |
||
| + | *'''And most important of all, you must have NOT collected the Heart Piece on top of the photo hut!''' |
||
| + | |||
| + | Now this is the procedure for the glitch: |
||
| + | #As Link, get into the water next to the dock at the Photo Shop, as put on the [[Zora Mask]], while diving, this will cause the buttons to act as if Zora link is swimming. |
||
| + | #Press B at the same time as taking off the mask, and the B button will become blank. Climb onto the dock. |
||
| + | #Use B to attack, which will cause you to move a little. DO NOT WALK REGULARLY or the game may crash! "Attack" your way all the way to the black tunnel the the [[Big Octo]] used to block. By doing this, you will enter an area that looks like you are walking on the sky! DO NOT STOP ATTACKING UNTIL YOU ARE WALKING IN THE SKY, or the game will crash later on! Walk all the way to the black box that you can see on the far side of the "Sky". |
||
| + | #When you walk through the black box, you will be back in the swamp. The game thinks you are entering the swamp and so everything will be loaded into the area, but since you never actually "left" the area, there will now be two of everything! |
||
| + | #Repeat steps 1-5 3 more times until everything is duplicated 5 times. '''The game WILL be laggy'''. To decrease the lag, get on top of every lilly pad to sink them and git rid of them, and get rid of the 5 duplicated frogs by talking to them with the Don Gero Mask. |
||
| + | #Now, go all the way back to the photo hut. You will be delighted to find out that the heart piece has also duplicated! Just simply collect all five pieces of heart! You can also look at the oddities that have happened in the swamp. Since the whole area has spawned 5 times upon itself, everything seems to "twitch". And the photo hut and potion shop all have 5 latters! |
||
| + | |||
| + | NOTE: Save with the owl statue to get out. The game will freeze, but it well have saved, so just restart it and continue your game with you new Heart Container! This also works with the Song of Time. Do not leave the area, enter the photo hut, or use the Song of Soaring. |
||
| + | |||
| + | ==External Links== |
||
| + | * '''[http://www.jaytheham.com/zcw/index.php5?title=Main_Page Zelda Chaos]''', ZeldaWiki's top glitch affilate that specializes in verifying hacks, explaining glitches, and providing up-to-date information on all things exploitable in the ''Zelda'' series. |
||
| + | |||
| + | |||
| + | {{Glitches}} |
||
| + | [[Category:Glitches|M]] |
||
Revision as of 06:39, 1 February 2011
These are the glitches which are possible to perform in Majora's Mask. Please read the Glitch Disclaimer Notes before attempting any of the glitches on this page.
Fierce Deity Link Glitches
Be the Fierce Deity Outside of Boss Rooms 1
This is the easiest and best way to transform and it works with all versions of Majora's Mask, including the GameCube and Wii Virtual Console. It can be done in several locations but the easiest is in Termina Field, just outside the entrance to Great Bay. There's a small pool of water off to the side, (to the right if facing Clock Town, or left if facing Great Bay) which Link must jump into. Once in the water, he needs to be positioned in a spot where he is floating, but if the Zora Mask were donned, he would stand. Once that had been achieved press A to dive and shortly after doing so press the C-Button with the Zora Mask equipped, which will cause a regular transformation. Rapidly press B and, if positioned correctly, Zora Link will appear to "hop". While he's "hopping", try to take off the Zora Mask, and if done correctly the B button will go blank. Hold A and swim in the direction of land, and Link will roll and then stand up normally. If he continues to swim, the positioning is off and the glitch needs to be restarted. Once this had been achieved, the 'B' and 'A' buttons will go blank, and anything can be equipped to the C-Button to which the Zora Mask was assigned. Equip the Fierce Deity Mask instead of the Zora Mask and put it on to become Fierce Deity Link. After you transform, you will notice that you cannot use any item but bottles.
Be the Fierce Deity Outside of Boss Rooms 2
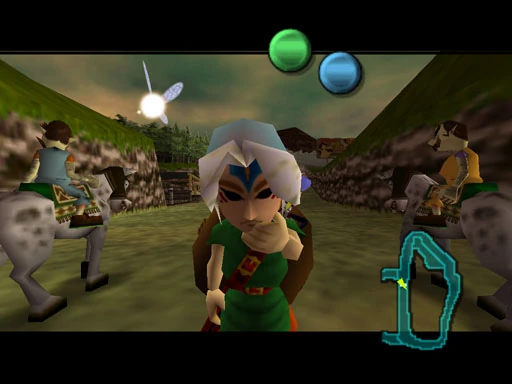
Link dons the Fierce Deity Mask at the race track
By riding Epona to Milk Road or Southern Swamp, it was possible through a saving glitch to get all the C-Buttons on the horse. There was a chance that when the game was reloaded, you would start on her, and have access to the C-Buttons and whatever was assigned to them, although the icons weren't visible. Unfortunately, if the Fierce Deity Mask was equipped straight after loading, you would have to wait until the Dawn of The Second or Third day to get off Epona, due to conflict between Fierce Deity Link's function of keeping his sword out, and the bow being assigned to B on Epona. By riding to the Gorman Brothers' race course and challenging them, you could avoid this little problem. Once the race started, you could safely put the mask on, and after it had ended, the bug would be canceled out, and you would be standing, as Fierce Deity Link with no problems. This glitch has also been removed from later versions such as the European Nintendo 64 version and the GameCube Collector's Edition.
Be the Fierce Deity Outside of Boss Rooms 3
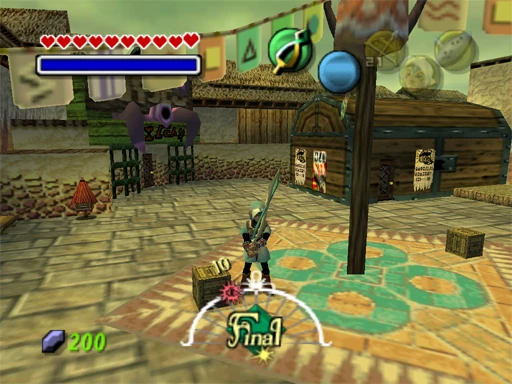
Fierce Deity Link in Clock Town
This glitch involves part of the Kafei and Anju quest, specifically, Sakon's Hideout; however, it isn't necessary to actually do the entire quest thanks to a glitch in the map design. On the Third Day enter Sakon's Hideout, either by waiting for Sakon to appear or by using the "Sakon's Hideout before day 3" glitch. Before complying with Kafei's request to step on the switch, Link should put on the Bunny Hood if he's not already wearing it. Once the player is in control of Kafei, it is possible to open the Start Menu, go to the mask screen and place the Fierce Deity Mask over the Bunny Hood on the C-Buttons. Once control is returned to Link, he will immediately put the mask on and transform into Fierce Deity Link. Once this is accomplished, all the player has to do is complete the hideout puzzle normally and then Link will be returned outside to Ikana Canyon.
This glitch has been exterminated and can only be used in the original Nintendo 64 American and Japanese versions since pausing as Kafei is no longer allowed. The glitch was fixed in the Nintendo 64 European release and was also fixed in the Collector's Edition for the GameCube. However, this glitch can be performed on the American Virtual Console game since you can pause as Kafei again, leading to the belief that the Nintendo 64 version was ported for Americans rather than the Collector's Edition version.
Dos and Don'ts as Fierce Deity Link
- Fierce Deity Link's in-game model is so large (much taller than most characters), that when he enters some buildings, he can not exit, and becomes trapped. A prime example of this is the Stock Pot Inn.
- The guards in Clock Town will not let Link leave in this form; however, there are multiple ways to escape.
- The first technique is to enter the body of water beneath Clock Tower and put on the Zora Mask. This technique will return Link to his regular Zora form and reverse the Fierce Deity glitch.
- The second technique is to stand atop the Milk Bar (or the other buildings surrounding East Clock Town's exit) and jump towards the exit of East Clock Town. If aimed correctly, Link will jump clear over the guard's head and escape to Termina Field.
- The third technique requires you to activate your target system and walk backwards past the wall to the entrance to Termina, then talk to the guard. Fierce Deity Link's model should touch the entrance to Termina, warping him to the field. Make sure to walk straight backwards and not on a diagonal, or else this glitch will not work. Also be sure to have Fierce Deity's sprite inside the guards before you talk. That way, Fierce Deity's sword will hit the exit and you will be in Termina field.
- The fourth technique is in East Clock Town, You should walk near Honey and Darling's and notice the obvious two targets and ledge the glitch is on the ledge, jump there from either over milk bar or from shooting gallery once on you will want to run into the left target so position yourself a little back on the ledge while still being on the lower part of the ledge look at the target with view and view a little to the right of the target, run and if done right you should jump out of bounds headed right to the termina field exit path.
- Alternatively, before activating the glitch, you can plot an escape route through the Astral Observatory by gaining access to the bombers hideout, popping the balloon blocking the ladder, and planting a Magic Bean in the soil outside the observatory.
- Speaking to the Bombers will cause the game to freeze, with the exception being the youngest guarding the entrance to their hideout (it will freeze if he has moved from his spot to let you pass, though).
Fierce Deity Link Uses a Bottle
To activate this glitch, do any of the 3 glitches to become Fierce Deity Link outside of boss battles. Second, equip a bottle. Normally, when the bottle button is pressed, Fierce Deity Link takes out the bottle and puts it away immediately, replacing it with his sword. However, if you press the bottle button a second time with the right timing (that is, when he has the bottle all the way out), he will fully swing the bottle. When he does, he will capture anything! For example, if he captures water, he will bottle a fish instead; if he swings the bottle in the air, he will catch a fairy. Another way to use a bottle it to go into an area where you cannot use a sword, e.g. a house or building. However, Fierce Deity can get stuck.
This glitches was executed on "The Legend of Zelda: Collector's Edition" for the GameCube.
Fierce Deity Link Falls Through Steps
First, complete the 'Fierce Deity Link Escapes To Termina’ glitch, then make your way to Clock Town. Enter Eastern Clock Town, and jump onto the ledge near the shooting game building. Turn your camera so you can see the Treasure Chest game building, then jump towards it. Fierce Deity Link should fall through the steps which lead to Southern Clock Town. He can also do this in Southern Clock Town, on one of the grass-roofed shacks. He will appear to fall through the ground, but will appear in East Clock Town instead. This is also possible as normal Link, by rolling off the edge near the Shooting Gallery, which makes your jump long enough to land on the steps and fall through. You will then appear in Southern Clock Town.
Fierce Deity Link Falls Through Ground Into Void
As Fierce Deity Link outside of a boss battle, find any ledge that is approximately the same height as you. A good area would be the cliff leading to the Clock Town Great Fairy. Climb it, then slowly tiptoe to the edge. You will attempt to jump, then fall through the ground. You will continue falling until you reach the void, and be transported back to the entrance of the area.
Epona Glitches
Epona In Clock Town First
Make sure that both files are reset to the beginning of day one. Then, in one file, ride Epona to the Owl Statue in Milk Road. Don't get off, save the game, and quit. On the second file, start the game, and you should be on Epona in Clock Town.
Ride Epona As Deku/Goron/Zora Link
This is similar to the "Ride Epona In Clock Town Glitch", but a few things change. First, make sure both files are reset to the beginning of day one. Afterwards, on one file, turn into Deku/Goron/Zora Link, and save at any owl statue.On the second file, ride Epona to the Milk Road owl statue; don't get off, and save the game. Go back to the first file, and play it. You should be on Epona, at the owl statue in which you saved your game at.
Be Epona
There are two ways to do this, both involving the "Use Items on Epona Glitch".
Method 1: This method is by far the easiest. First, perform the "Use Items on Epona Glitch", and wear the Deku Mask, Goron Mask or the Zora Mask. You will drop off Epona, but you will still be able to control her.
Method 2: Perform the "Use Items on Epona Glitch". Then go to the Gorman Brothers Race Track, and challenge them. When the race starts, wear the Giant's Mask. You will be frozen in mid-air, but still able to control Epona.
This only works on the Golden N64 cartridge.
Use Any Item On Epona
Call Epona, and ride to Milk Road, go to the Owl Statue and save (Don't get off of Epona). Go back in, and you will have the C buttons active on Epona, although they aren't visible.
This can only be performed on the Golden N64 Cartridge.
Teleport Epona
This glitch is similar to the “Epona in Clock Town Glitch”, but a few things change. First, make sure two files are reset to the beginning of the first day. Then, on one file, use the Song of Soaring to warp to Zora Cape. Check the owl statue, then save and quit the game. On the second file, exit Clock Town, and call Epona with “Epona’s Song.” Ride her to Milk Road, and don’t get off. Check the owl statue, then save and quit the game. Go back to the first file, and play it. You should be on Epona at Zora Cape. Get off her, and then play “Epona’s Song.” She should vanish, and be no where in sight. Exit Zora Cape, and then go back. You can do this a number of ways; but it does not matter as long as you leave the location, then come back. When you come back, Epona should be there, and act as though nothing has happened.
Get Epona Past Steep Hills
First, do all of the necessary preparations for the “Teleport Epona Glitch.” But, don’t do the last step. Instead of getting off, ride Epona into Zora Hall. In Zora Hall, there should be a big hill which leads to the tallest area in Zora Hall, and to the Zora who wants pictures of the princess. Normally, Epona couldn’t get in Zora Hall, and the game won’t let Link ride her up all the way. But, this glitch changes all of that. Ride Epona up the hill until the game won’t let you go any further. Get off Epona, and play Epona's Song in front of Epona, and a little higher up the hill. Make sure when your ocarina is out, that you can see at least part of Epona. (It does not matter which part you see, as long as it is in view.) Once the song is played, run/roll up the hill, and then Epona should run towards the side of the hill, then up it. Epona should stop when she is almost to the top. Get on Epona, and ride her to the rest of the way up the hill.
- Extra Fun.
The game has no borders near the cliff for Epona in this area. This lets Link ride Epona off the cliff, and onto the floor below. This does not hurt Link, and can be done as much as you want for endless "Almost kill Epona and Link fun."
Sequence Breaking
Bombchu Jumping
- Effect: Jump over barricades and enter areas early
- Prerequisites: Bombchu and Infinite Sword Glitch
- How to: To perform this glitch, activate the infinite sword glitch. Next, equip bombchu and begin Z targeting. Be sure to perform this quickly! Jump backwards, press the button you have the bombchu on, and then hold down R. Link will backflip, pull out a bombchu, and then drop it by pulling out his shield. When the bombchu explodes, it will hit Link's shield and cause him to float. This can be repeated to enter areas early
- Notes: If you do this from ground level, you must do two of these in quick succession or else Link will return to the ground after the first. This is because the game attempts to "link" him with the ground at all times, and being that close results in the game pushing him down where it believes he should be. Also note that if you take damage, you must reactivate the Infinite Sword Glitch.
Enter Mountain Village without Hero's Bow
Activate the Infinite Sword glitch. Stand with your back to the big block of ice, hold Z & R, and backflip. The ice won't freeze you, and you will be standing on it. Keep backflipping until you get over the ice.
Enter Great Bay before getting Epona
First, activate the infinite sword glitch. Go to Termina Field and stand on the lower fence in front of the big fence. Face away from the big fence, backflip, drop a Bombchu and hold up your Shield(All in mid-air). You will be left floating in mid-air. Repeat, until you get over the fence. An easier way is to have the Goron Mask and the Bomb Bag. As Link,. set a bomb behind you. Then, transform into Goron Link, wait until the bomb starts blinking fast (a little after), then do a ground-pound but uncurl in mid-air (let go of A). If the timing is done correctly, the bomb should explode while Goron Link is in midair, and he will be sent over the fence. Once there, you can hit the Owl statue and get the Zora Mask.
Bypass Invisible Blockades
Bypass Zora Hall-Shell Speakers/Amplifiers "Out of reach blockade"
In Zora Hall, on the giant shell in the middle of the room, there are two shell speakers/amplifiers. Link can get into one; by simply back flipping a few times in front of them. The speaker/amplifier which is being tuned by a Zora cannot be reached. To get out, jump out of the front of the speaker/amplifier.
Bypass The Soldier-Clock Town
As Deku Link, face your back to any soldier guarding a gate out of Clock Town. Get out your shield, pull your control stick back, and walk backwards towards the soldier at an angle. If done correctly, Deku Link will go pass the soldier, and into Termina field. If this is done before Link gets the Deku mask, there will be no sound, or enemies in the field.
Bypass The Guard Bomber
In Eastern Clock Town, there is a Bomber guarding the entrance of the sewers which led to the Observatory. You do not have to complete the Bomber “Hide and go seek game” to get the pass code, and go through. Instead, get far enough away from the Bomber, so that the “A” button does not say “Talk”, and do a few back flips in the space between the Bomber, and the wall. If done correctly, you should get pass the Bomber, and be able to go to the observatory.
Go Through Walls
Zora Hall- The Giant Shell
In Zora Hall, there is a giant shell which the Zora band plays in. Go behind the shell, and take out Link’s sword. Do a jump strike a few times until you go through it. To get out, simply go forwards, towards the water surrounding the little island.
Game Freeze
All of the following glitches can be undone by resetting the game.
Oni Link-Communication Freeze
This is one of the simplest glitches in Majora's Mask. First, execute the be Fierce Deity outside of boss battes glitch. Afterwards, go to Clock Town, and talk to one of the bomber kids or the man who runs the shooting building.
Transformation Freeze-Giant’s Mask
This glitch freezes the game when Link is trying to transform by using the Giant Mask. First, you must be in day three. You can wait for the time to pass, or play The Song of Double Time four times to get to the dawn of the final day. Next, execute the "Enter Sakon's Hideout Before Day 3/Anytime Glitch." This freeze can only be done in Day three because Kafei will not be there. Once inside, step on the switch, which will activate Sakon's security system. Put on any mask (that is not a transformation one), and continue through it. Once you are Kafei, go to the start menu, and put the Fierce Deity's Mask on the C button which has the mask you are wearing. Continue through it until you are Link again. Link should put on the Giant’s Mask, and scream. Then, the game should freeze, with a blue and white haze surrounding Link's face.
Fourth Day Freeze
This glitch can only be done after you do the "Fourth Day Glitch." First, execute the "Fourth Day Glitch." This will make the clock vanish, and allow Link to play past the Three Day period. Talk to the scarecrow in the observatory, and say "yes" when it asks you if you want to dance until night. Afterwards, talk to anyone who helps move the plot around during a certain time period. For ex: the mayor's assistant. You should then go to a screen with the scarecrow dancing. The game should freeze up, but you should be able to hear the room's background music. You can see the scarecrow's animation, but it is stuck-slightly leaning to the right.
Freeze In The Secret Shrine
Every so often, a glitch will occur in the Secret Shrine where after Link has overcome the four battles, the Poe Collector will not reappear. Once this has happened, the only way to reverse the glitch is to reverse time. There is no real way to execute the glitch. The glitch itself is done because the game is lacking the coding to make the Poe Salesman reappear.
Zora Freeze
First, do the Be the Fierce Deity outside of Boss Rooms 1, but with a slight change. In stead of equiping the Fierce Deity's Mask, equip the Hookshot or Hero's Bow. Now just shoot with either of them. Zora Link will fire his Boomerangs, but when they're a foot away from him, Link's controls will freeze except for the B button and the button the Hookshot or Hero's Bow was assigned to.
Other Glitches
Hop to the Great Bay Temple
Usually, the only way to get to The Great Bay Temple is to ride the giant Turtle, but this glitch allows access without the Turtle. The game recognizes if you are out too far in the water, and warps you back to where you were. But, it does not recognize you if you are above the water (which is the base of this glitch). You need: Romani's Mask, at least 200 Rupees, Ice Arrows, the Deku Mask (recommended), and a bottle of Chateau Romani. First, get 200 rupees, and then some arrows. When it's 10:00 Pm, put on Romani's Mask, and enter the Milkbar. Buy the Chateau for 200 rupees, and head to Zora's Cape. (Hopefully, you got a lot of arrows.) Drink the Chateau, this will give you infinite Magic. Shoot an ice arrow in the water, put on the Deku Mask, and hop to the new platform. (You can hop to it as Link, but it will be harder not to slide off. Take off the Deku Mask, and repeat. Once you are there, you will see that you can walk right through The Great Bay Temple.
Glide Through Walls
Clock Town:
On any given day, talk to the head Bomber in Northern Clock Town. You will than enter the hide, and go seek minigame. Go to Eastern Clock Town, and go up the stairs which lead to the Mayor's Residence. Turn right, and scare the Bomber near the edge, with the cucco in his hands. Jump off the edge, and grab the Cucco. Go back to where you were, and throw the cucco on top of the fence. Get on the fence, and grab it before it runs off of it. Jump off the fence, and towards the wall. You will go through it, and into the void. You will continue to float until you let go of the cucco.
Invisible Great Fairy's Sword
This glitch allows Link to be holding what would appear like an invisible Great Fairy's sword. To do this, first you must have the Great Fairy's Sword itself. Once you have the item, go to East Clock Town or any other place which has a mailbox Equip the Great Fairy's Sword, and press the A button the check the mailbox. When the mailbox asks you to deposit mail, click the C button which the Great Fairy's Sword is equipped to. The mailbox will not accept it, because the item is not mail. When the dialog box is gone, Link should be holding an Invisible Great Fairy's Sword. This glitch can be undone by exiting the area in which the glitch was performed or put the item away. This glitch also works with the Hookshot and Hero's Bow.
Infinite Sword
Through this glitch, whenever Link's sword is drawn, it will be automatically swung causing damage to enemies without you having to press B, yet also without Link actually swinging his sword. Link will hold his sword normally, however your surroundings, whether an enemy or object, will react as if you hit them with your sword. This glitch is also needed to perform other such glitches as Bombchu hovering. We did this on the Nintendo 64 golden cartridge version and the Nintendo Gamecube Collector's Edition version using any sword.
To perform this glitch find an item that Link can interact with. A mail box is recommended, but other such things as signs, Terminans, dogs or even Bombs if nothing else is around will work. Go up to your selected item, and crouch down with your shield. Rapidly tap B (or if using the Great Fairy's Sword, tap the C direction it is assigned to) so that Link jabs with his sword, but make sure he doesn't actually hit anything but air. Whilst rapidly pressing B, push A once so that Link reacts with the item, whether by reading it, picking it up, or talking to the character. If using bombs, you'll need to be extremely quick to avoid it exploding. Only use bombs when nothing else is around. Having done that successfully the glitch should have worked, however it can often take a few tries. With some items, such as mail boxes and signs, Link's sword will already be drawn, and you'll see a white trail behind his sword when moving, showing that the glitch has been activated. Other items, such as bombs, dogs or characters will leave Link with his sword sheathed. To draw Link's sword and not effect the glitch, you must draw it in mid air, whilst doing a backflip, by targeting the camera behind Link, pulling back on the control stick and pressing A, then quickly pressing B whilst in the air. To undo this glitch either enter a new area, or put Link's sword away with A, and draw it normally again with B.
Sakon's Hideout Before Day 3
In this glitch you can enter Sakon's hideout in Ikana Canyon before day 3 and without doing the Anju and Kafei sidequest. Once inside it is possible to progress to the final room using only Link, however no way has yet been found to obtain the Sun Mask, therefore rendering this glitch pretty much useless. The only way out of the hideout is to warp using the song of soaring or to play the Song of Time. We used the Nintendo 64 golden cartridge version.
This glitch is really quite simple. Head to the entrance of Sakon's hideout. Face the rock blocking the entrance, and look to the bottom right where there is a crack between the rock and the wall. Equip the bunny hood, and run at that small crack, rolling just before contacting the wall. This usually will take a few tries, but soon enough Link will roll through the crack, jump, and enter the hideout. This is possible to do without the bunny hood, however wearing the hood does improve your chances of making it through the crack.
"Fourth Day" Glitch
This glitch allows you to play past the three day time limit, and explore Termina without the limitation of a clock. During this time most of the Terminans are gone, and the moon has vanished. Because of the nature of the glitch, there is no way to complete the storyline with this glitch activated, so don't use this glitch just to give you unlimited time to complete the game. Once this glitch has been executed there are some actions that cannot be done, and some other glitches which can be activated. This glitch can be executed on the Nintendo 64 golden cartridge version of the game, "The Legend of Zelda Collector's Edition" for Gamecube, and the Virtual Console version for Wii.
To do this glitch, go to the astral observatory near the end of the 3rd day, and look through the telescope by talking to Professor Shikashi. As you are looking through the telescope, carefully watch the clock. You need to press B to exit the telescope view as close to the clock reaching 00:00:00 as possible, but if you let it reach zero, it will be game over. If you are successful, once you have exited the telescope view, and spoken to the Professor, the clock will have vanished from the bottom of your screen, and time will flow uninterrupted past the three day limit. To use your items again you will have to talk with the scarecrow and go forward to the next night. Playing the Song of Double Time will cause the game to freeze. You'll need to reset your console to deactivate this glitch.
Zora Link Can Fly
Through using this glitch, Zora Link will be able to fly in the air above the water. It will appear as if he was swimming normally, however he will be floating in mid air. This glitch will only last as long as you can keep it going, and eventually you will decline back into the water. We executed this glitch on the Nintendo 64 golden cartridge version of the game, and also on the Nintendo Gamecube Collector's Edition.
To begin, go to the area of Great Bay Coast where Zora Hall is located. Just offshore, near the cave entrance to the area, you will see a Like Like. Equip the Zora Mask, and defeat the Like Like however you prefer. Float stationary above where the Like Like was and face directly towards the shore. Now quickly swim towards the shore using A to go faster and just before reaching the shore pull the control stick backwards. Again tap A and steer Zora Link back over the water. Most of the time this will succeed, but if not give it another shot. Once in the air you'll need to keep tapping A to stay in the air.
There are other areas of Termina where the it is possible to do this glitch, however it is a lot harder to do. One such place is the Spring Water Cave in Ikana Canyon.
Mess Up Sakon's Hideout
This glitch does not truly "mess up" Sakon's Hideout; but it does interfere with what is happening inside. On the first day play the Song of Double Time three times. This will make your time of waiting shorter. Next, execute the "Enter Sakon's Hideout before Day 3/Anytime" glitch. Step on the switch, and turn into a Goron. Roll past the door, and push a block into the blue switch. If you are not fast enough, you will either not make to the door, or the door will close on top of you and you will teleport back outside of Sakon's Hideout. Afterwards, a short scene should play, and Tatl should tell you to enter the other room. Since it is not day three, your views will vary from Link's to Kafei's. But, you will play as Link throughout the Glitch because Kafei is not there. Exit the first room, pass the main room, and enter the room with the Deku Baba. Kill it, and go back to the first room. Go back to the lower room, through the door, and into the next room. Wait there until the third day. It is possible to go further, but it is next to impossible to kill the second Deku Baba. Once it is day three, Link should be in the main room, and on the switch. Kafei is behind him, and will go up towards the Sun's Mask. Kafei will go through Link, then stand in front of him. Sakon's security system should start, and the Sun's Mask should begin to go down the beltway. Kafei should run towards the door, but stop because the door shuts before he can get through, despite the two doors in the main room being opened. Kafei should say "Step on the switch." Link, already on the switch is yours to control. Since both doors are opened, walk off the switch, and then back on. This should re-activate the lower door’s mechanism to open/close. The door leading to where the Deku Baba will stay open, but the other door will open/close depending on the switch. You cannot get to the Sun's Mask because the system is messed up, and Kafei stays in front of the lower door. Exit, and then come back for everything to be back to normal again.
Stuck Block
This glitch is useless, and was found while trying to prove the “Get The Sun’s Mask Before Day 3” glitch true. On day one or two, go to Sakon’s Hideout and execute the “Get Into Sakon’s Hideout Before Day 3/Anytime Glitch.” Once inside, go into the main room, and step on the switch. Turn into Goron Link, and roll past the door before it closes on you. Push a block on the switch, then you should be back in the main room. Go to the new room, and kill the Deku Baba. Go back to the main room, and did what you did before to get into the bottom room. Stand be hide the block closest to the door to the next room, and pull in two/three times towards the door. You will have to pull it three times if that is the block you used to weigh down the blue switch. The block should be right under the door now. Step on the blue switch, and the door should slam down on the block. The block is now stuck in between the doorway, and is half-way through the door. This cannot be undone unless you exit the hideout, or restart the game.
Jump Past The Giant Octorok
Normally Link needs an arrow, or ride the boat cruise to get passes the giant Octorok guarding the tunnel to the Deku Palace. This glitch allows the player to get passed the giant octorok without either of them. First, execute one of the Fierce Deity Link early glitches to be able to play as Fierce Deity in Southern Swamp. Afterwards, climb up the latter which allows Link to enter the Photo Contest Hut, and talk to the Deku. As Fierce Deity Link, run to the top rightmost corner of the platform, and jump off. Once about 1/2-1/4 of the way to the giant Octorok, do a Downwards Slash in mid air by holding the Z button, and pressing the B button. Once passed the first Octorok, it will switch places, and be in front of you. Go closer to it until it sucks you closer to its mouth, then flings you out towards the palace
Super Fast Link
To execute this glitch, you will need to have the following: the Romani Mask, Kamaro's Mask, Bunny Hood, Deku Mask, Goron Mask and Zora Mask. First, enter the Milk Bar using the Romani Mask and agree to perform. Complete all of the acts except the Hyrulean act. Now, equip the Bunny Hood and dash at Toto. When your next to him, equip the Kamaro's Mask (while still running) and press A. Perform and get the Circus Leader's Mask. Link will run as fast as he would with the Bunny Hood, despite not wearing it. If Link actually wears the mask, he will run even faster. The glitch is canceled when Link leaves the Milk Bar, or if he transforms.
Super Link
Enter a room in the Pirates' Fortress where you will battle a Pirate. When Link is in range of a lantern, equip the Hookshot and fire at a lantern without triggering the fight. Link will latch onto the lantern, and will fly towards it. While in mid-flight, Link will trigger the fight while the Gerudo pirate appears from the ceiling.
Ocarina of Time on B
Play the Honey and Darling game on any day. As the minigame ends, dangle from the edge of the platform. When the game ends, your B button will be blank. Play again and jump off the platform. The Ocarina of Time will appear on your B button. Note: This glitch can be put to full use during the Twinmold fight. While wearing the Giant's Mask, you can use anything that is on B. If you play the Elegy of Emptiness, you will make a giant statue of Link, and if you play the Song of Storms, you will have unlimited magic. Because you don't have your Sword equipped, you can't actually fight them, making the fight pointless unless you have obtained the Great Fairy's Sword.
Floating Hole
This strange hole floats above the lake.
In the Northern Mountains, there is a secret grotto entrance which floats above the frozen lake. To reach it, use bombchu jumping or the levitation cheat. Inside the grotto are four gossip stones, with the second one from the right being larger than the rest. It will change color like those found in Termina Field, as well. Upon exiting the grotto, Link will return to the frozen pond.
Extra Heart Container
This is a glitch that allows one to get an extra Heart Container. It is tricky to perform and requires patience and general knowledge of the game, and can only be performed in the Southern Swamp. Due to that fact that this glitch is achieved by causing the objects in the swamp to "multiply", the N64 cannot hold all the memory loaded at once and therefore, can only be done on the Gamecube. It is believed that this is also achievable on the Wii, but it has yet to be tested. Video of this glitch
Below is a list of things that must be done before this glitch is attempted.
- Give your Gamecube a nice, long rest. It may help in allowing the system to handle the large number of things that will be loaded at once.
- Beat Odolwa. This will get rid of many many things that will duplicate otherwise (Octoroks, flower things, miscellaneous objects), thus making it impossible to do this glitch without it freezing. It will also stop you from getting hurt by the poison water.
- Give the Moon Tear to the Deku Scrub in Clock Town and trade the title deed to the one in the swamp to get rid of another duplicating object.
- Get rid of more duplicating objects by killing the Deku Baba by the owl statue, as well as cutting down any signs or grass.
- And most important of all, you must have NOT collected the Heart Piece on top of the photo hut!
Now this is the procedure for the glitch:
- As Link, get into the water next to the dock at the Photo Shop, as put on the Zora Mask, while diving, this will cause the buttons to act as if Zora link is swimming.
- Press B at the same time as taking off the mask, and the B button will become blank. Climb onto the dock.
- Use B to attack, which will cause you to move a little. DO NOT WALK REGULARLY or the game may crash! "Attack" your way all the way to the black tunnel the the Big Octo used to block. By doing this, you will enter an area that looks like you are walking on the sky! DO NOT STOP ATTACKING UNTIL YOU ARE WALKING IN THE SKY, or the game will crash later on! Walk all the way to the black box that you can see on the far side of the "Sky".
- When you walk through the black box, you will be back in the swamp. The game thinks you are entering the swamp and so everything will be loaded into the area, but since you never actually "left" the area, there will now be two of everything!
- Repeat steps 1-5 3 more times until everything is duplicated 5 times. The game WILL be laggy. To decrease the lag, get on top of every lilly pad to sink them and git rid of them, and get rid of the 5 duplicated frogs by talking to them with the Don Gero Mask.
- Now, go all the way back to the photo hut. You will be delighted to find out that the heart piece has also duplicated! Just simply collect all five pieces of heart! You can also look at the oddities that have happened in the swamp. Since the whole area has spawned 5 times upon itself, everything seems to "twitch". And the photo hut and potion shop all have 5 latters!
NOTE: Save with the owl statue to get out. The game will freeze, but it well have saved, so just restart it and continue your game with you new Heart Container! This also works with the Song of Time. Do not leave the area, enter the photo hut, or use the Song of Soaring.
External Links
- Zelda Chaos, ZeldaWiki's top glitch affilate that specializes in verifying hacks, explaining glitches, and providing up-to-date information on all things exploitable in the Zelda series.
| ||||||||||||||