(Undid revision 455932 by Brainiac Adam (Talk)) |
m (→Enemies) |
||
| Line 31: | Line 31: | ||
===Enemies=== |
===Enemies=== |
||
<gallery> |
<gallery> |
||
| − | File: |
+ | File:TFH Fire Keese.png|[[Fire Keese]] |
| − | File: |
+ | File:TFH Guruguru Bar Model.png|[[Guruguru Bar]] |
| − | File: |
+ | File:TFH Stalfos.png|[[Stalfos]] |
</gallery> |
</gallery> |
||
Revision as of 23:48, 5 November 2015
Template:Dungeons Desert Temple is a Level in Tri Force Heroes. It is the fourth and last Level of The Dunes area.
The Desert Temple is an ancient tomb set in the desert. Unlike most Levels in The Dunes, it has almost no sand, with the exception of its final Stage, where Stalchampion is fought in a sandy courtyard.
In Stage 1, the Links begin at the entrance of the temple. Immediately ahead are a series of wooden posts blocking the passage, which can be pounded down with the Magic Hammer provided nearby. Another Hammer and a Boomerang can be found beyond the first set of posts. A heavy Switch lies at the end of the room, which pressing with all three Links opens two large doors to the next chamber. In the next room is a mole-like enemy that pops out and alternates between three holes. The Links must quickly hit it with their Hammer before it drops down to open the next door. The Links can also stun it with their Boomerang as well to make the task easier. The next room has three moles that pop out of eight holes. The Links must hit all of them, each one faster than the other. After they are all pounded, the doors to the Triforce Gateway opens.
In Stage 2, the Links drop into a pit whose floor bares the likeness of a skull. Groups of Stalfos immediately appear as they fall in. Two Hearts sit in the "eye sockets" of the floor. Energy Potions are also provided along the walls so the Links can regain their energy fighting the Stalfos. Once they are all defeated, the Triforce Gateway appears.
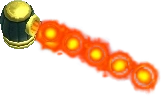
In Stage 3, the Links appear on a walkway leading to a stiff teeterboard. This board can be made to tilt either up or downwards by hitting its left or right side with the Hammer. Hitting the right side points it downwards, allowing the Links to hit a Switch below using the Boomerang. This will send floating platforms down that snap into place, creating a bridge to the next area. The Links will have to hit the board so that it points up to reach this platform. The next ledge has a heavy Switch, as well as a pair of Fire Keese flying nearby. The Switch creates a moving platform to the next ledge, however the Links must also avoid swinging Guruguru Bars while crossing the pit. The next ledge has another teeterboard plus three timed Switches. The Links must pound the teeterboard so they can reach and hit all the Switches. This creates a bridge to the next ledge, where the Links find three more teeterboards. Initially they are tilted, but a Switch nearby can be struck to flatten them. To reach the next area, the Links must pound the boards so they tilt upwards, creating a slope to the platform above. This will require that the Links throw each other onto the next board. The Links must also be careful of cannons that will occasionally blast streams of fire. At the very top is the Triforce Gateway.
Stage 4 is where Stalchampion is fought outside of the temple, in a circular courtyard surrounded by quicksand.
Drablands Challenge
Desert Temple includes the following Drablands Challenges: "Fewer Heart Containers!", "Clear within the time limit!", and "Don't pop any balloons!".
Enemies
- TFH Fire Keese.png
- TFH Stalfos.png